Registering Destinations to the Address Book (Remote UI) (Touch Panel Model)
You can register destinations to the Address Book using Remote UI from a computer.
Administrator privileges are required to register destinations using Remote UI.
1
Log in to Remote UI in System Manager Mode. Starting Remote UI
2
On the Portal page of Remote UI, click [Address Book]. Portal Page of Remote UI
3
Click [One-Touch] or [Coded Dial].
4
Click an item displayed as [Not Registered].

The [Register New Destination] screen is displayed.
If the [Enter PIN] screen is displayed, enter the Address Book PIN, and then click [OK].
5
Select [Fax], and click [OK].
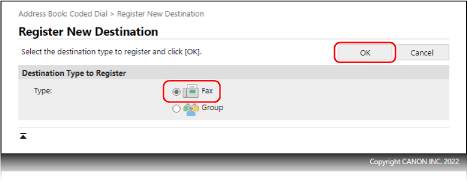
When registering group destinations, see the following.
Registering Groups to the Address Book (Remote UI) (Touch Panel Model)
Registering Groups to the Address Book (Remote UI) (Touch Panel Model)
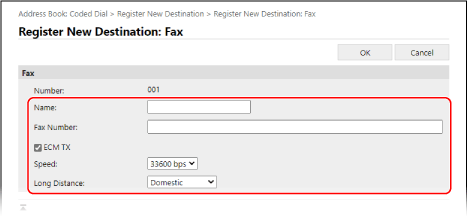
6
Set the destination information.
You can register a destination without entering its name, but by entering the name, you can search for it by its initials when specifying the destination.
1 | Enter the name and fax number. |
2 | Set the fax sending details, as needed. If a send error occurs or it takes time to send a fax to a registered fax number, set the fax sending details. [ECM TX]*1 When this is selected and an error occurs for an image being sent, the machine corrects the image so as not to send a distorted image. [Speed]*1 If it takes time to start sending a fax, such as when there is a poor phone line connection, the machine lowers the communication start speed. [Long Distance] If a communication error occurs when sending a fax to an international destination, select [International (1)]. If the error does not improve, select [International (2)] and [International (3)] in that order. *1 If this is not set here, the setting in [Settings/Registration] [ECM TX] [TX Start Speed] |
7
Click [OK].
The destination is registered to the Address Book.
8
Log out from Remote UI.
 |
Editing or Deleting Registered DestinationsYou can edit the registered information by clicking the destination you want to edit in the screen in Step 4. In Step 4, click [Delete] to the right of the destination you want to delete, and the destination will be deleted. |