
9A7Y-0F0
Connecting to a Wireless LAN (Wi-Fi)
Connect the PC and printer to the network via a wireless LAN router (access point). You can use the following two methods to connect the wireless LAN (Wi-Fi). Depending on your model, the selected connection method may not be supported.
Selecting a wireless LAN router found by the printer
Entering all the wireless LAN settings manually
|
When Switching Between Wired and Wireless LANYou must uninstall the currently installed drivers and then re-install them. For information on uninstalling and installing drivers, see the driver manuals at the online manual site. https://oip.manual.canon/ |
Wireless LAN (Wi-Fi) Router Information Required for Connection
The information required for connection is provided on the body of the wireless LAN router. For details, see the manual of the wireless LAN router or contact the manufacturer.
When connecting by selecting an access point, prepare the following information and keep it close by:
SSID
This is the name that identifies the wireless LAN router. It may be listed as the access point name or network name.
Network Key
This is the keyword used for data encryption or the password used for network authentication. It may be listed as the encryption key, WPA/WPA2 passphrase, or pre-shared key (PSK).
When connecting by specifying the connection details, prepare the following information and keep it close by:
Security Standards
Security Standards
WPA-PSK
WPA2-PSK
WPA-EAP
WPA2-EAP
WPA3-SAE
Encryption for WPA/WPA2
AES-CCMP
IEEE 802.1X Authentication
Encryption for WPA3
AES-CCMP
Connecting by Selecting the Access Point
Search for a wireless LAN router (access point) to which to connect from the printer and enter the network key.
Prepare the information for the wireless LAN router (SSID and network key) to which you want to connect and keep it close by.
If you are connecting to a wireless LAN router that uses the WPA-EAP or WPA2-EAP security standard, specify IEEE 802.1X.
Wireless LAN (Wi-Fi) Router Information Required for Connection
If you are connecting to a wireless LAN router that uses the WPA-EAP or WPA2-EAP security standard, specify IEEE 802.1X.
Wireless LAN (Wi-Fi) Router Information Required for Connection
Black and White Touch Panel Model / Black and White 5 Lines LCD Model 
On black and white touch panel model, you do not need to press  .
.
.1
On the control panel, press [Wireless LAN(Wi-Fi) Set.] in the [Home] screen  , or press [Menu] [Preferences] [Network] [Wireless LAN(Wi-Fi) Settings] .
, or press [Menu] .The [Select Network] screen is displayed.
If the login screen is displayed, enter the System Manager ID and PIN, and then press  , or press [Log In] .
For information on the System Manager ID and PIN, see the "User's Guide" for the respective model at the online manual site.
https://oip.manual.canon/
, or press [Log In] . For information on the System Manager ID and PIN, see the "User's Guide" for the respective model at the online manual site.
https://oip.manual.canon/
If the [Enable the wireless LAN(Wi-Fi)?] message is displayed, press [Yes] .
.If the [Cannot find the access point.] message is displayed, check that the wireless LAN router is discoverable. Cannot Connect to Wireless LAN (Wi-Fi)
2
Select the SSID of the wireless LAN router to which you want to connect and press .
.The network key input screen is displayed.
If you are connecting to a wireless LAN router that uses the WPA-EAP or WPA2-EAP security standard, the [IEEE 802.1X Settings values will be applied to connect.] message is displayed. Press [OK] or and proceed to Step 4.
If you are connecting to a wireless LAN router that uses the WPA-EAP or WPA2-EAP security standard, the [IEEE 802.1X Settings values will be applied to connect.] message is displayed. Press [OK] or
and proceed to Step 4.If you cannot find the wireless LAN router to which you want to connect, check that the router is discoverable. Cannot Connect to Wireless LAN (Wi-Fi)
3
Enter the network key and press [<Apply>] [Yes] .
.4
When [Connected.] is displayed on the control panel, press .
.When the machine is connected to the wireless LAN, [ ] is displayed on the [Home] screen and the screen of each function.
] is displayed on the [Home] screen and the screen of each function.5
Wait a few minutes.
By default, the IP address is set automatically.
To use a specific IP address, set the address manually.
Setting IPv4 Addresses
To use a specific IP address, set the address manually.
Setting IPv4 Addresses
6
Return to the application once the connection is complete.
How To Return to the Application
How To Return to the Application
 |
If an Error Message is Displayed During Operation and a Connection Cannot Be Established.Press [Close] or , check the information (SSID and network key) for the wireless LAN router to which you want to connect, and then repeat the procedure starting from Step 2. |
Color Touch Panel Model
1
On the control panel, press [Wireless LAN(Wi-Fi) Settings] in the [Home] screen.
The [Select Network] screen is displayed.
If the login screen is displayed, enter the System Manager ID and PIN and then press [Log In].
For information on the System Manager ID and PIN, see the "User's Guide" for the respective model at the online manual site.
https://oip.manual.canon/
For information on the System Manager ID and PIN, see the "User's Guide" for the respective model at the online manual site.
https://oip.manual.canon/
If the [Do you want to enable the wireless LAN(Wi-Fi)?] message is displayed, press [Yes].
If the [Could not find the access point.] message is displayed, check that the wireless LAN router is discoverable. Cannot Connect to Wireless LAN (Wi-Fi)
2
Select the SSID of the wireless LAN to which you want to connect.
The network key input screen is displayed.
If you are connecting to a wireless LAN router that uses the WPA-EAP or WPA2-EAP security standard, the [To connect, the values configured in IEEE 802.1X Settings will be applied.] message is displayed. Press [OK] and proceed to Step 4.
If you are connecting to a wireless LAN router that uses the WPA-EAP or WPA2-EAP security standard, the [To connect, the values configured in IEEE 802.1X Settings will be applied.] message is displayed. Press [OK] and proceed to Step 4.
If you cannot find the wireless LAN router to which you want to connect, check that the router is discoverable. Cannot Connect to Wireless LAN (Wi-Fi)
3
Enter the network key and press [Apply].
4
When [Connected.] is displayed on the control panel, press [Close].
When the machine is connected to the wireless LAN, [ ] is displayed on the [Home] screen and the screen of each function.
] is displayed on the [Home] screen and the screen of each function.5
Wait a few minutes.
By default, the IP address is set automatically.
To use a specific IP address, set the address manually.
Setting IPv4 Addresses
To use a specific IP address, set the address manually.
Setting IPv4 Addresses
6
Return to the application once the connection is complete.
How To Return to the Application
How To Return to the Application
|
If an Error Message is Displayed During Operation and a Connection Cannot Be Established.Press [Close], check the information (SSID and network key) for the wireless LAN router to which you want to connect, and then repeat the procedure starting from Step 2. |
BX570 Series / BX540 Series / BX510 Series
1
On the control panel, press  in the [Home] screen.
in the [Home] screen.The display of varies depending on the printer’s network connection status.
varies depending on the printer’s network connection status.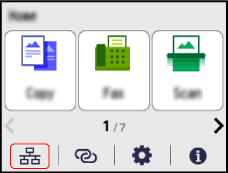
The [Network] screen is displayed.
If the login screen is displayed, enter the System Manager ID and PIN and then press [Log In].
For information on the System Manager ID and PIN, see the "User's Guide" for the respective model at the online manual site.
https://oip.manual.canon/
For information on the System Manager ID and PIN, see the "User's Guide" for the respective model at the online manual site.
https://oip.manual.canon/
2
Press [Wi-Fi Settings].
3
Select the SSID of the wireless LAN to which you want to connect.
The network key input screen is displayed.
If you are connecting to a wireless LAN router that uses the WPA-EAP or WPA2-EAP security standard, the [IEEE 802.1X Settings values will be applied to connect.] message is displayed. Press [OK] and proceed to Step 4.
If you are connecting to a wireless LAN router that uses the WPA-EAP or WPA2-EAP security standard, the [IEEE 802.1X Settings values will be applied to connect.] message is displayed. Press [OK] and proceed to Step 4.
If you cannot find the wireless LAN router to which you want to connect, check that the router is discoverable. Cannot Connect to Wireless LAN (Wi-Fi)
4
Enter the network key and press [Apply].
The message [Connected.] is displayed on the control panel screen.
When the machine is connected to the wireless LAN, [ ] is displayed on the [Home] screen and the screen of each function.
] is displayed on the [Home] screen and the screen of each function.5
Wait a few minutes.
By default, the IP address is set automatically.
To use a specific IP address, set the address manually.
Setting IPv4 Addresses
To use a specific IP address, set the address manually.
Setting IPv4 Addresses
6
Return to the application once the connection is complete.
How To Return to the Application
How To Return to the Application
|
If an Error Message is Displayed During Operation and a Connection Cannot Be Established.Press [Close], check the information (SSID and network key) for the wireless LAN router to which you want to connect, and then repeat the procedure starting from Step 2. |
Connecting to a Wireless LAN (Wi-Fi) by Specifying the Details
You can connect to a wireless LAN router by manually entering all the information for the router, such as the SSID, network key, and security settings.
Prepare the information for the wireless LAN router to which you want to connect and keep it close by.
If you are connecting to a wireless LAN router that uses the WPA-EAP or WPA2-EAP security standard, specify IEEE 802.1X. Wireless LAN (Wi-Fi) Router Information Required for Connection
If you are connecting to a wireless LAN router that uses the WPA-EAP or WPA2-EAP security standard, specify IEEE 802.1X. Wireless LAN (Wi-Fi) Router Information Required for Connection
Black and White Touch Panel Model / Black and White 5 Lines LCD Model
On black and white touch panel model, you do not need to press .
.1
On the control panel, press [Wireless LAN(Wi-Fi) Set.] in the [Home] screen , or press [Menu] [Preferences] [Network] [Wireless LAN(Wi-Fi) Settings] .
, or press [Menu] .The [Select Network] screen is displayed.
If the login screen is displayed, enter the System Manager ID and PIN, and then press , or press [Log In] .
For information on the System Manager ID and PIN, see the "User's Guide" for the respective model at the online manual site.
https://oip.manual.canon/
, or press [Log In] .For information on the System Manager ID and PIN, see the "User's Guide" for the respective model at the online manual site.
https://oip.manual.canon/
If the [Enable the wireless LAN(Wi-Fi)?] message is displayed, press [Yes] .
.If the [Cannot find the access point.] message is displayed, press [Close] .
.2
Press [Other Connections] .
.3
Press [Manually Enter Network Name] .
.The SSID input screen is displayed.
4
Enter the SSID and press [<Apply>] .
.The [Security Settings] screen is displayed.
5
Select the security standard and set the authentication and encryption.
 When Using WPA-PSK, WPA2-PSK, or WPA3-SAE
1 | Select [WPA/WPA2-PSK], [WPA2-PSK/WPA3-SAE], or [WPA3-SAE] to match the security settings on the wireless LAN router and press .The encryption key input screen is displayed. If the [Encryption Method] screen is displayed, select an encryption method and then press . When you select [Auto], the encryption method is set automatically according to the wireless LAN router to which you want to connect. Note that when you select WPA3-SAE, the encryption method is set to AES-CCMP even if you select [Auto]. |
2 | Enter the network key and press [<Apply>] . |
When Using WPA-EAP or WPA2-EAP
Press [WPA/WPA2-EAP] [OK] or .
.When Not Using a Security Standard
Press [None] .
.6
Press [Yes] .
.7
When [Connected.] is displayed on the control panel, press .
.When the machine is connected to the wireless LAN, [] is displayed on the [Home] screen and the screen of each function.
] is displayed on the [Home] screen and the screen of each function.8
Wait a few minutes.
By default, the IP address is set automatically.
To use a specific IP address, set the address manually.
Setting IPv4 Addresses
To use a specific IP address, set the address manually.
Setting IPv4 Addresses
9
|
If an Error Message is Displayed during Operation and a Connection Cannot Be Established.Press [Close] or , check the information for the wireless LAN router to which you want to connect, and then repeat the procedure starting from Step 2. |
Color Touch Panel Model
1
On the control panel, press [Wireless LAN(Wi-Fi) Settings] in the [Home] screen.
The [Select Network] screen is displayed.
If the login screen is displayed, enter the System Manager ID and PIN and then press [Log In].
For information on the System Manager ID and PIN, see the "User's Guide" for the respective model at the online manual site.
https://oip.manual.canon/
For information on the System Manager ID and PIN, see the "User's Guide" for the respective model at the online manual site.
https://oip.manual.canon/
If the [Do you want to enable the wireless LAN(Wi-Fi)?] message is displayed, press [Yes].
If the message [Could not find the access point.] appears, press [Close].
2
Press [Other Connections].
3
Press [Manually Enter Network Name (SSID)].
The SSID input screen is displayed.
4
Enter the SSID, and press [Apply].
The [Security Settings] screen is displayed.
5
Select the security standard, and set the authentication and encryption.
When Using WPA-PSK, WPA2-PSK, or WPA3-SAE
1 | Select [WPA/WPA2-PSK], [WPA2-PSK/WPA3-SAE], or [WPA3-SAE] to match the security settings on the wireless LAN router. The encryption key input screen is displayed. If the [Encryption Method] screen is displayed, select an encryption method. When you select [Auto], the encryption method is set automatically according to the wireless LAN router to which you want to connect. Note that when you select WPA3-SAE, the encryption method is set to AES-CCMP even if you select [Auto]. |
2 | Enter the network key and press [Apply]. |
When Using WPA-EAP or WPA2-EAP
Press [WPA/WPA2-EAP] [OK].
When Not Using a Security Standard
Press [None].
6
When [Connected.] is displayed on the control panel, press [Close].
When the machine is connected to the wireless LAN, [] is displayed on the [Home] screen and the screen of each function.
] is displayed on the [Home] screen and the screen of each function.7
Wait a few minutes.
By default, the IP address is set automatically.
To use a specific IP address, set the address manually.
Setting IPv4 Addresses
To use a specific IP address, set the address manually.
Setting IPv4 Addresses
8
|
If an Error Message is Displayed During Operation and a Connection Cannot Be Established.Press [Close], check the information of the wireless LAN router to which you want to connect, and repeat the procedure starting from Step 2. |
BX570 Series / BX540 Series / BX510 Series
1
On the control panel, press in the [Home] screen.
in the [Home] screen.The display of varies depending on the printer’s network connection status.
varies depending on the printer’s network connection status.The [Network] screen is displayed.
If the login screen is displayed, enter the System Manager ID and PIN and then press [Log In].
For information on the System Manager ID and PIN, see the "User's Guide" for the respective model at the online manual site.
https://oip.manual.canon/
For information on the System Manager ID and PIN, see the "User's Guide" for the respective model at the online manual site.
https://oip.manual.canon/
2
Press [Wi-Fi Settings].
3
Press [Other Connections].
4
Press [Manually Enter Network Name].
The SSID input screen is displayed.
5
Enter the SSID, and press [Apply].
The [Security Settings] screen is displayed.
6
Select the security standard, and set the authentication and encryption.
When Using WPA-PSK, WPA2-PSK, or WPA3-SAE
1 | Select [WPA/WPA2-PSK], [WPA2-PSK/WPA3-SAE], or [WPA3-SAE] to match the security settings on the wireless LAN router. The encryption key input screen is displayed. |
2 | Enter the network key and press [Apply]. |
When Using WPA-EAP or WPA2-EAP
Press [WPA/WPA2-EAP].
When Not Using a Security Standard
Press [None].
The message [Connected.] is displayed on the control panel screen.
When the machine is connected to the wireless LAN, [] is displayed on the [Home] screen and the screen of each function.
] is displayed on the [Home] screen and the screen of each function.7
Wait a few minutes.
By default, the IP address is set automatically.
To use a specific IP address, set the address manually.
Setting IPv4 Addresses
To use a specific IP address, set the address manually.
Setting IPv4 Addresses
8
|
If an Error Message is Displayed During Operation and a Connection Cannot Be Established.Press [Close], check the information of the wireless LAN router to which you want to connect, and repeat the procedure starting from Step 2. |