Media Handling
Follow the following precautions regarding the handling and storage of media to prevent errors such as paper jams and ensure clear printing.
NOTE
For information on loading media to the press and collecting printed media from the press, see the following.
Loading and Collecting Media
Loading and Collecting Media
Handling/Storing Media
Acclimatizing media
Only use media that has fully acclimatized to the environment in which the press is installed. Using media that has been stored under different temperature or humidity may cause paper jams or result in poor print quality.
Storage method before using media
We recommend using the media immediately after opening the package. Rewrap any remaining media in its original package, and store it on a flat surface.
Keep the media wrapped in its original package to protect the media from moisture or dryness.
Do not store the media in such a way that may cause it to curl or fold.
Do not store the media vertically or stack too much media.
Do not store the media in direct sunlight, or in a place subject to high humidity, dryness, or drastic changes in temperature or humidity.
The permissible ranges of temperature and humidity for media storage are as follows.
Temperature: 15°C to 27.5°C (59°F to 81.5°F)
Humidity: 25% to 75%
Using media stored in conditions other than the above may cause a paper jam or other printing problems.
Before using cut media
Follow the procedure below to smooth the cut edges before using the cut media.
Place the media on a level surface, and move a polishing tool perpendicularly against the edges approximately three times.
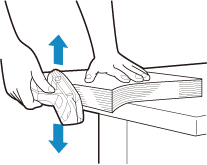
If the four edges of the media are not smooth, a paper jam or other printing problems may occur.
Caution regarding paper dust
Before loading paper
Paper dust (paper cutting waste) attached to the paper may cause problems such as parts of the printed image being left blank.
Make sure to remove any paper dust on the surface or sides of cut paper before loading it to the press.
Removing paper dust
Use a brush or similar object to remove the paper dust.
Paper dust may not be able to be adequately removed with blown air only.
When using thick paper or paper with a large amount of paper dust
When using thick paper or paper with a large amount of paper dust, more paper dust may become attached to the paper than usual.
Make sure to remove the paper dust on the paper before printing.
Print quality
If printing is performed with paper dust attached to the paper, parts of the printed image may be left blank* if the paper dust is taken off by the fixing belt.
It is recommended that you remove the paper dust before loading the paper, to ensure stable print quality.
* Refer to If the Symptom Occurs on One Side for One-Sided Printing or Both Sides for Two-Sided Printing in "When Parts of the Printed Image Are Left Blank" in "Troubleshooting."
Handling/Storing Printed Media
Handle the printed media with two hands.
When removing the stack of printed media from the dolly, we recommend that you handle the stack in segments of approximately 50 mm (2").
Handling Media
To prevent damage to the printed media and prevent fingerprints, sweat, or saliva from adhering to the printed media, we recommend that you wear cotton gloves and a face mask.
If the printed media becomes stained during the post-press process, avoid touching or holding the printed media by the printed areas.
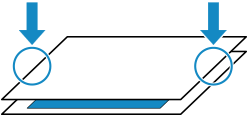
Stains can be prevented by drying the media well, reducing the amount of printed media handled at the same time, or aligning the printed media by hand.
The printed media may be stained if the next process is started immediately after printing is complete.
Do not move the printed media immediately after printing if possible.
Before starting the next process, fan out the printed media to dry it with air.
If you are printing on media that is prone to getting dirty, reduce the number of sheets stacked or the number of sheets fanned at once.
Protecting the printed surface
To reduce image bleed-through, insert sheets between printed pages for a certain period of time. You can also rearrange the pages so that the pages that are prone to bleed-through are not facing each other.

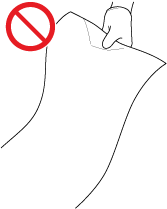
Do not pull out any of the sheets from the stack of the printed media.
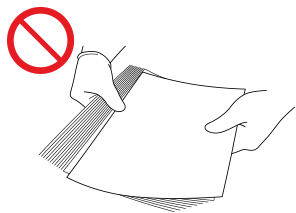
Do not straighten or fan the sheets when counting the printed media.
Do not touch the printed media with a sharp object or hard object.
Do not write notes or perform other tasks on top of the printed media.
How to fix curling
Place a weight on the curled part to fix the curling. You can also carefully roll the printed media in the opposite direction of the curling to fix the curling.
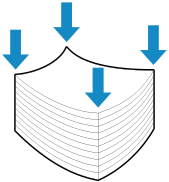
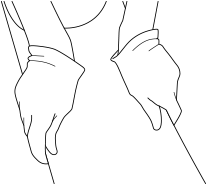
Do not straighten the printed media on the edge of a desk or other such location. Doing so may damage the printed media.
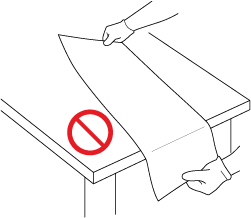
If the curling affects the cutting process, attach a cover sheet.
Method for storing the printed media
Store the media on a flat surface.
Do not store the media together with items made from PVC (polyvinyl chloride), such as vinyl folders.
Store the media so that it does not become folded or wrinkled.
Do not store the media in direct sunlight, or in a location subject to high humidity or high temperature.
When storing the media for an extended period (two or more years), use a binder or other protection.
Long-term storage may discolor the media, which in turn may cause the printed image to appear discolored.
When transporting the printed media
Transport the printed media as indicated below to prevent damage or folding.
Keep the media horizontal.
Protect the media with a packaging sleeve and plastic/paper packaging.
When transporting the media using a box or tray, insert a protective sheet under the media.
When transporting the printed media in a cardboard box, we recommend that the media be secured as indicated below.
Protect the media with a packaging sleeve and plastic/paper packaging and secure it with cushioning.
Attach a packaging sleeve and secure the media with suspension packaging.
Precautions when gluing the printed media
Make sure to use insoluble adhesive.
Test the adhesive on scrap printed media before use.
Stack the glued media after the glue has dried completely.