Cleaning the Inside of the Print Belt
Remove the ink attached to the inner surface of the print belt.
Required Preparations
Wear plastic gloves and protective goggles.
Prepare the following cleaning materials. For details on the cleaning sheet, contact your dealer or service representative.
Dedicated cleaning sheet
Anhydrous ethanol (commercially available)
Plastic bags (commercially available)
1
Select [System]  [Maintenance] [Go to maintenance tasks].
[Maintenance] [Go to maintenance tasks].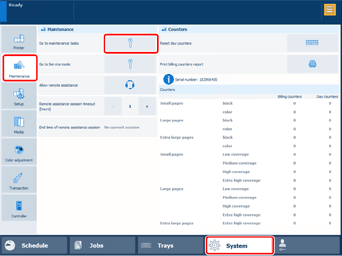
2
Select [Clean inner surface of print belt] [Start].
[Start].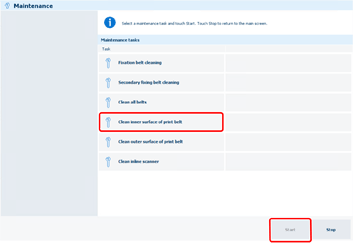
3
Select [Unlock] on the main control panel.
If a screen prompting you to enter a password appears, enter the password.
4
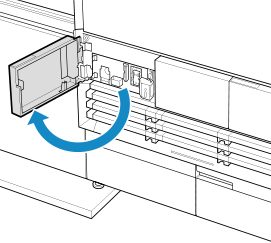
Open the front middle left cover of the PM.
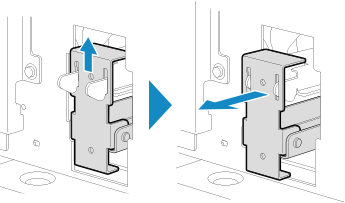
Take out the cleaning unit from the storage position.
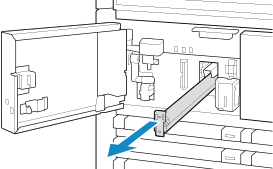
Lift up the part on the front of the cleaning unit when taking the unit out.
6
Place the cleaning sheet in the plastic bag.
If the cleaning unit does not have a cleaning sheet
1
Place the new cleaning sheet in the plastic bag.
If the cleaning unit has a cleaning sheet
1
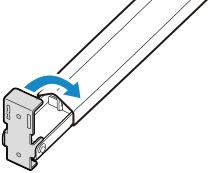
Push down the part on the front of the cleaning unit.
2
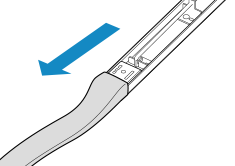
Remove the cleaning sheet from the cleaning unit.
3
Replace the cleaning sheet with a new cleaning sheet, as necessary.
* Replace the cleaning sheet after it has been turned and used five times according to step 8-4.
4
Place the cleaning sheet in the plastic bag.
7
Pour 25 ml (0.85 fl oz) of anhydrous ethanol into the plastic bag to dampen the cleaning sheet.
Attach the cleaning sheet dampened with anhydrous ethanol.
1
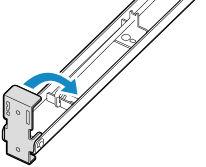
Push down the part on the front of the cleaning unit.
2
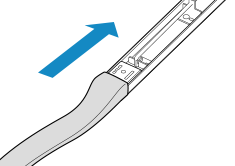
Attach the cleaning sheet dampened with anhydrous ethanol to the cleaning unit.
3
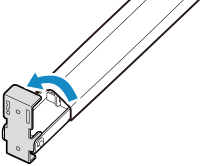
Pull up the part on the front of the cleaning unit.
4
Check/adjust the cleaning sheet.
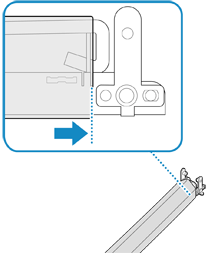
Attach the cleaning sheet so that the end of the cleaning sheet overlaps with the notch on the far side of the cleaning unit, as indicated in the illustration.
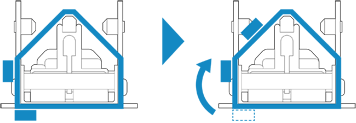
If the bottom left side of the cleaning sheet is dirty, turn the cleaning sheet approximately 15 mm (0.59") clockwise.
Confirm that there are no wrinkles, sagging, or tearing in the dedicated cleaning sheet.
Insert the cleaning unit to the cleaning position.
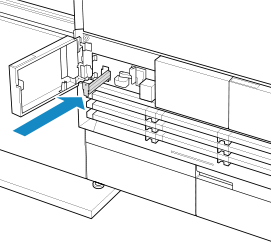
Place the wheels of the cleaning unit on the rails of the slot and push the cleaning unit all the way in.
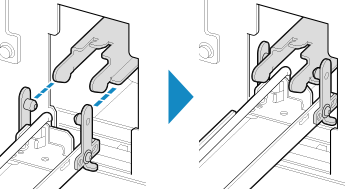
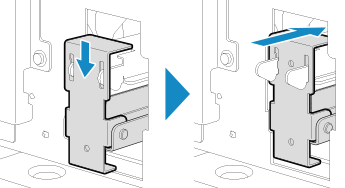
Install the part on the front of the cleaning unit as indicated in the illustration.
10
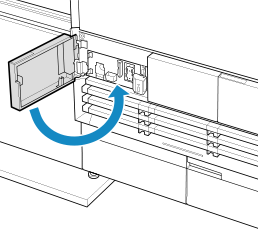
Close the front middle left cover of the PM.
11
Select [Start] on the main control panel to start cleaning the inside of the print belt.
Wait until cleaning is complete.
12
When the main control panel indicates that cleaning is complete, open the front middle left cover of the PM.
13
Remove the cleaning unit.
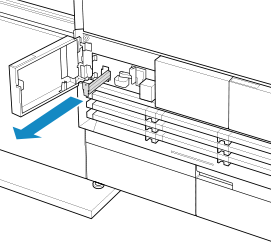
Take out the cleaning unit in the same manner as step 5.
14
Return the cleaning unit to the storage position.
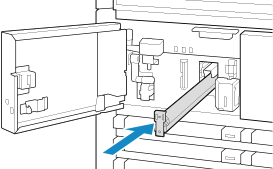
Install the cleaning unit in the same manner as step 9.
15
Close the front middle left cover of the PM.
16
Select [Confirm] on the main control panel.
The print belt turns and the press checks the cleaning status.