
Replacing Consumables
Replace the ink pack, conditioning liquid, and maintenance liquid according to the ink status indicators. Consumable Status
They are stored in the ink pack tray of the PM (Print Module).
They are stored in the ink pack tray of the PM (Print Module).
If ink/conditioning liquid/maintenance liquid gets in your mouth, consult a physician immediately.
If ink/conditioning liquid/maintenance liquid gets in your eyes, wash them immediately with cold water. If ink/conditioning liquid/maintenance liquid gets on your skin, wash it off immediately with cold water and soapy water. If any eye or skin irritation persists after washing, consult a physician immediately.
Dispose of the used pack as industrial waste. For information on the disposal method, contact your service representative.
Do not use a box cutter or utility knife to open the packaging, as it may damage the pack.
IMPORTANT
Avoid dropping the ink/conditioning liquid/maintenance liquid pack or handling it roughly. Doing so may cause the ink/conditioning liquid/maintenance liquid to leak and stain the surroundings or cause press failure.
When replacing the ink/conditioning liquid/maintenance liquid pack, take care not to allow the ink/conditioning liquid/maintenance liquid to come into contact with your hands or clothing. When you remove the ink/conditioning liquid/maintenance liquid pack, the ink/conditioning liquid/maintenance liquid may remain around the pack's opening. Take sufficient care when handling the pack. Ink/conditioning liquid/maintenance liquid may not come off if it comes into contact with your hands or clothing. If they become dirty, wash them immediately with cold water.
Replace the ink/conditioning liquid/maintenance liquid pack within 10 minutes and do not leave the press with the pack removed. Doing so may cause printing problems.
To maintain optimal print quality, install the ink/conditioning liquid/maintenance liquid pack to the press before the expiration date indicated on the packaging box. Also, use up the contents of the pack within six months of opening the package. Using a pack after this time has elapsed may reduce the print quality.
Required Preparations
Wear plastic gloves and protective goggles.
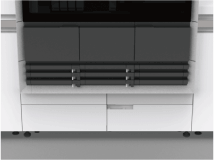
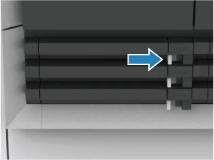
1
Move the tray bar to the right to unlock the tray
2
Remove the ink pack tray.
1
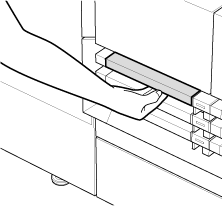
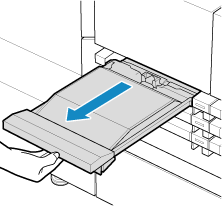
Grip the handle of the ink pack tray, and then pull it out partway.
2
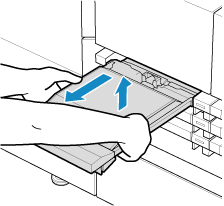
Grip the left and right of the ink pack tray, and then lift it up to remove it from the PM.
3
Remove the used pack from the ink pack tray.
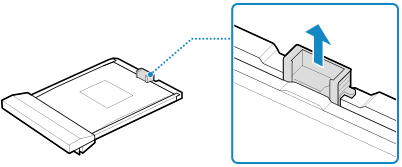
Lift the spout (tip) of the pack up, and then remove the pack from the ink pack tray.
NOTE
Do not allow the spout to point downward, as doing so may cause ink to leak.
4
Remove the new pack from the packaging box.
5
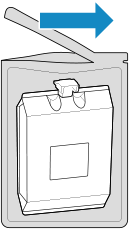
With the pack standing up, open the bag and remove the pack from the bag.
Open the bag from the tear notch on the side near the top.
Do not touch the tip  of the spout or the ink/conditioning liquid/maintenance liquid supply area
  .
.
of the spout or the ink/conditioning liquid/maintenance liquid supply area .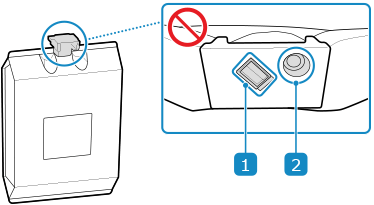
6
With the label facing up, attach the ink pack to the ink pack tray, then push the spout in until it clicks.
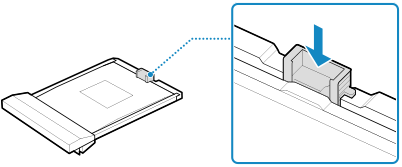
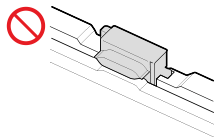
The spout cannot be attached if the label is facing down.
7
Flatten the pack.
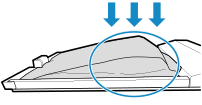
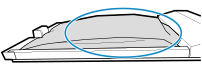
If the gusset is not adequately folded, the ink pack tray may not be able to be installed due to the thickness of the pack.
8
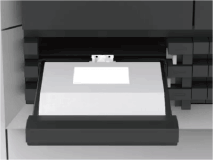
Holding the ink pack tray in both hands, gently push it all the way into the PM.
9
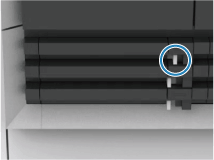
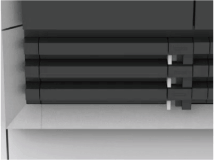
Move the tray bar to the left to lock the tray.
NOTE
The ink is stirred for approximately five minutes immediately after the pack is replaced. Because the ink is not supplied until stirring is complete, printing may not resume or may stop, depending on the amount of ink remaining in the buffer tank. Remaining Ink Status Indicators