 ) appear at the bottom right of the screen when the drum unit is reaching the end of its lifetime. In this case, replace the drum unit while following the message.
Replacing the Drum Unit
A message and the icon ( ) appear at the bottom right of the screen when the drum unit is reaching the end of its lifetime. In this case, replace the drum unit while following the message.
 ) appear at the bottom right of the screen when the drum unit is reaching the end of its lifetime. In this case, replace the drum unit while following the message.
The message that is displayed at the bottom of the screen instructing you to replace the drum unit varies depending on your contract.
You can press [ ] to display a step-by-step video of how to replace the drum unit.
 ] to display a step-by-step video of how to replace the drum unit.
* You can play the replacement procedure video at any time by pressing [ Settings/Registration] on the [Home] screen or other screen. [Replace Drum Unit]
 Settings/Registration] on the [Home] screen or other screen. [Replace Drum Unit]
Check the precautions in "Important Safety Instructions" supplied with the machine before replacing the drum unit.
1
Open the front cover of the machine.
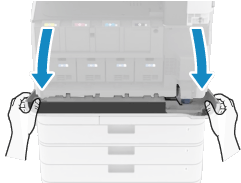
Open the cover while holding both sides.
2
Open the drum unit cover.
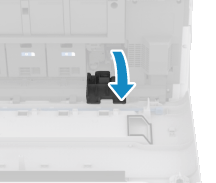
3
Remove the drum unit.
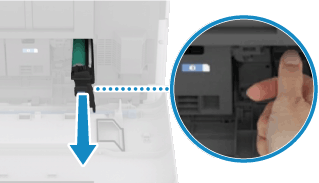
Pull out the drum unit while supporting it with your hands.
Do not tilt the drum unit. Toner inside the drum may spill.
Prepare a piece of paper or cloth that can get dirty, and temporarily place the removed drum unit on it.
4
Remove the new drum unit from the box.
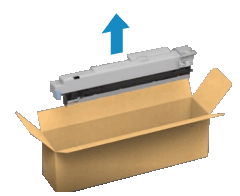
5
Install the new drum unit.
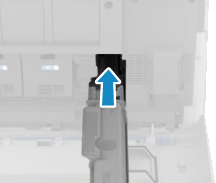
6
Remove the protective cover.
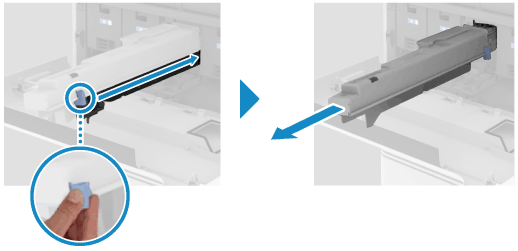
First, push the slider on the right side of the gray protective cover toward the rear of the machine as far as it will go, and then pull out the protective cover.
After removing the protective cover, check that the drum unit is pushed all the way into the machine. If the drum unit is not pushed all the way in, accidental operations may occur.
7
Close the drum unit cover.
8
Close the front cover of the machine.
9
Press [Close].
NOTE
Correcting Color and Density
You can correct the print color and density if they are different from those before replacing the drum unit.