Registering the IPP Print Settings
You can register IPP print settings as presets. You can call up the registered presets when you print.
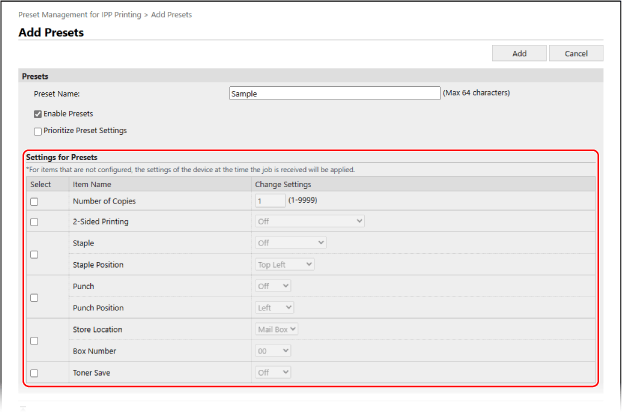
Settings such as the number of copies, 2-sided printing, and finishing settings can be registered in the presets. You can also save documents to Mail Box.
Settings such as the number of copies, 2-sided printing, and finishing settings can be registered in the presets. You can also save documents to Mail Box.
* You can register up to 10 presets.
Register presets using Remote UI from a computer. You cannot use the control panel to register presets.
Administrator or NetworkAdmin privileges are required.
Administrator or NetworkAdmin privileges are required.
1
Log in to Remote UI as an administrator. Starting Remote UI
2
On the Portal page of Remote UI, click [Settings/Registration]. Remote UI Portal Page
3
Click [Printer]  [Preset Management for IPP Printing].
The [Preset Management for IPP Printing] screen is displayed.
4
Click [Add Presets].
The [Add Presets] screen is displayed.
5
Enter the preset name.
6
Select the [Enable Presets] checkbox.
7
Set whether to prioritize the preset settings, as needed.
When the [Prioritize Preset Settings] checkbox is selected, the settings configured for printing will be overwritten with the preset settings.
8
In [Settings for Presets], configure the print settings.
9
Click [Add].
The registered preset is added to the [Preset Management for IPP Printing] screen.
10
Log out from Remote UI.
NOTE
Editing a Registered Preset
On the [Preset Management for IPP Printing] screen, you can click the name of a preset to edit the settings.