Staple Jams (Option)
Remove the jammed staple from the location where it occurred. Follow the instructions on the control panel to check the location of the staple and remove the jammed staple.
Staple Jams in the Staple Finisher
This section describes how to clear staple jams in the staple finisher. Follow the instructions on the control panel to check the location of the staple and remove the jammed staple.
Required Preparations
Close the cover and paper drawer if they are open.
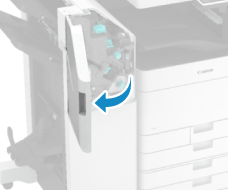
1
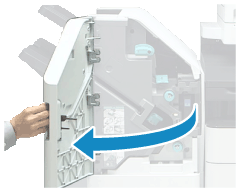
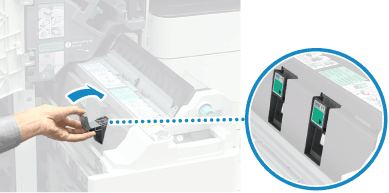
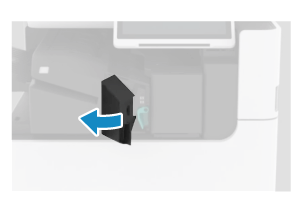
Open the front cover of the finisher.
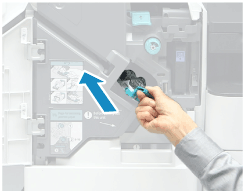
2
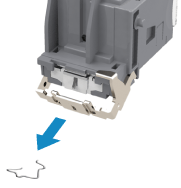
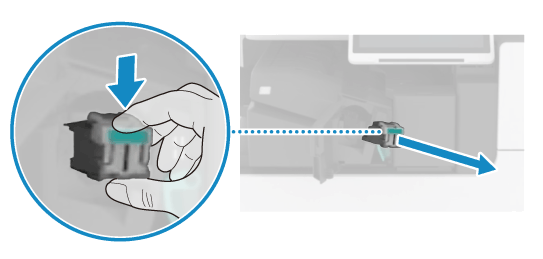
Pull out the staple cartridge.
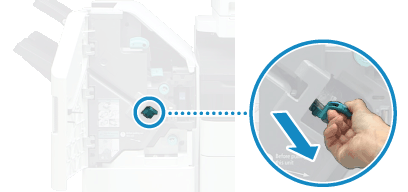
Hold the green knob on the staple cartridge, and pull it straight out.
3
Remove the jammed staples from the staple cartridge.
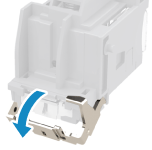
1
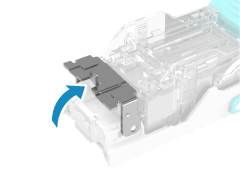
Lift the knob of the staple cartridge.
2
Remove all jammed staples and exposed staples.
3
Lower the knob of the staple cartridge.
4
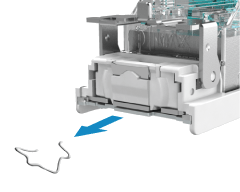
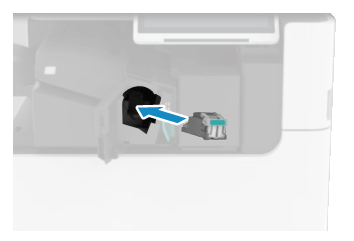
Install the staple cartridge into the finisher.
Hold the green knob on the staple cartridge, and firmly push it all the way in.
5
Close the front cover of the finisher.
Dry stapling may be performed automatically to reposition the staples.
Staple Jams in the Paper Folding/Booklet Finisher
This section describes how to clear staple jams in the saddle stitch unit. Follow the instructions on the control panel to check the location of the staple and remove the jammed staple.
The method for removing staple jams in the stapler unit is the same as that when removing staple jams in the staple finisher. Staple Jams in the Staple Finisher
The method for removing staple jams in the stapler unit is the same as that when removing staple jams in the staple finisher. Staple Jams in the Staple Finisher
Required Preparations
Remove all paper output to the booklet tray.
Close the cover and paper drawer if they are open.
1
Open the front cover of the finisher.
2
Pull out the saddle stitch unit.
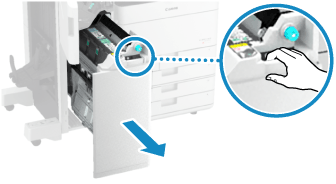
3
Remove the two staple cartridges while lowering the levers toward you.
4
Remove the jammed staples from the staple cartridge.
1
Lower the knob of the staple cartridge.
2
Remove all jammed staples and exposed staples.
3
Lift the knob of the staple cartridge.
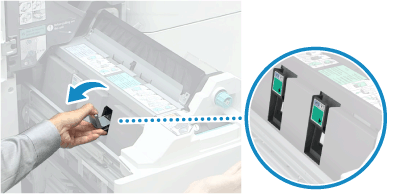
5
Install the two staple cartridges into the saddle stitch unit.
Firmly push in the cartridges as far as they will go.
6
Gently push the saddle stitch unit into the machine.
7
Close the front cover of the finisher.
8
Reposition the staples. [Saddle Stitch Staple Repositioning]
After clearing the staple jam, be sure to reposition the staples.
Staple Jams in the Inner Finisher
This section describes how to clear staple jams in the inner finisher. Follow the instructions on the control panel to check the location of the staple and remove the jammed staple.
Required Preparations
Close the cover and paper drawer if they are open.
1
Open the left cover of the finisher.
2
Pull out the staple cartridge.
Lower the part of the staple cartridge with the green mark to unlock it, and pull it straight out.
3
Remove the jammed staples from the staple cartridge.
1
Lift the knob of the staple cartridge.
2
Remove all jammed staples and exposed staples.
3
Lower the knob of the staple cartridge.
4
Install the staple cartridge into the finisher.
Hold the staple cartridge so that the part with the green mark is facing toward you, firmly push in the staple cartridge as far as it will go, and raise the part with the green mark to lock it.
5
Close the left cover of the finisher.
Dry stapling may be performed automatically to reposition the staples.