Performing Color Validation
Flow of Color Validation
Preparations Required |
Before performing color validation, it is necessary to install an application and configure the initial settings. Prepare your spectrophotometer. |
Follow the steps below to perform color validation.
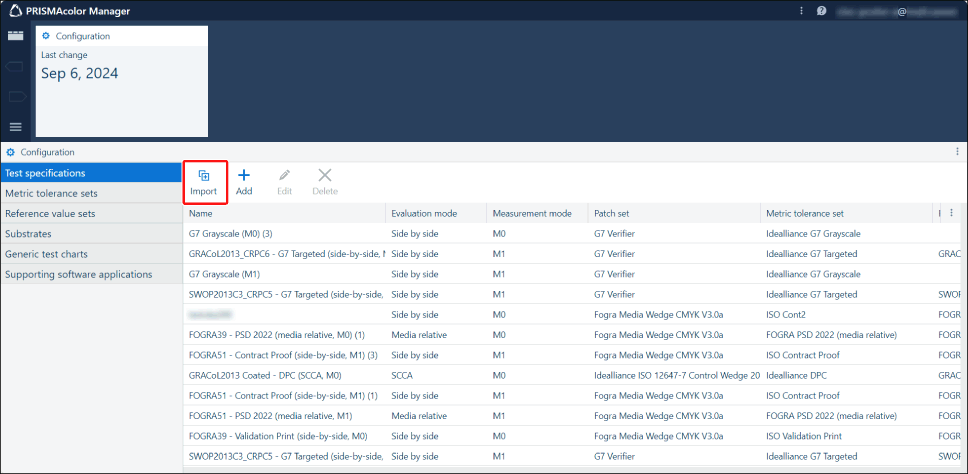
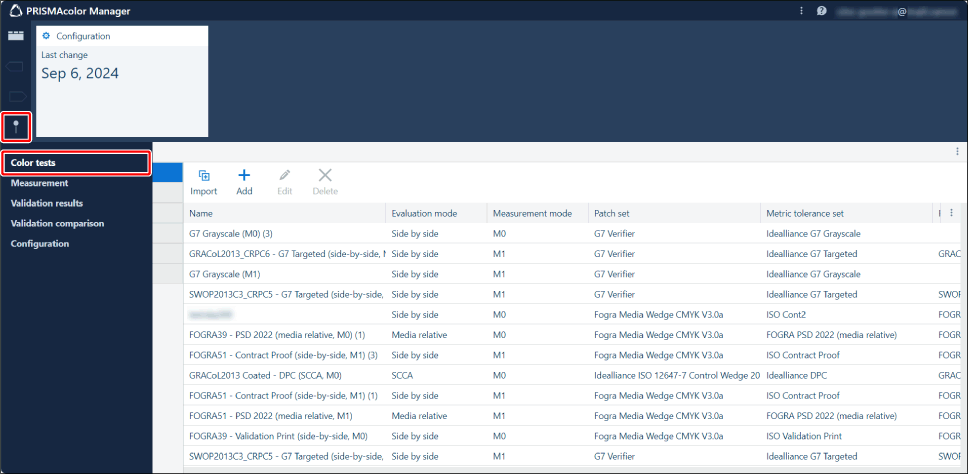
Step 1. Importing Test Specifications
Multiple sets of test specifications containing items and reference values for various standards are provided by default. Select the test specifications that you want to use for color validation and import them to your environment.
1.
Click the hamburger menu > [Configuration] > [Test specifications].
2.
Click [Import].
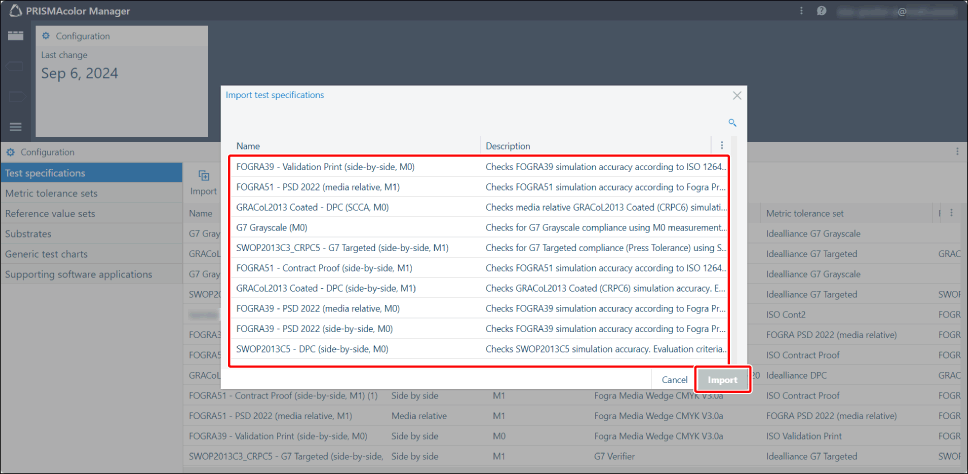
3.
Select the test specifications, then click [Import].
NOTE |
The following test specifications are recommended for initial testing. FOGRA51 – Contract Proof (side-by-side, M1) GRACoL2013 Coated – DPC (side-by-side, M1) G7 Grayscale (M0) |
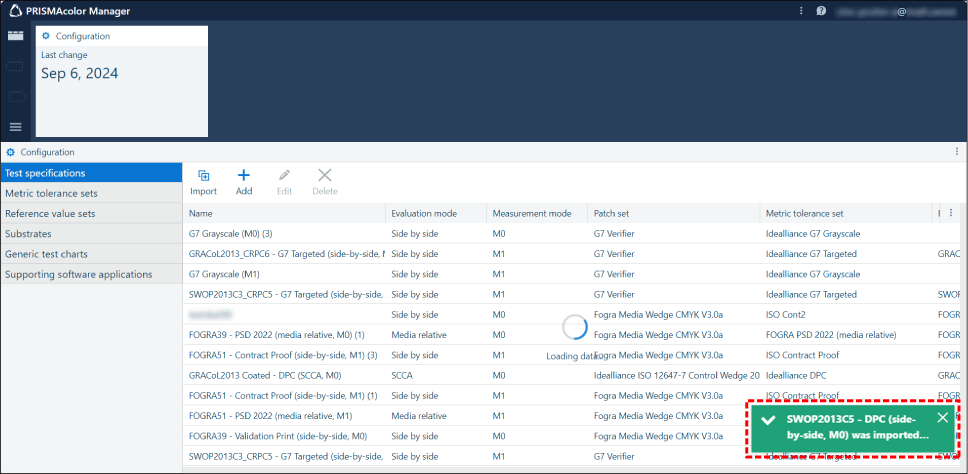
4.
Confirm that a dialog box indicating that the import process was successful is displayed.
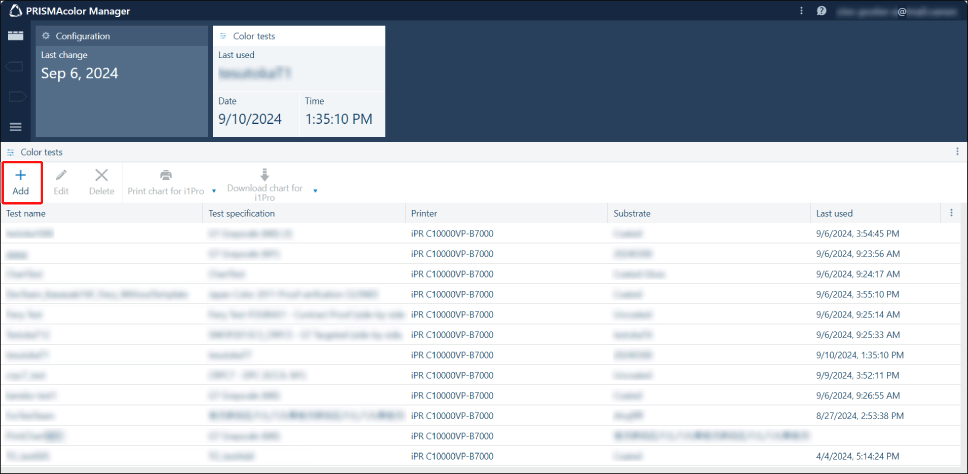
Step 2. Creating Color Test Settings
Combine the imported test specifications, printer for color validation, and paper to use to create color test settings, and save the settings to PRISMAcolor Manager. The saved settings can be reused.
1.
Click the hamburger menu > [Color tests].
2.
Click [Add].
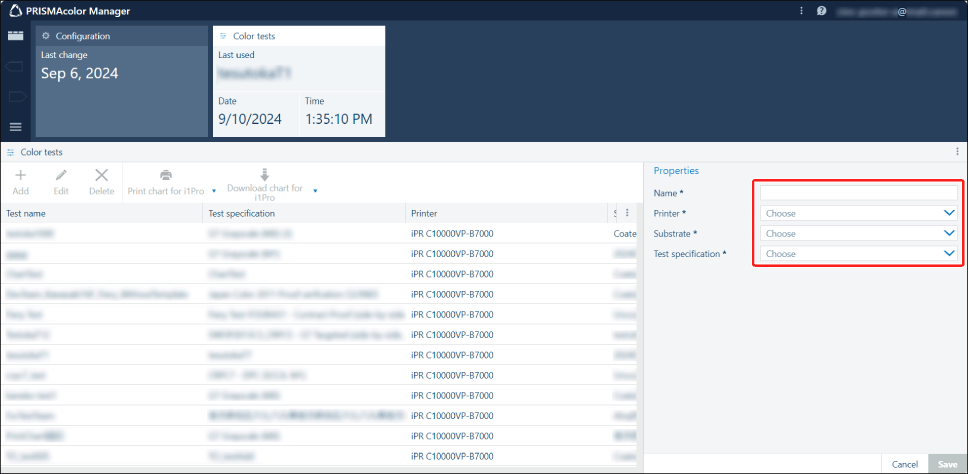
3.
Enter the properties.
[Name]: Manually enter a name of your choice.
[Printer]: Select the printer for color validation in the pull-down menu.
[Substrate]: Select the paper to use in the pull-down menu.
[Test specification]: Select the test specifications imported in the previous step in the pull-down menu.
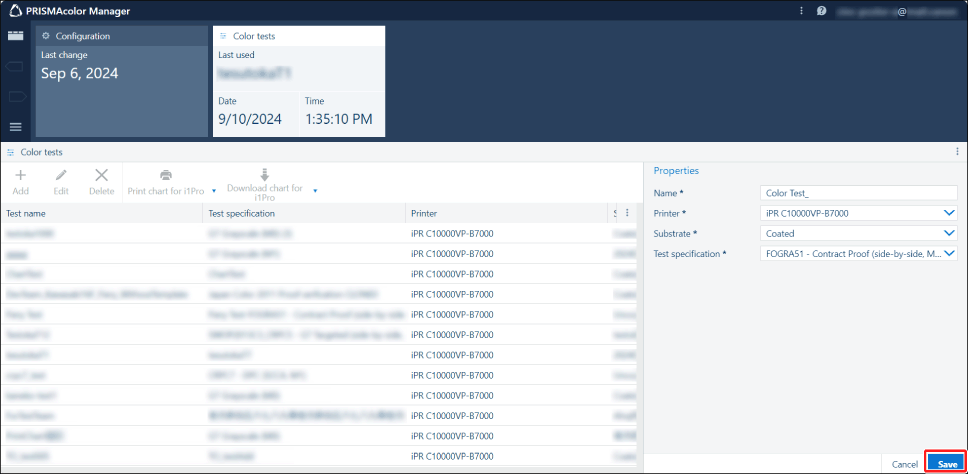
4.
Click [Save].
Step 3. Printing a Color Chart
Print a color chart according to the color test settings that you created.
1.
Connect the spectrophotometer to the workstation.
NOTE |
The following spectrophotometers are supported. X-Rite i1Pro 2 X-Rite i1Pro 3 X-Rite i1iSis 1 XL and i1iSis 1 standard X-Rite i1iSis 2 XL and i1iSis 2 standard |
2.
Click [Download chart for i1Pro] or [Download chart for i1iSis].
Select the chart type according to the spectrophotometer you connected.
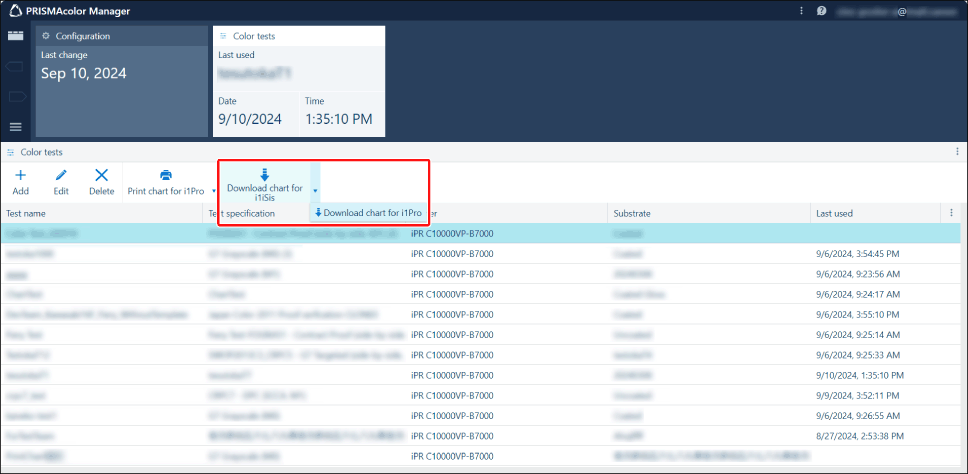
3.
Confirm the print settings displayed in the popup, then click [Continue] and save the PDF file to a location of your choice.
The color chart PDF file is saved according to the color test settings.
You can also check the print settings in the color chart PDF file.
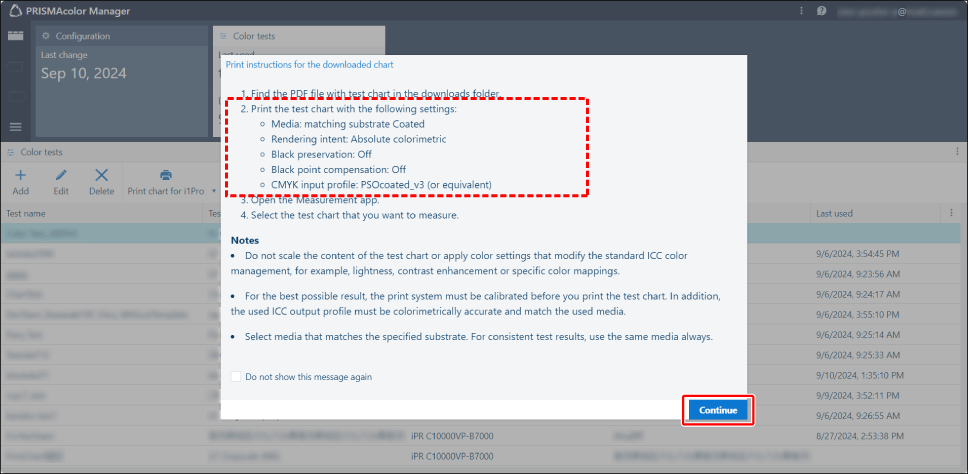
4.
Open the color chart PDF file that you downloaded to check the print settings.
5.
Reflect the print settings in the print driver and print the PDF file for the color chart on the printer for color validation.
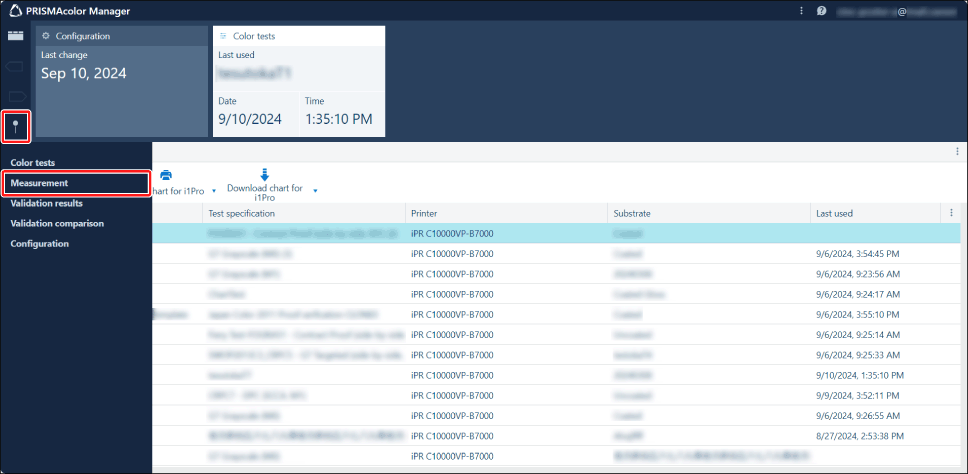
Step 4. Starting Color Measurement
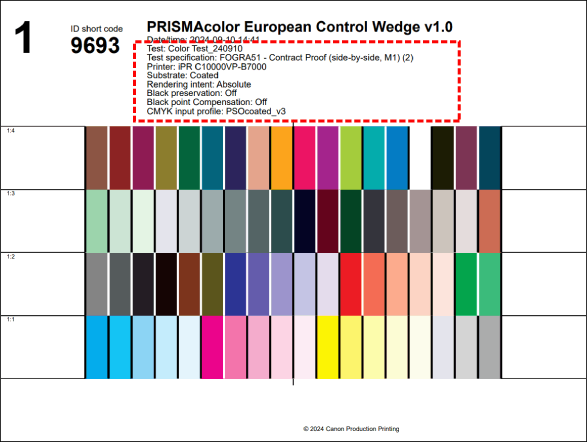
1.
Check the number under "ID short code" on the printed color chart.
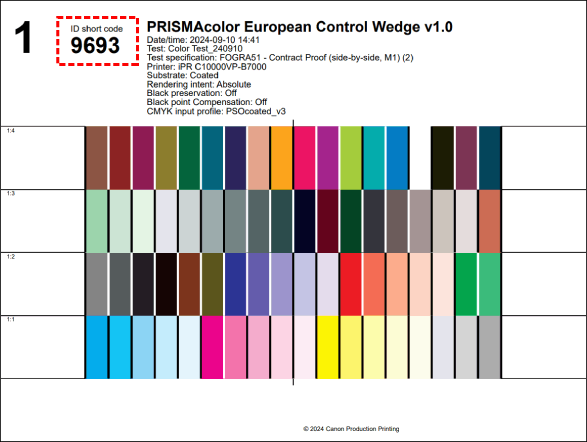
2.
Click the hamburger menu > [Measurement].
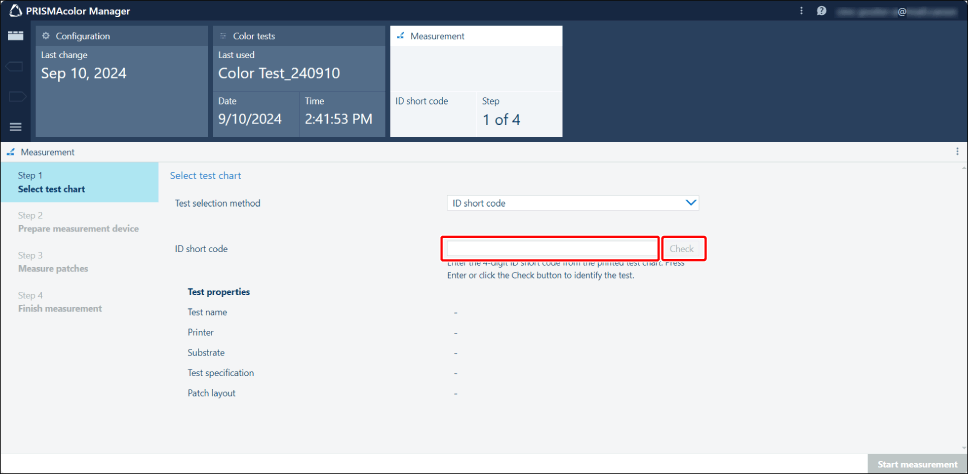
3.
Enter the "ID short code" printed on the color chart in [ID short code], and then click [Check].
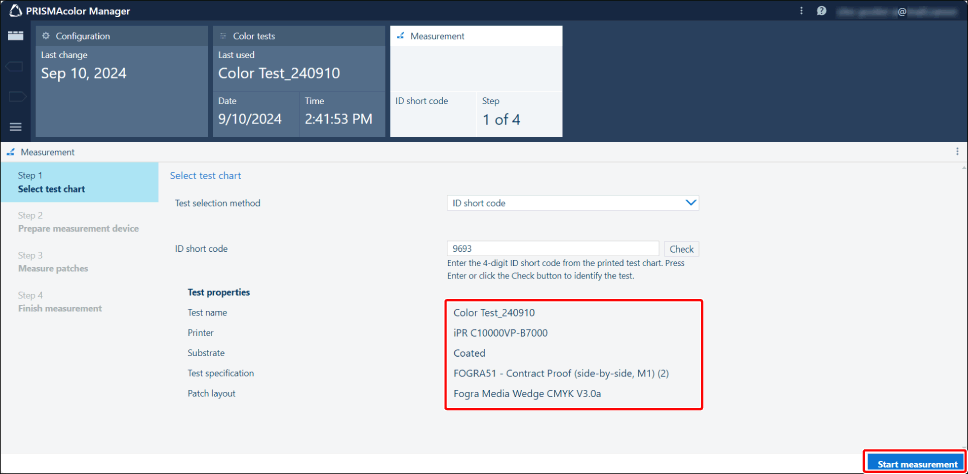
4.
Confirm the displayed information, then click [Start measurement].
NOTE |
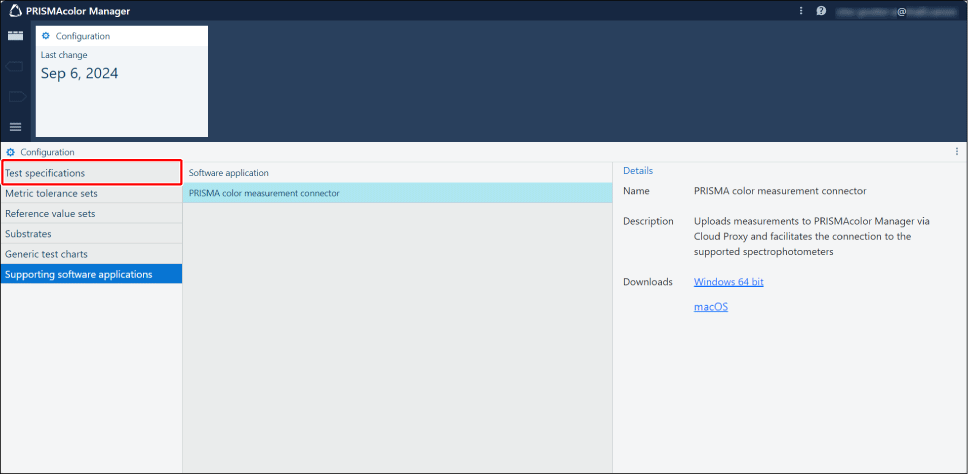
If you are prompted to install PRISMA color measurement connector, do so before performing measurement. |
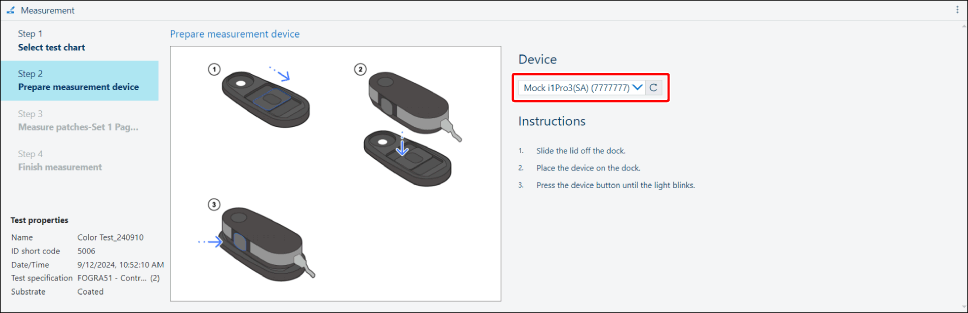
Step 5. Calibrating the Connected Spectrophotometer
1.
Select the spectrophotometer to use.
The spectrophotometers connected to the workstation are displayed.
If multiple spectrophotometers are connected, use the pull-down menu to select the spectrophotometer that was selected when downloading the color chart.
NOTE |
If [No devices found] is displayed in the pull-down menu, click [Stop] on the bottom right of the screen, then restart the procedure from the following step. |
2.
Follow the instructions on the screen to calibrate the spectrophotometer.
The procedure differs according to the spectrophotometer.
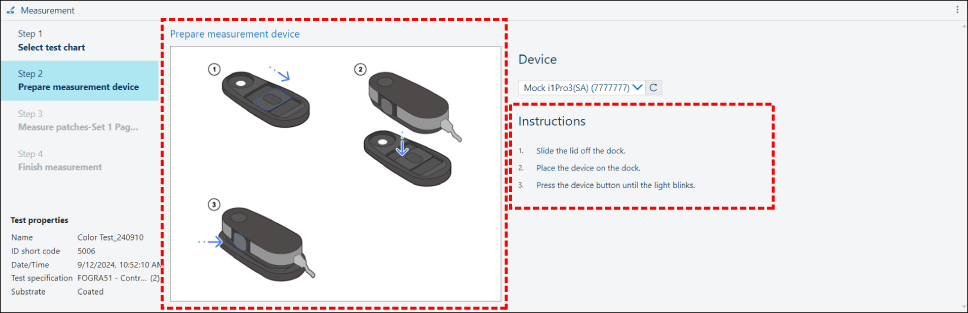
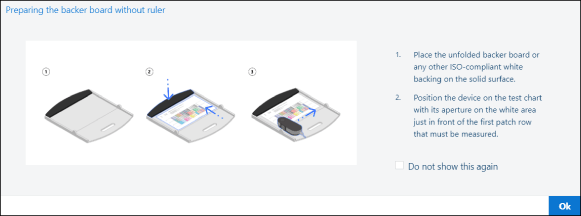
3.
If you are using an i1Pro, follow the instructions on the screen to prepare a backing board.
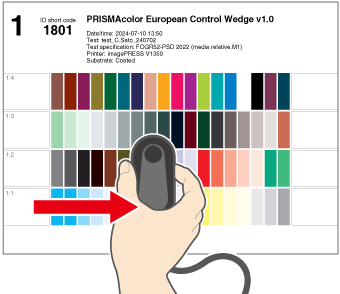
Step 6. Performing Color Measurement with the Printed Color Chart
1.
Follow the instructions on the screen to perform color measurement with the printed color chart.
Slide the spectrophotometer one row at a time to scan the color chart. The procedure differs according to the spectrophotometer and the test specifications.
NOTE |
If you are using the i1Pro2, each row must be measured twice. For details, see the instructions on the screen. |
2.
If a check mark is displayed for the measured row and a green message indicating that color measurement was successful is displayed on the bottom right of the screen, proceed to the next row.

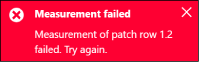
3.
If a red message indicating that color measurement failed is displayed on the bottom right of the screen, measure the row again.
4.
If an orange message indicating that color measurement may not have been performed correctly is displayed on the bottom right of the screen, click the [Redo] button on the right edge of the screen and perform color measurement again.

5.
When a green check mark is displayed on the left of all the rows, click [Finish measurement].

NOTE |
A thumbnail of the measured color is displayed on the bottom right of each color of the color chart on the screen. If there is a large difference between the color of the chart itself and the color of the thumbnail, you may have measured the wrong row, moved the spectrophotometer in the wrong direction, or measured the wrong chart. In this case, it is recommended that you click the [Redo] button on the right edge of the screen and perform color measurement again.  |
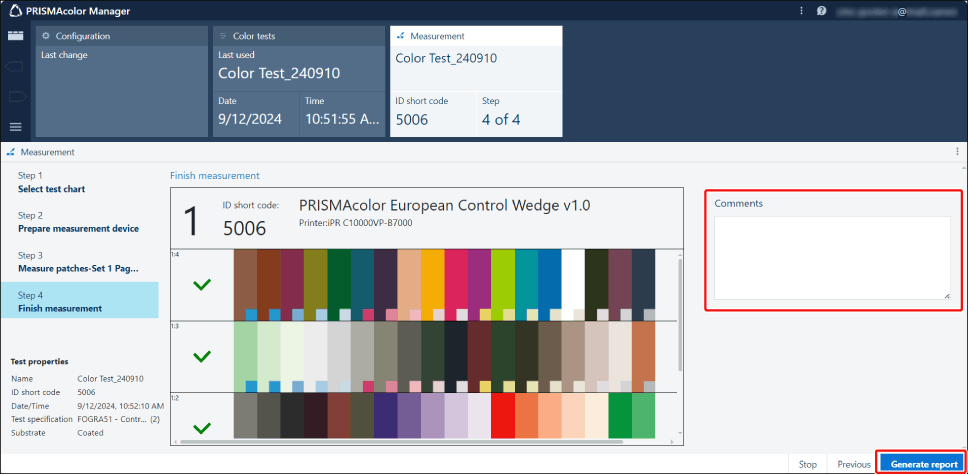
6.
Enter a comment as required, then click [Generate report].
The results of color measurement are uploaded to PRISMAcolor Manager. The test report screen will be displayed after waiting a while.
Step 7. Checking the Results of Color Validation
The uploaded color measurement results are used to automatically determine whether color validation was successful, according to the test specifications.
When the test report screen is displayed, check the results and implement the required countermeasures if necessary.
1.
If [Passed] is displayed, color validation was successful and no further action is required.
If [Failed] is displayed, click the link in the dialog box to open the User's Guide, then proceed to the next step.
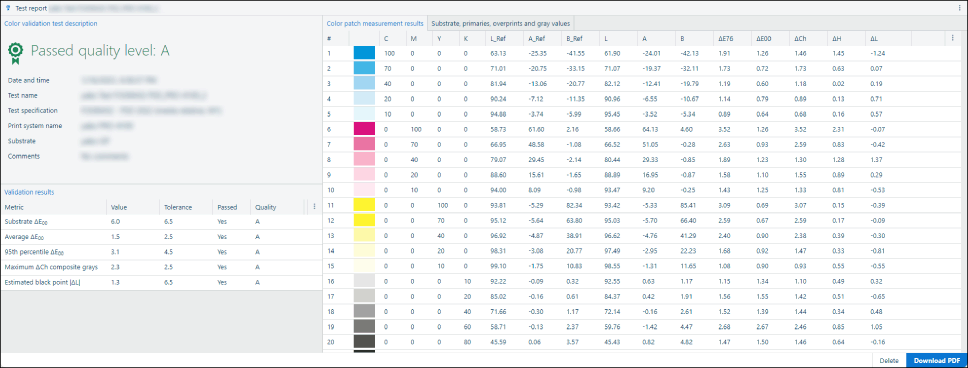
Screen when color validation is successful
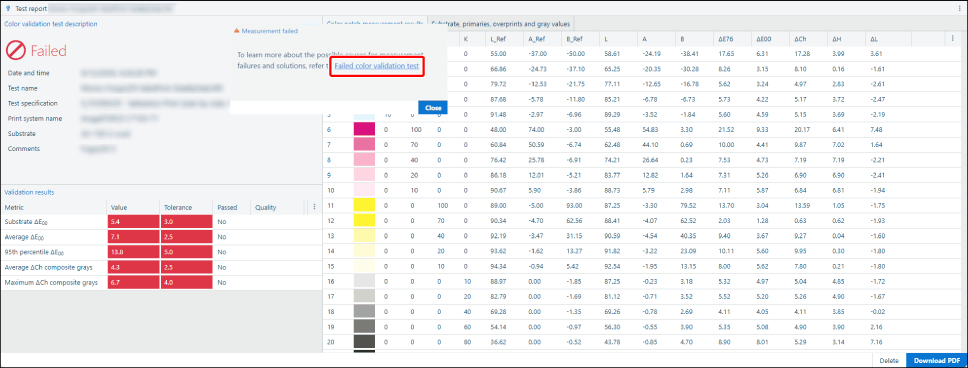
Screen when color validation is unsuccessful
2.
Check the cause and remedy in the User's Guide, and perform printer adjustment if there is a problem with the printer.
For details on performing printer adjustment, see the manual of your printer.
3.
When printer adjustment is complete, follow the procedure below to perform the color test again.
NOTE |
After initial color validation is complete, perform color validation at the interval recommended for the printer. When records of validation results have accumulated, you can display graphs in [Test report] and [Validation results] to check the changes over time. Graph analysis is useful for performing printer management, as it enables you to detect early signs of device problems. For details, see the User's Guide. Validation results are reflected in the graph about 15 minutes after they are uploaded. |