Scanning Using the MF Toolbox
1
Place your document.
|
NOTE
|
To scan from the platen glassYou can scan a multiple-page document only when
[Paper Size] in Step 6 is set to "fit the image."
|
2
Double-click the [Canon MF Toolbox 4.9] icon on the desktop.
The MF Toolbox starts.

3
Click one of the MF Toolbox command buttons based on your purpose of the scan.

|
[Mail]
|
The document is scanned and sent as an e-mail attachment from your e-mail application.
|
|
[OCR]
|
The document is scanned and read by Optical Character Recognition (OCR) software.
|
|
[Save]
|
The document is scanned and saved.
|
|
[PDF]
|
The document is scanned and saved as a PDF file.
|
|
[Color Scan]
[B&W Scan]
[Custom 1]
[Custom 2]
|
The document is scanned and displayed in the registered application. A dialog box appears for each of the buttons.
|
Specify the scanner settings as needed.
Click [Apply] to save the settings.
See "Using the MF Toolbox" for more information.

5
Click [Start].
Scanning starts.
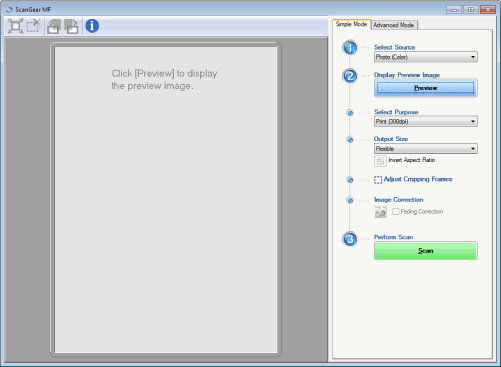
When the [Display the Scanner Driver] check box is selected in Step 4:
The [ScanGear MF] dialog box appears.

|
(1)
|
Specify the settings as needed.
See "Using the ScanGear MF" for more information.
|
|
(2)
|
Click [Scan].
Scanning starts.
|
