Faxing
The procedure for faxing a document created in an application is as follows.
|
NOTE
|
|
Faxing methods may vary according to the application you are using. For details, see the instruction manuals provided with the application.
|
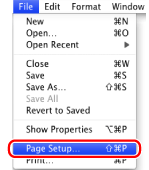
1.
Select [Page Setup] from the [File] menu of the application.
|
NOTE
|
|
In Mac OS X 10.5.x, the [Page Setup] dialog box may not be displayed, depending on the application you are using. If this is the case, skip to step 4. You can specify [Paper Size] and [Orientation] in the [Print] dialog box.
|
2.
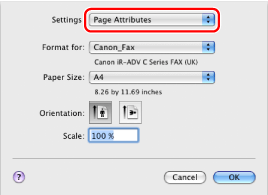
Select [Page Attributes] from [Settings].
3.
Select your fax from [Format for] → set [Paper Size], [Orientation], and [Scale] as necessary → click [OK].
4.
Select [Print] from the [File] menu.
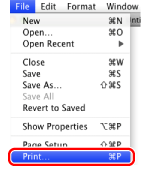
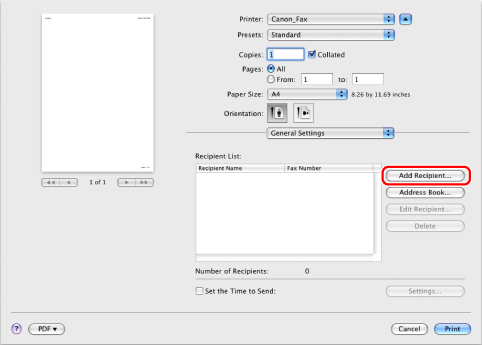
5.
Select your fax from [Printer] → select [General Settings].
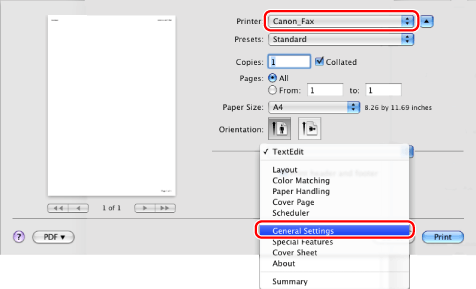
6.
Specify the fax destination.
When entering a new destination name and fax number:
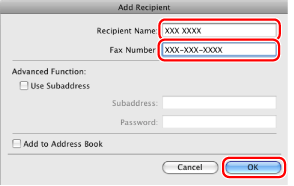
Click [Add Recipient].
Enter the recipient name and fax number → click [OK].
|
NOTE
|
|
To change a recipient name or fax number that has already been added, select the recipient from [Recipient List] and click [Edit Recipient].
|
When setting a destination from an address book:
Click [Address Book].
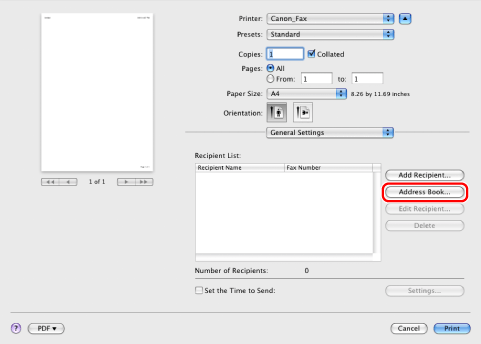
Select a recipient → click [ ] → [OK].
] → [OK].
|
NOTE
|
|
For information on using the address book, see "Registering a Person in an Address Book," "Registering a Group in an Address Book," "Importing an Address Book," and "Exporting an Address Book."
|
7.
If you want to attach a cover sheet, configure the settings for the cover sheet in the [Cover Sheet] preferences pane.
|
NOTE
|
|
For details about how to attach a cover sheet, see "Attaching a Cover Sheet."
|
8.
Click [Print].
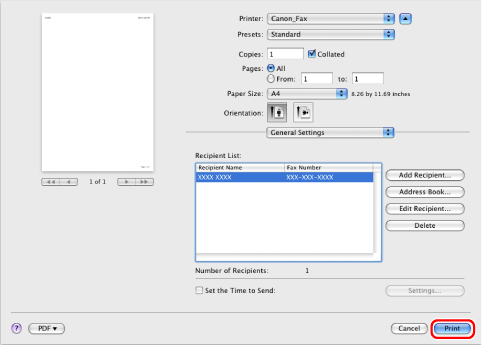
Faxing begins.
|
NOTE
|
|
Some printer models enable you to stop printing from a printer status confirmation/print cancelation display (see "Status Monitor/Cancel").
To stop sending data that is waiting to be output from Mac OS, click the printer icon in the Dock → click the name of the file you want to stop sending → click [Delete].
The display may vary according to the operating system and fax driver version you are using.
|