Setting IEEE 802.1X Authentication
Specify various protocols (TLS, TTLS, or PEAP) for IEEE 802.1X authentication.
|
Before specifying the settings, see "Attention (IEEE 802.1X Authentication)."
|
Setting TLS Authentication Information
Specify authentication information for using TLS during IEEE 802.1X authentication.
|
IMPORTANT
|
To specify TLS authenticationYou need to specify keys and their certificates or CA certificates to be used for authentication.
|
1
Start the Remote UI, and then log in as Management Mode.
2
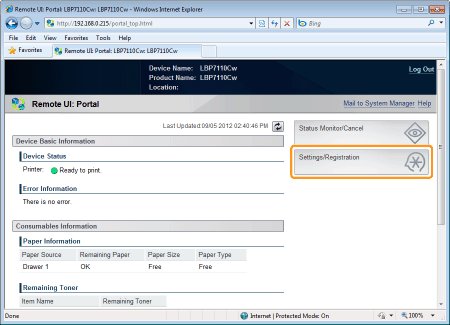
Click [Settings/Registration].
3
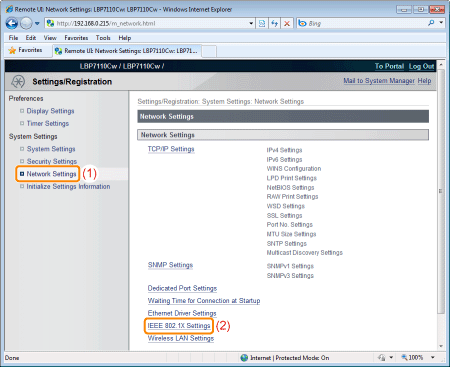
Display the [IEEE 802.1X Settings] page.
|
(1)
|
Select [Network Settings].
|
|
(2)
|
Click [IEEE 802.1X Settings].
|
4
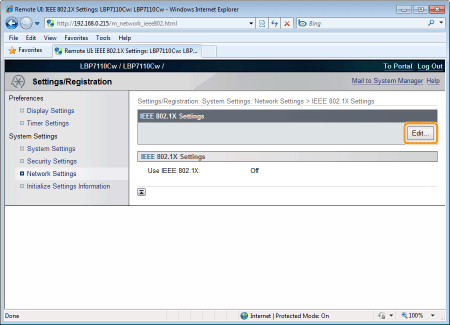
Click [Edit].
5
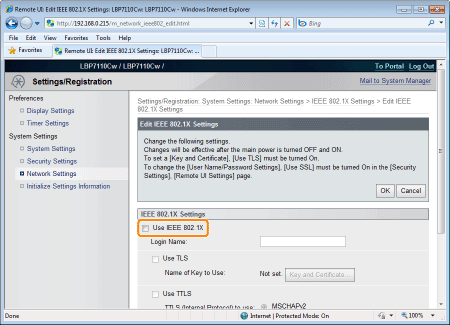
Select the [Use IEEE 802.1X] check box.
6
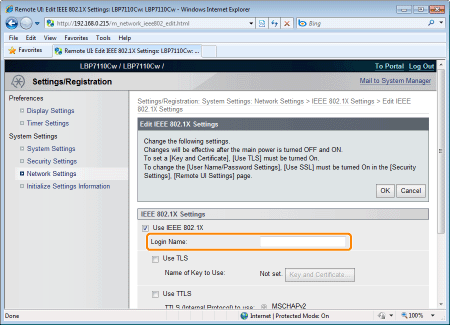
Enter a login name.
7
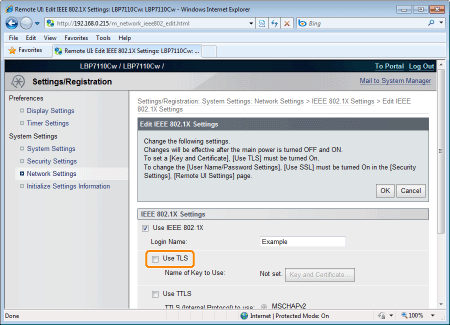
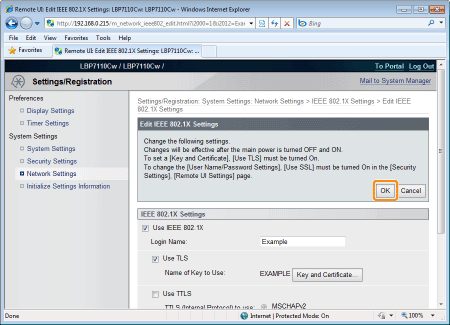
Select the [Use TLS] check box.
8
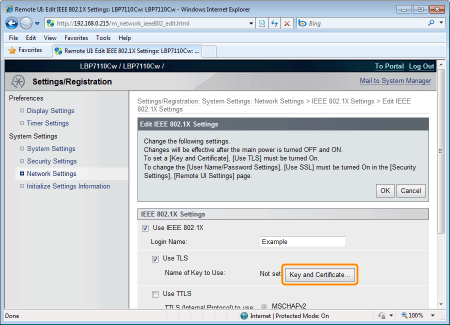
Click [Key and Certificate].
9
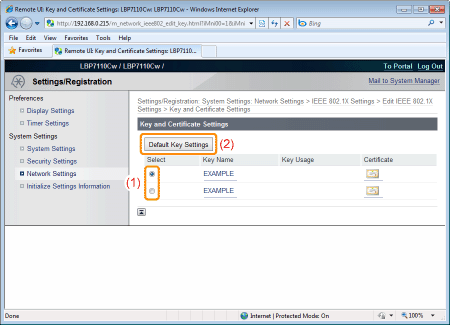
Specify keys and certificates to be used for authentication.
|
(1)
|
Select the key to use from a list of registered keys and certificates.
|
||
|
(2)
|
Click [Default Key Settings].
|
10
Click [OK].
11
Restart the printer.
Turn the printer OFF, make sure that the Main Power indicator is off, wait for 10 seconds or longer, and then turn it ON again.
|
→
|
After the printer is restarted, the settings become effective.
|

Setting TTLS/PEAP Authentication Information
Specify authentication information for using TTLS or PEAP during IEEE 802.1X authentication.
|
IMPORTANT
|
To specify TTLS/PEAP authenticationYou need to specify the SSL encrypted communication function.
|
1
Start the Remote UI, and then log in as Management Mode.
2
Click [Settings/Registration].

3
Display the [IEEE 802.1X Settings] page.
|
(1)
|
Select [Network Settings].
|
|
(2)
|
Click [IEEE 802.1X Settings].
|

4
Click [Edit].

5
Select the [Use IEEE 802.1X] check box.

Enter a login name.

7
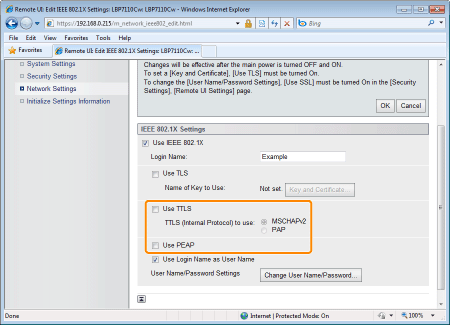
Select the [Use TTLS] or [Use PEAP] check box.
To use TTLS, select the TTLS internal protocol ([MSCHAPv2] or [PAP]).
8
Click [Change User Name/Password].
To use the login name entered to the user name at Step 6, select the [Use Login Name as User Name] check box.

9
Specify the user name and the password.
|
(1)
|
Enter a user name and a password.
|
|
(2)
|
Click [OK].
|

|
[User Name]
|
Enter a user name. You can enter up to 24 single-byte alphanumeric characters.
|
|
[Change Password]
|
Select the check box when changing the password.
|
|
[Password]
|
Enter a password. You can enter up to 24 single-byte alphanumeric characters.
|
|
[Confirm]
|
To confirm the [Password] you entered, enter it again.
|
10
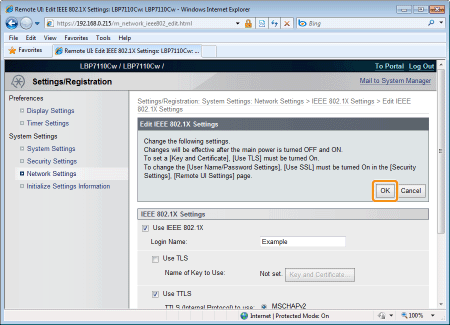
Click [OK].
11
Restart the printer.
Turn the printer OFF, make sure that the Main Power indicator is off, wait for 10 seconds or longer, and then turn it ON again.
|
→
|
After the printer is restarted, the settings become effective.
|


 ] (Certificate), you can check and verify detailed information of certificates.