Preparing for Using Google Cloud Print
To print with Google Cloud Print, register the machine with Google Cloud Print.
|
NOTE
|
|
To use Google Cloud Print, a Google account is required. If you do not have one, access Google Web site to create your account.
|
Checking the Machine Settings
Before setting up Google Cloud Print, check the following:
Make sure that the machine is assigned an IPv4 address and connected to a computer over a network. Connecting via Wireless LAN Connecting via Wired LAN
Make sure that the date and time and the time zone settings are correct. Date/Time Settings
If the Department ID Management is enabled, make sure that the machine is configured to enable printing from a computer even when no Department ID and PIN are entered. Blocking Jobs When Department ID Is Unknown
Enabling Google Cloud Print
Enable the Google Cloud Print function of the machine.
1
Press  .
.
.2
Use  /
/ to select <System Management Settings>, and press
  .
.
/ to select <System Management Settings>, and press .If the logon screen appears, enter the correct ID and PIN using the numeric keys, and then press  . Logging on to the Machine
. Logging on to the Machine3
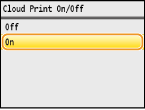
Select <Cloud Print On/Off>, and press .
.4
Select <On>, and press .
.
5
Restart the machine.
Turn OFF the machine, wait for at least 10 seconds, and turn it back ON.
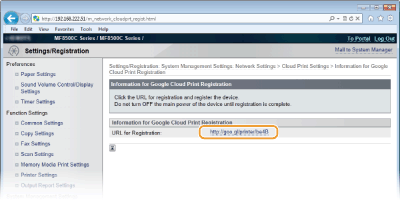
Registering the Machine with Google Cloud Print
Register the machine with Google Cloud Print.
1
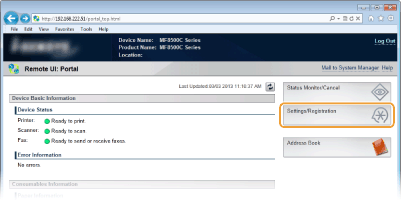
Start the Remote UI and log on in System Manager Mode. Starting Remote UI
2
Click [Settings/Registration].
3
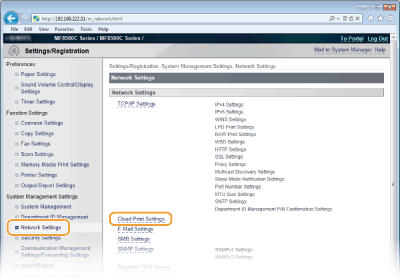
Click [Network Settings]  [Cloud Print Settings].
4
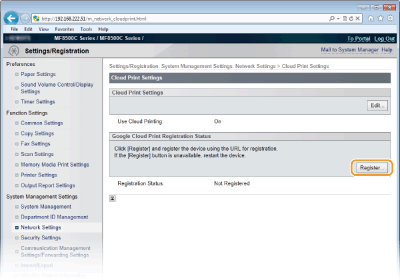
Click [Register...] in [Google Cloud Print Registration Status].
NOTE:
If [Register...] is unavailable
If [Register...] is unavailable
You need to enable Google Cloud Print. Click [Edit...], select the [Use Cloud Printing] check box, click [OK], and then restart the machine.
To reregister the machine
To reregister the machine if the owner of the machine has changed or for other reasons, unregister the machine and register it again.
5
Click the link of the URL displayed for [URL for Registration].
6
Follow the on-screen instructions to register the machine.