Setting IPv4 DNS
|
Before setting DNS settings, see "Attention (DNS Settings)."
|
DNS (Domain Name Service) is a service used for associating a host name (a name of a computer or a printer on a TCP/IP network) with an IP address.
1
Start the Remote UI, and then log on in system manager mode.
2
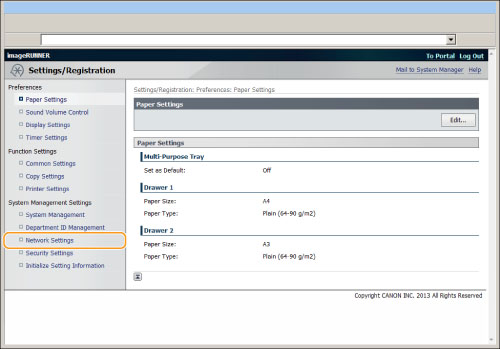
Click [Settings/Registration].
3
Click [Network Settings] for <System Management Settings>.
4
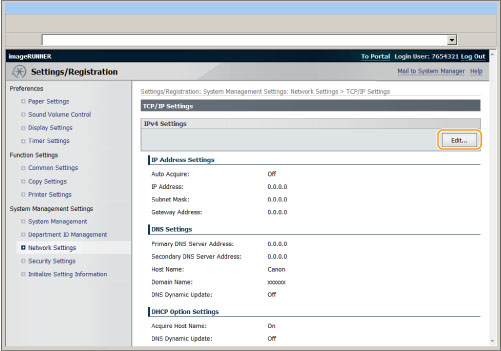
Click [TCP/IP Settings].
5
Click [Edit...] for <IPv4 Settings> of [TCP/IP Settings].
6
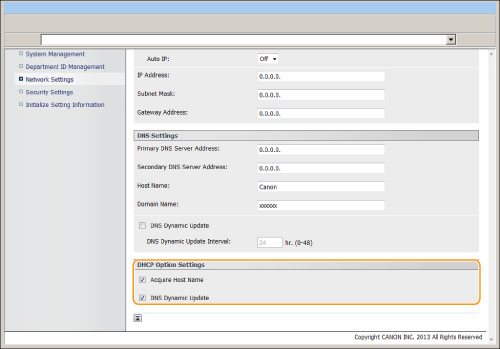
Specify the DNS settings.

|
[Primary DNS Server Address:]
|
Enter the IP address of the primary DNS server.
|
||
|
[Secondary DNS Server Address:]
|
Enter the IP address of the secondary DNS server.
|
||
|
[Host Name:]
|
Enter the host name to be added to the DNS server. Up to 47 characters can be entered.
|
||
|
[Domain Name:]
|
Enter the name of the domain to which the machine belongs. Up to 47 characters can be entered.
Input Example: "example.com" |
||
|
[DNS Dynamic Update]
|
Select this check box when using the DNS Dynamic Update function.
You can use the IP address of the machine without fixing the address by using the DNS dynamic update function and specifying [Host Name:] and [Domain Name:].
|
7
Set the DHCP options.
|
[Acquire Host Name]
|
Select this check box to automatically obtain the host name from the DHCP server.
|
|
[DNS Dynamic Update]
|
Select this check box to automatically register the machine's IPv4 address, host name, and name set as the domain name in the DNS server using the DNS Dynamic Update function.A dynamic DNS server is required for the DNS Dynamic Update function.
|
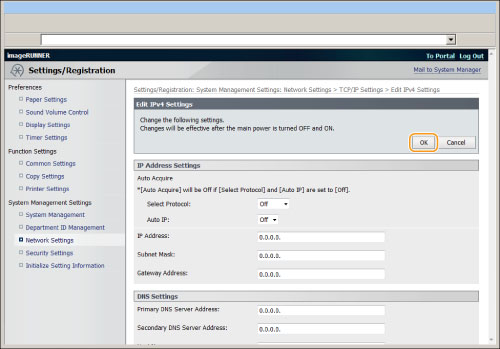
Click [OK].
9
Restart the machine.
It is necessary to restart the machine to take effect the settings.
Turn OFF the machine and wait for at least 10 seconds before turning it back ON.
Turn OFF the machine and wait for at least 10 seconds before turning it back ON.