Performing Saddle Stitch Printing (iW Desktop)
You can use the document handling software iW Desktop to compile different documents created with different applications and use the print settings of imageRUNNER ADVANCE to perform saddle stitch printing.
Advantages of Performing Saddle Stitch Printing for Multiple Documents
Ensures efficient document creation without launching different applications.
Allows deletion of unnecessary pages on the PC screen to prevent waste of printing.
Reduces incorrect printing by checking the layout on the PC screen.
Laying out information in a saddle-stitched book to save paper.
Provides convenient double-spread format printing.
Enables automatic imposition and output in accordance with the page order after saddle stitching.
|
Required Condition
|
|
iW Desktop is installed.
Booklet printing is supported by the printer.
Printer is equipped with the saddle-stitch finisher.
Printer driver is installed on the printer to perform booklet printing.
|
The following performs saddle stitch printing for a document complied with iW Desktop using imageRUNNER ADVANCE.
The screens may differ, depending on the model of the machine and on attached optional products.
Follow the procedure below.
Compile the document with iW Desktop.
Perform saddle stitch printing.
Compiling the Document with iW Desktop
Use iW Desktop to compile files created with various applications in a single binder document.
1.
Launch iW Desktop.
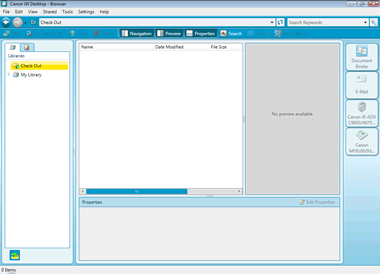
The [Desktop Browser] dialog box is displayed.
2.
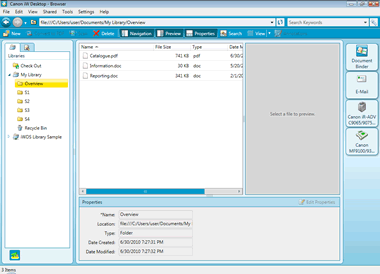
Select a library and a folder in the library to display documents to compile as a single binder document in the File List View Pane.
3.
Select documents to compile in the File List View Pane and click the  (Document Binder) icon.
(Document Binder) icon.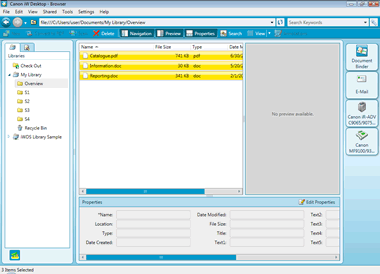
The [Document Binder] dialog box is displayed.
4.
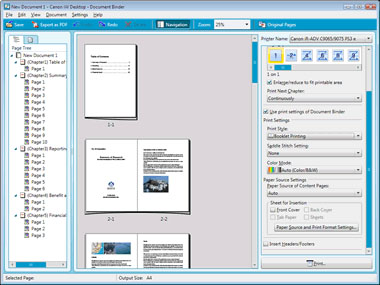
Check that the documents have been compiled.
5.
If an unnecessary page is contained, select it in the preview area or tree display, and click [Delete] to delete it.
6.
To change the page order, select the page to move in the preview area or tree display and drag it to the desired location.
Performing Saddle Stitch Printing
Perform saddle stitch printing from iW Desktop using imageRUNNER ADVANCE.
When [Use print settings of Document Binder] in Document Binder is checked, these settings can be configured.
1.
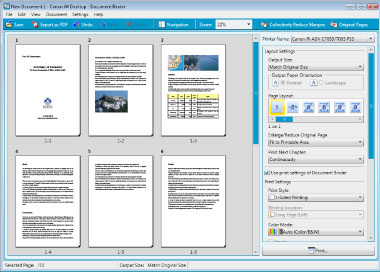
Select [Booklet Printing] from [Print Style] in the [Print Settings] panel.
The preview area is updated and the setting items in the [Print Settings] panel are switched to the setting items for booklet printing.
|
NOTE
|
|
When a paper size for which booklet printing is not possible is selected in [Output Size], you cannot select [Booklet Printing]. In this case, select an output paper size for which booklet printing can be performed.
|
2.
Select a method of specifying saddle stitch settings from [Saddle Stitch Setting] in the [Print Settings] panel.
3.
Select an opening location of the booklet from [Book Opening] on the [Print Settings] panel.
|
NOTE
|
|
For more information on configuring the layout settings of Document Binder, see the e-manual of iW Desktop.
|
4.
Click [File] → [Print].
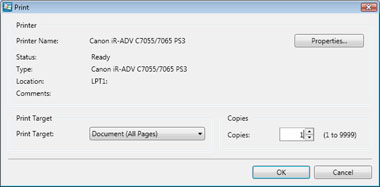
The [Print] dialog box is displayed.
5.
Specify the number of copies to print in [Copies] if necessary.
6.
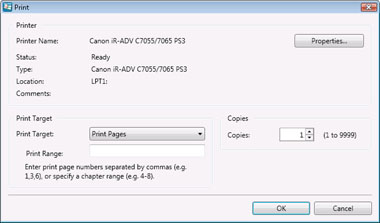
Select [Document (All Pages)] or [Print Pages] in [Print Target].
When you select [Print Pages], specify the page numbers in [Print Range] displayed.
|
NOTE
|
|
For more information on the format of the page number, see "Reference Information."
|
7.
Click [OK].
imageRUNNER ADVANCE performs saddle stitch booklet printing.
Reference Information
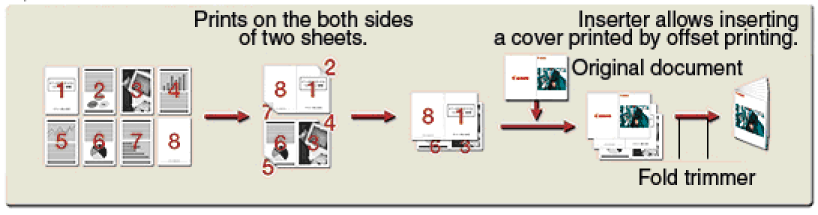
Page Order of Saddle Stitch Booklet Printing and Insertion of Front Cover
You can automatically impose pages, two original pages per output sheet of the specified size and orientation, in accordance with the page order after saddle stitching. You can also insert a cover page.
Detailed Settings of Saddle Stitch Booklet Printing
When you select [Booklet Printing] in [Print Style] of imageRUNNER ADVANCE, the [Detailed Settings for Booklet] button becomes available. When you the [Detailed Settings for Booklet] button, the [Detailed Settings for Booklet] dialog box is displayed.
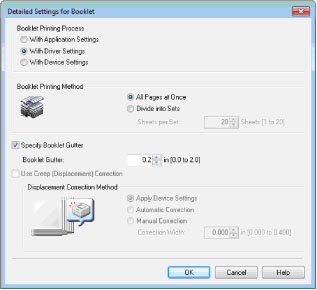
By selecting [With Driver Settings] under [Booklet Printing Process] in the [Detailed Settings for Booklet] dialog box, you can configure detailed settings of booklet printing with the driver, including how to divide printed sheets into sets as well as gutter width.
By selecting [With Device Settings] under [Booklet Printing Process] in the [Detailed Settings for Booklet] dialog box, you can use the creep correction function.
You can specify [Book Opening] whether you select [With Driver Settings] or [With Device Settings].
Creep (Displacement) Correction
You can automatically correct displacement of image position at the most inner part and the most outer part of the book caused by booklet printing.

To perform creep correction, select [With Device Settings] under [Booklet Printing Process] and select [Use Creep (Displacement) Correction]. You can specify [Displacement Correction Method] when [Use Creep (Displacement) Correction] is selected.
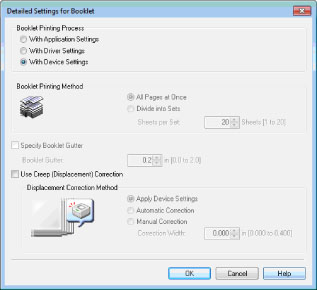
You need the optional saddle finisher to perform creep correction.
Input Format for [Print Range]
When you select [Print Pages] under [Print Target] in the [Print] dialog box of Document Binder, specify a page number(s) as follows. You can enter up to 255 characters.
When printing from page a to the last page: a-
("a" indicates the page number to start printing.)
When printing from the first page to page n: -b
("b" indicates the page number to end printing.)
When printing continuous pages: a-b
("a" and "b" indicate the page numbers to start and end printing respectively.)
When printing discontinuous pages: c,d
("c" and "d" indicate page numbers to be printed. Separate "c" and "d" with a comma.)
Note that the order of entry in this field does not mean the order of printing. Even when you enter "1,2" or "2,1", pages are printed in the order "1,2".
Checking Print Status
You can use Document Monitor to monitor print jobs. By configuring Document Monitor, the status display icon and completion notification icon for the latest print job are displayed. These icons change depending on the processing status of the job.
|
|
This is displayed during the period from the beginning of spooling executed by the Windows spooler to the completion of sending the print job to imageRUNNER ADVANCE.
|
|
|
This is displayed during the period from the completion of a print job to imageRUNNER ADVANCE to the completion of printing with imageRUNNER ADVANCE.
|
 (Error) (Error) |
This is displayed when an error occurs in imageRUNNER ADVANCE or the status of imageRUNNER ADVANCE cannot be confirmed due to a network connection failure or power failure during the period from the beginning of spooling executed by the Windows spooler to the completion of printing with imageRUNNER ADVANCE.
|
 (Printing Paused/Locked) (Printing Paused/Locked) |
This is displayed when a job process is paused by instruction from the Windows spooler, operational panel on imageRUNNER ADVANCE or remote UI during the period from the beginning of spooling executed by the Windows spooler to the beginning of sending the print job to imageRUNNER ADVANCE.
|
 (Job is complete) (Job is complete) |
Displayed when the printing is completed successfully.
|
 (Error/Unknown) (Error/Unknown) |
This is displayed when an error occurs in imageRUNNER ADVANCE or the status of imageRUNNER ADVANCE cannot be confirmed due to a network connection failure or power failure.
|
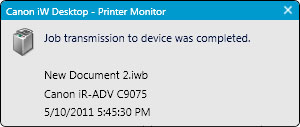
In addition, when a print job completes, the completion notification message is displayed.
For more information on how to configure Document Monitor, see the e-manual of iW Desktop.
Troubleshooting
Printed result differs from the expected image.
Check the output paper setting on Document Binder and the paper set in the printer. If the output paper size set with Document Binder is different from the size of the paper set in the printer, documents are not printed correctly.
Printed fonts differ from those displayed on the screen.
Desktop uses the screen fonts together with the font library used for printing in order to reproduce easy-to-read text (just as it is printed on a page) on the screen. Therefore, printed fonts may differ from those displayed on the screen.
Printed image is too dark (or light).
Document Binder does not perform colour management using colour profiles. Adjust the hue on the printer. To make the printed image lighter or darker, select [Manual Color Settings] on the [Quality] sheet displayed from the [Print Settings] dialog box, and click [Color Settings].
Creep correction cannot be configured.
To perform creep correction, select [With Device Settings] under [Booklet Printing Process] in the [Detailed Settings for Booklet] dialog box for the printer driver. You cannot configure creep correction if [With Driver Settings] or [With Application Settings] is selected. Also, you need the optional saddle finisher to perform creep correction.
I want to divide printed sheets into several sets.
To divide printed sheets into several sets, select [With Driver Settings] under [Booklet Printing Process] in the [Detailed Settings for Booklet] dialog box for the printer driver, and then select [Divide into Sets]. You cannot specify [Divide into Sets] if [With Driver Settings] or [With Application Settings] is selected. The maximum number of pages which can be divided into sets depends on the options used.
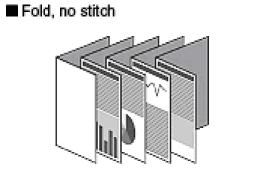
I want to just fold and pile printed sheets without stapling them.
From the [Print Settings] dialog box for the printer driver, display the [Finishing] sheet and select [Fold Only] under [Saddle Stitch]. You may not be able to select [Fold Only] depending on the options used.
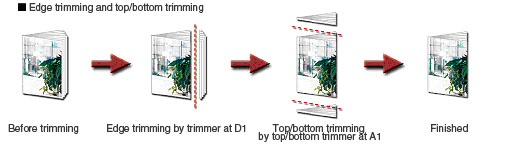
I want to trim the edge or three sides of the book.
From the [Print Settings] dialog box for the printer driver, display the [Finishing] sheet, select [Fold + Saddle Stitch + Trim] under [Saddle Stitch], and set the trimming width. You may not be able to select [Fold + Saddle Stitch + Trim] depending on the options used. In addition, top and bottom trimming may not be available and edge trimming is only available depending on the options used. You need the optional trimmer for edge trimming. You need the optional trimmer and top/bottom trimmer for three-sided trimming.