Checking the List of Insertable Stamped Images
You can display the stamped image list that is registered in Desktop Editor. You can also switch between showing/hiding the registered stamped images.
Hiding Stamped Images
This section describes how to hide the selected stamped images in the stamped image list.
1.
Click [Manage Stamped Images] on the ribbon.
Or, follow one of the steps described below.
Start the Digital Stamps Mode, select the digital stamp list on the ribbon > ▼ > select [Manage Stamped Images]
Select the [File] menu > [Settings/Management] > [Manage Stamped Images]
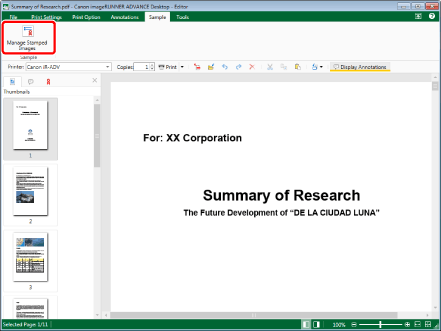
[Manage Stamped Images] is displayed.
|
NOTE
|
|
If commands are not displayed on the ribbon of Desktop Editor, see the following to display them.
This operation can also be performed with the tool buttons. If tool buttons are not displayed on the toolbar of Desktop Editor, see the following to display them.
For information on how to start the Digital Stamps Mode, see the following.
|
2.
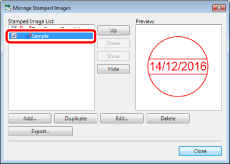
Select a stamped image to hide from [Stamped Image List].
3.
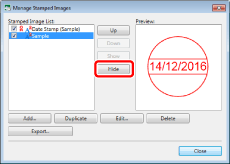
Click [Hide].
Or, deselect the check box next to the stamped image.
4.
Click [Close].
The selected stamped image is no longer displayed on the ribbon.
Displaying Hidden Stamped Images Again
This section describes how to display stamped images hidden on the stamped image list again.
1.
Click [Manage Stamped Images] on the ribbon.
Or, follow one of the steps described below.
Start the Digital Stamps Mode, select the digital stamp list on the ribbon > ▼ > select [Manage Stamped Images]
Select the [File] menu > [Settings/Management] > [Manage Stamped Images]

[Manage Stamped Images] is displayed.
|
NOTE
|
|
If commands are not displayed on the ribbon of Desktop Editor, see the following to display them.
This operation can also be performed with the tool buttons. If tool buttons are not displayed on the toolbar of Desktop Editor, see the following to display them.
For information on how to start the Digital Stamps Mode, see the following.
|
2.
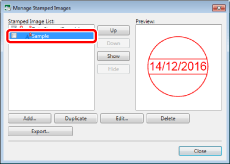
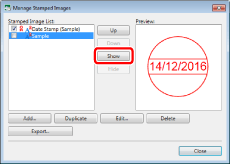
Select a stamped image to display again from [Stamped Image List].
3.
Click [Show].
Or, select the check box next to the stamped image.
4.
Click [Close].
The selected stamped image is displayed on the ribbon again.
Changing the Display Order of Stamped Images
This section describes how to change the order of the digital stamp list on the ribbon.
1.
Click [Manage Stamped Images] on the ribbon.
Or, follow one of the steps described below.
Start the Digital Stamps Mode, select the digital stamp list on the ribbon > ▼ > select [Manage Stamped Images]
Select the [File] menu > [Settings/Management] > [Manage Stamped Images]

[Manage Stamped Images] is displayed.
|
NOTE
|
|
If commands are not displayed on the ribbon of Desktop Editor, see the following to display them.
This operation can also be performed with the tool buttons. If tool buttons are not displayed on the toolbar of Desktop Editor, see the following to display them.
For information on how to start the Digital Stamps Mode, see the following.
|
2.
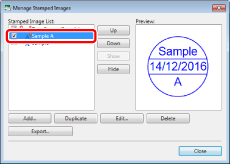
Select the stamped image whose position you want to change in [Stamped Image List].
3.
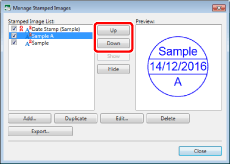
Click [Up] or [Down] to change the position of the stamped image.
4.
Click [Close].
The digital stamps are displayed in the digital stamp list on the ribbon in the order you changed them.
|
NOTE
|
|
Only the stamped images with the check box selected next to the stamped image name in [Stamped Image List] are displayed in the digital stamp list on the ribbon.
|