
Basic Operations for Sending Faxes
This section describes the basic operation procedure used to fax an original.
 |
|
You need to complete some procedures before using fax functions. Configuring Initial Settings for Fax Functions
|
1
Place the original(s). Placing Originals
2
Select <Fax> in the Home screen. Home Screen
3
Press  .
.
 .
.If the destinations set by the previous user are still selected, this can cause transmission errors. Always reset the settings before sending.
4
Specify the destination.
Specifying from Address Book
Specifying from Coded Dial Numbers
Specifying from One-Touch
Entering Destinations Directly
Specifying from Address Book
 |
|
The Address Book enables you to specify a destination by selecting from a list of registered destinations or by searching by name for destinations with recipient names.
|
 |
|
You need to register destinations in the Address Book before using this feature. Registering Destinations
|
1
Select <Destination>  <Specify from Address Book>.
 <Specify from Address Book>.
2
Select an index. Index

3
Select a destination.
 |
|
If a destination is selected from <Addr. Book> in the Home screen, the Fax Basic Features screen can be displayed while the selected destination remains being specified.
|
Back to Top
Specifying from Coded Dial Numbers
 |
|
Three-digit numbers (coded dial numbers) are assigned to addresses in the Address Book. You can specify an address simply by entering its coded dial number.
|
 |
|
To use coded dial numbers, the destination must be registered in the Address Book beforehand. Registering Destinations
|
1
Select <Destination>  <Specify from Coded Dial>.
 <Specify from Coded Dial>.
2
Enter a three-digit number.
If you have entered an incorrect value, use  to clear it.
 to clear it.

If a confirmation screen appears
When <One-Touch/Coded Dial TX Confirmation> is set to <On>, a screen is displayed that shows the destination and the name for the number. (For Group Dial, the group name and the number of destinations are shown.) Check the contents and if everything is correct, select <OK>. To specify a different destination, select <Cancel> and then re-enter the three-digit coded dial number. Displaying Destinations in Address Book
 |
|
If a coded dial number is selected from <Coded Dial> in the Home screen, the Fax Basic Features screen can be displayed while the selected destination remains being specified.
|
Back to Top
Specifying from One-Touch
 |
|
Specify a destination by selecting from a list registered to the one-touch buttons.
|
 |
|
You need to register destinations before using one-touch dialing. Registering Destinations in the Address Book
|
1
Select <Destination>  <Specify from One-Touch>.
 <Specify from One-Touch>.
2
Select a destination.

If a confirmation screen appears
When <One-Touch/Coded Dial TX Confirmation> is set to <On>, a screen is displayed that shows the destination and destination name registered to the one-touch button. (For Group Dial, the group name and the number of destinations are shown). Check the contents and if everything is correct, select <OK>. To specify a different destination, select <Cancel> and then select the one-touch buttons again.
 |
|
If you select any of <One-Touch 1> to <One-Touch 4> in the Home screen, the Fax Basic Features screen can be displayed while the selected destination remains being specified.
|
Back to Top
Entering Destinations Directly
For a destination that is not registered in the Address Book, specify it by entering a fax number.
1
Select <Destination>  <Specify Using Numeric Keys>.
 <Specify Using Numeric Keys>.
2
Enter the fax number.
If your machine is connected to a PBX (Private Branch Exchange), select <R> before entering the destination. If <R> is not available, you need to register the R-key settings. <R-Key Setting>
If you have entered an incorrect value, press  to clear it.
 to clear it.
 |
If a confirmation screen appearsWhen <Confirm Entered Fax Number> is set to <On>, the input screen reappears so that you can confirm the destination (Confirming the Entered Fax Number). Enter the destination again.
Sending a fax abroadEnter the international access code, the country code, and the fax number to specify the destination. If you are not able to successfully connect to a recipient, select <Pause> and insert a pause between numbers.
|
Back to Top

Adding a destination
To send a fax to multiple destinations at a time (sequential broadcast), repeat the appropriate steps to enter all destinations.
You can also recall previously used destinations. Recalling Previously Used Settings for Sending (Recall Settings)
 To delete destinations
If you specified multiple destinations, you can delete destinations as necessary.
|
1
|
Select <Destination>
 <Confirm/Edit>. <Confirm/Edit>. |
|
2
|
Select a destination you want to delete.
If you specified Group Dial, "XX destination(s)" is displayed. Selecting <Number of Destinations> displays destinations registered in the group.
|
|
3
|
Select <Remove>
 <Yes>. <Yes>. |
3
Specify the scanning settings as necessary.
Adjusting Image Quality
Scanning 2-Sided Originals
Adjusting Image Quality
 |
|
You can select the resolution suitable for your original type. The higher the resolution is, the clearer the image becomes, but the longer it takes to send. Selecting Resolution
|
 |
|
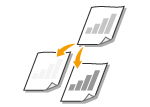
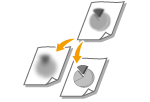
You can adjust the density of the fax if the text or images in an original are too light or dark. Adjusting Density
|
 |
|
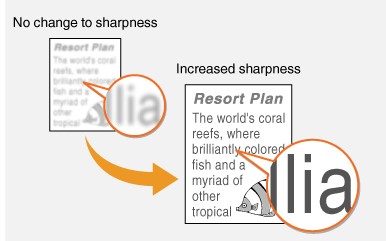
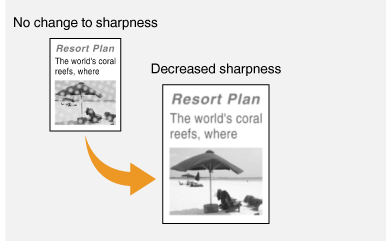
You can adjust the sharpness of the image. Increase the sharpness to sharpen blurred text and lines, or decrease the sharpness to improve the appearance of magazine photos. Adjusting Sharpness
|
<Resolution>  Select the resolution
 Select the resolution
<Density>  Adjust the density
  <Apply>
 Adjust the density
  <Apply>
<Sharpness>  Adjust the sharpness
  <Apply>
 Adjust the sharpness
  <Apply>
Example: If you want to sharpen text and lines written in pencil
Example: If you want to improve the appearance of magazine photos
Back to Top
Scanning 2-Sided Originals
 |
|
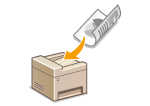
The machine can automatically scan the front and back sides of originals in the feeder.
|
 |
|
The machine cannot scan both sides of originals automatically when the originals are placed on the platen glass or when the machine is set to Manual Sending.
|
<2-Sided Original>  Select <Book Type> or <Calendar Type>
 Select <Book Type> or <Calendar Type>
<Book Type>
Select for originals whose images on the front and back sides face the same direction.
Select for originals whose images on the front and back sides face the same direction.
<Calendar Type>
Select for originals whose images on the front and back sides face in opposite directions.
Select for originals whose images on the front and back sides face in opposite directions.
Back to Top
4
Press  .
.
 .
.Scanning of the original starts.
If you want to cancel, select <Cancel>  <Yes>. Canceling Sending Faxes
 <Yes>. Canceling Sending Faxes
 When placing originals in the feeder in step 1
When scanning is complete, the faxes are sent.
 When placing originals on the platen glass in step 1
When scanning is complete, follow the procedure below.
|
1
|
Select the original size.
When there is only one page to be scanned, proceed to step 3.
|
|
2
|
Place the next original on the platen glass, and press
 . .Repeat this step until you finish scanning all of the pages.
|
|
3
|
Select <Start TX>.
The faxes are sent.
|
 |
|
If you always want to send faxes with the same settings: Changing the Default Settings for Functions
If you want to sound an alarm when the handset is off the hook: <Off-Hook Alarm>
|