Printing from a Cloud Service
Required Preparations |
User registration must be performed and authentication settings must be configured in advance. Prepare the PIN code obtained during the user registration process. |
1
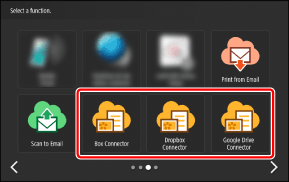
On the Home screen, press the button for the cloud service.
Select the cloud service where the document to print is saved.
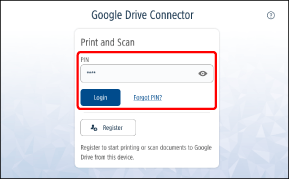
2
Enter the PIN code, and press [Login].
 |
If you forget the PIN Code, you can issue another one. For more information, see the following. |
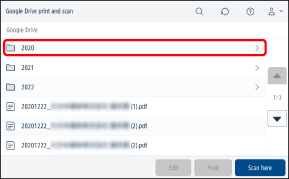
3
Select the folder of the document to print.
|
Press [  ] and enter part of the folder name or file name to perform a search. The folders below the current folder are searched. ([] is not displayed for some folders.) ] and enter part of the folder name or file name to perform a search. The folders below the current folder are searched. ([] is not displayed for some folders.) |
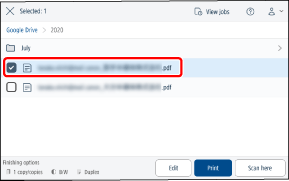
4
Select the document to print.
|
Only files that can be printed are displayed in the list. You can select multiple files. If you print a PDF file without fonts embedded, the print results may not be as intended because the fonts will be overwritten with other fonts. |
5
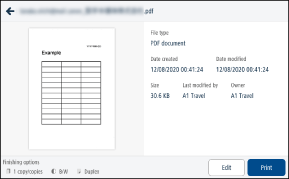
Check the print settings on the bottom left of the screen, and press [Print] to print without changing the settings.
All the selected documents are printed with the displayed settings.
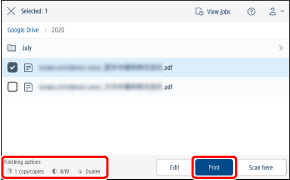
For information on changing the print settings, see the following.
6
Press [Print].
Printing starts for the jobs that have finished processing in Cloud Connector.
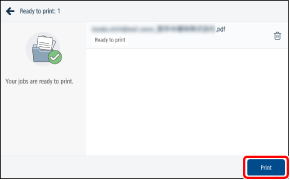
|
Press [Show details] to check the status of processing or cancel a job. An error message is displayed if processing fails. Reselect the file and execute printing again. |
7
Press [Close] or [X].
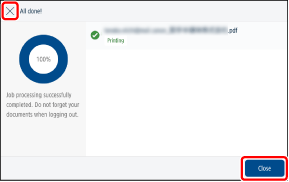
8
After printing is complete, log out to complete the operation.
 To return Cloud Connector to the initial screen
Press [ ] on the top right of the screen and select [Logout] from the menu.
] on the top right of the screen and select [Logout] from the menu.To exit Cloud Connector
Log out from the multifunction printer, or press [ ].
].
]. |
If you log out without waiting for all jobs to print, the following occurs. Printing continues for jobs that are already printing. Jobs that have finished processing in Cloud Connector but not yet started printing are retained for 10 hours. Printing can be executed when you log in again. Jobs that have not finished processing in Cloud Connector are canceled. |
Changing the Print Settings
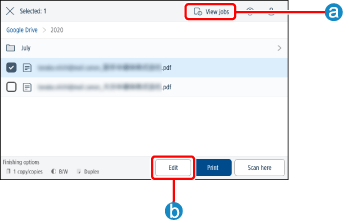
If you pressed  [View jobs]
You can check each selected job and change the settings before printing.
If you pressed  [Edit]
You can change the settings for all the selected jobs before printing.
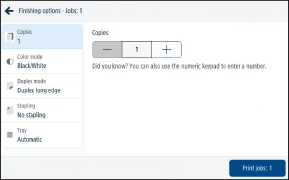
Setting
The following settings can be changed. (Some settings may not be available, depending on the model of the printer.)
Number of copies (1 to 9,999)
Color mode (color/black-and-white)
Simplex/Duplex long edge/Duplex short edge
Staple (none/corner/double/saddle stitch)
Tray (Automatic/Tray*/Stack bypass)
* Paper sources other than the multi-purpose tray are displayed as "Tray" followed by a number.
|
Jobs may be printed on a paper size that differs from that of the original data, depending on the settings. For information on changing the settings, contact your administrator. The paper tray settings may not be able to be changed, depending on the version you are using. |