Preparing to Scan Data from a Computer (Windows)
You can use the supplied "Color Network ScanGear 2" scanner driver to scan from image processing software, document creation software, or another application*1 that supports TWAIN*2 or WIA*3.
Make the following preparations for each computer to which to save scanned data.
Make the following preparations for each computer to which to save scanned data.
*1Check the manual of the application you are using to see if it supports TWAIN or WIA.
*2TWAIN is a standard for connecting a scanner or other image input device to a computer.
*3WIA is a function that comes standard in Windows.
NOTE
You can also scan without installing a scanner driver. Using Mopria® to Print and Scan
Step 1: Installing the Driver to the Computer
Install Color Network ScanGear 2 on the computer where the scanned data will be saved. Installing Software and Drivers to the Computer
Step 2: Registering the Machine with a Computer
Register the machine with the computer to which the scanned data will be saved.
1
Click [ ] (Start)
  [All apps]
  [Color Network ScanGear 2]
  [Color Network ScanGear 2 Tool].
 [All apps]
  [Color Network ScanGear 2]
  [Color Network ScanGear 2 Tool].
Color Network ScanGear 2 Tool starts, and the [Select Scanner] window is displayed.
2
Specify the machine.
When Specifying the Machine by Entering the IP Address or Host Name
Select [Specify Address], and enter the IP address or host name of the machine.
When Searching for and Specifying the Machine

1
Select [Search for Scanners on the Network].
2
In [Address Displayed in Search Result], select [IP Address] or [IP Address or Host Name], and click [Discover].
3
Select the machine in the [Search Results] list.
3
Click [OK].
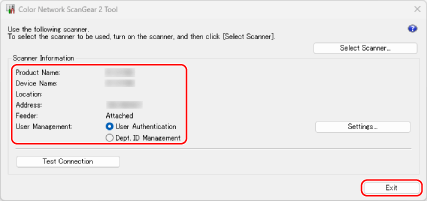
The [Color Network ScanGear 2 Tool] screen is displayed.
4
Check that the machine is selected, and then click [Exit].

When user management functions are enabled, select [User Authentication] or [Dept. ID Management], and then click [Settings] to configure the user management information. Configuring User Management Information on a Computer
You can click [Test Connection] to check the connection to the machine.