Installing the MF Drivers and MF Toolbox
|
See "Attention (MF Drivers and MF Toolbox)" in advance.
|
 |
If you are operating in the IPv6 environment, you may not install the drivers or software following the procedures below.
Refer to "Installing the MF Drivers on the WSD Network" to install MF Drivers. |
 |
You may not use the scan function in the IPv6 environment.
|
There are two ways to install the drivers. You can choose between [Easy Installation] and [Custom Installation].
Choose [Easy Installation] for quick and easy installation.
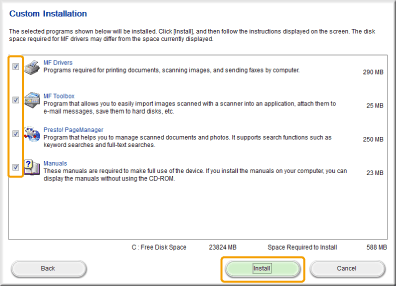
Choose [Custom Installation] to install the following application and manual.
Presto! PageManager
e-Manual
|
NOTE
|
Connecting the USB cable:Connect the USB cable after the software installation is complete.
|
Installing Using [Easy Installation]
1
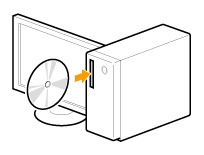
Insert the User Software CD-ROM into the slot on your computer.
2
Click [Easy Installation].
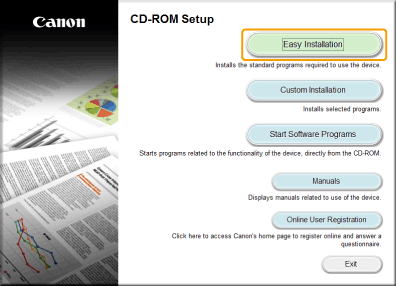
 If the above CD-ROM setup screen does not appear: If the above CD-ROM setup screen does not appear: |
 If the language selection screen is displayed before the CD-ROM setup screen appears: If the language selection screen is displayed before the CD-ROM setup screen appears:Select the language and click [Next].
|
3
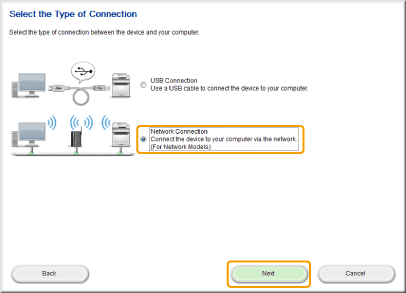
When the following screen appears, select the connection to a computer.
For USB Connection:
Select [USB Connection], and click [Next].

For Network Connection:
Select [Network Connection], and click [Next].
|
NOTE
|
Windows Server 2003/Server 2008/Server 2012:This screen is not displayed. Proceed to the following procedure.
|
4
Click [Install].
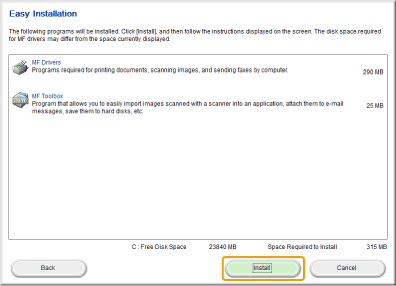
5
Read the License Agreement and click [Yes].
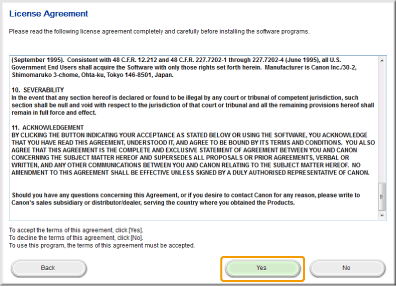
6
Click [Next].
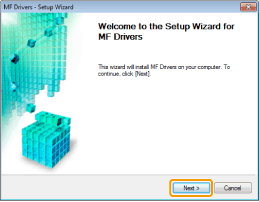
The following screen appears. Click [Yes].
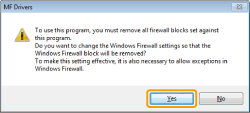
Select the device to be installed.
|
(1)
|
Select the device.
|
|
(2)
|
Click [Next].
|
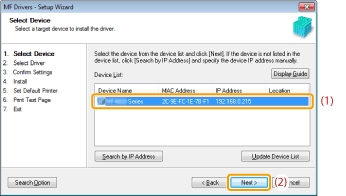
 If no devices are displayed in [Device List]: If no devices are displayed in [Device List]:Perform the following procedure.
|
||||||||
|
If any devices are not displayed by performing the above procedure, perform the following procedure.
|
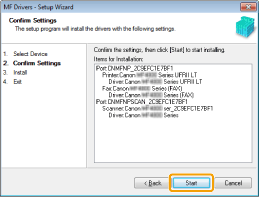
8
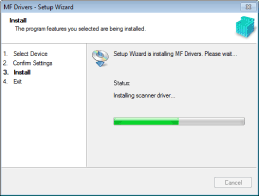
Installation starts when clicking [Starts].
 |
 |
 |
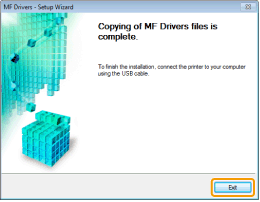
Click [Exit].
For USB Connection: |
|
For Network Connection: |
 |
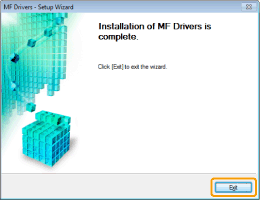 |
|
Next, installation of MF Toolbox starts.
|
10
Click [Next].
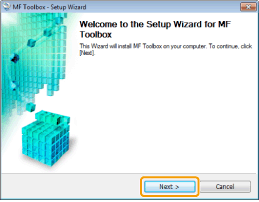
11
Click [Exit].
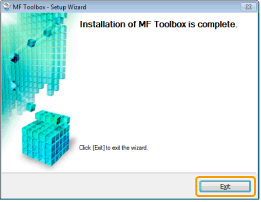
12
When the following screen appears, read the displayed information, click [Accept] or [Do Not Accept], and then click [Next].
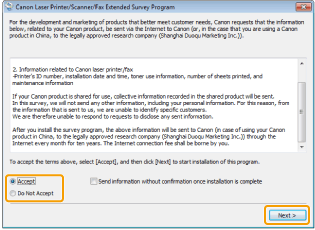
 If you select [Accept]: If you select [Accept]:The Product Extended Survey Program (the program to investigate the state of usage) will be installed.
The Product Extended Survey Program is the program to send the information related to the usage of this machine to Canon every month for ten years. Any other information including your personal information is not sent.
You can also uninstall the Product Extended Survey Program.
|
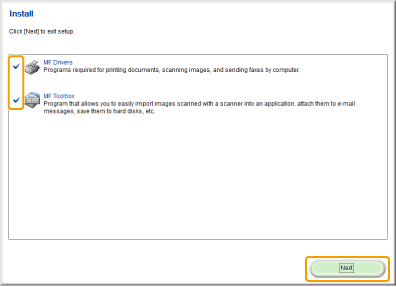
Confirm that the application is selected [ ] under [Install] and click [Next].
 ] under [Install] and click [Next].
14
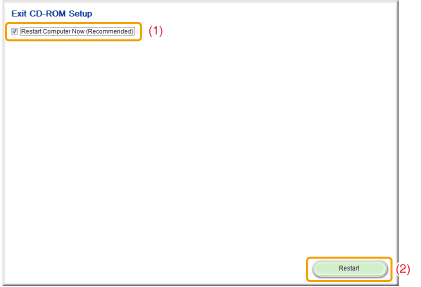
Restart your computer.
|
(1)
|
Select the [Restart Computer Now (Recommended)] check box.
|
|
(2)
|
Click [Restart].
|
 |
Remove the CD-ROM once this screen appears.
|
|
In the case of USB connection, wait until your computer is restarted.
In the case of network connection, check the installation results.
|
Installing Using [Custom Installation]
1
Insert the User Software CD-ROM into the slot on your computer.

2
Click [Custom Installation].

 If the above CD-ROM setup screen does not appear: If the above CD-ROM setup screen does not appear: |
 If the language selection screen is displayed before the CD-ROM setup screen appears: If the language selection screen is displayed before the CD-ROM setup screen appears:Select the language and click [Next].
|
3
When the following screen appears, select the connection method to a computer.
For USB Connection:
Select [USB Connection], and click [Next].

For Network Connection:
Select [Network Connection], and click [Next].

|
NOTE
|
Windows Server 2003/Server 2008/Server 2012:This screen is not displayed. Proceed to the following procedure.
|
Select the check box next to the application you want to install and click [Install].
5
Read the License Agreement and click [Yes].

6
Click [Next].

The following screen appears. Click [Yes].

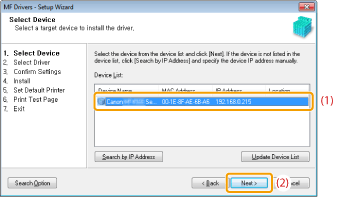
Select the device to be installed.
|
(1)
|
Select the device.
|
|
(2)
|
Click [Next].
|
 If no devices are displayed in [Device List]: If no devices are displayed in [Device List]:Perform the following procedure.
|
||||||||
|
If any devices are not displayed by performing the above procedure, perform the following procedure.
|
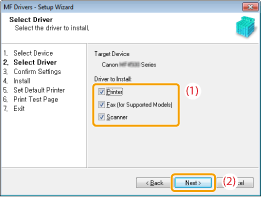
Select the function you want to use.
|
(1)
|
Select the function you want to use (driver to be installed).
|
|
(2)
|
Click [Next].
|
|
[Printer]
|
Select when using the print functions.
|
|
[Fax (for Supported Models)]
|
Select when using the PC fax function. (This function sends documents or images that were created on a computer directly as a fax transmission.)
|
|
[Scanner]
|
Select when using the scan functions.
|
9
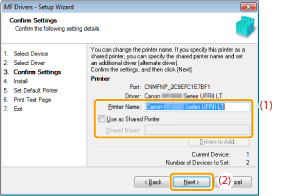
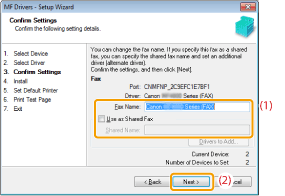
Set the printer or fax information.
|
(1)
|
Specify the settings for each option as needed.
|
|
(2)
|
Click [Next].
|
Printer information*1 |
|
Fax information*2 |
 |
 |
|
*1
|
Appears if you selected [Printer] in step 8.
|
|
*2
|
Appears if you selected [Fax (for Supported Models)] in step 8.
|
|
[Printer Name]
|
Enter a new name if you want to change the printer or fax name.
|
|
[Fax Name]
|
|
|
[Use as Shared Printer]
|
Select the check box to share the printer or fax.
|
|
[Use as Shared Fax]
|
|
|
[Shared Name]
|
Change the shared name as needed.
|
|
NOTE
|
||||||||||
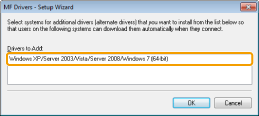
If you selected the [Use as Shared Printer] or [Use as Shared Fax] check box:Install the additional driver as follows.
|
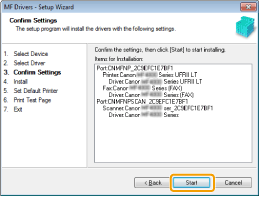
10
Installation starts when clicking [Start].
 |
 |
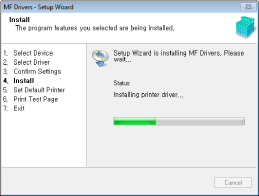 |
11
Select the device you would like to make your default printer.
|
(1)
|
Select the device you would like to make your default printer.
|
|
(2)
|
Click [Next].
|
 |
This screen appears only when installing the printer driver and fax driver.
|
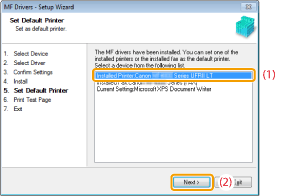
12
Select to print a test page.
|
(1)
|
Select the check box to print a test page.
|
|
(2)
|
Click [Next].
|
 |
This screen appears only when installing the printer driver and fax driver.
|
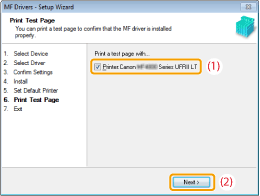
Click [Exit].
For USB Connection: |
|
For Network Connection: |
 |
 |
|
Next, installation of MF Toolbox starts.
|
14
Click [Next].
The screens for specifying a location in which the MF Toolbox is installed and position to which the start menu is added appear.
Specify the settings in the respective screens, and then click [Next]. Click [Start] in the displayed screen.

15
Click [Exit].

|
The software for which the check box was selected in step 4 is installed.
Follow the on-screen instructions. |
16
When the following screen appears, read the displayed information, click [Accept] or [Do Not Accept], and then click [Next].

 If you select [Accept]: If you select [Accept]:The Product Extended Survey Program (the program to investigate the state of usage) will be installed.
The Product Extended Survey Program is the program to send the information related to the usage of this machine to Canon every month for ten years. Any other information including your personal information is not sent.
You can also uninstall the Product Extended Survey Program.
|
Confirm that the applications are selected [ ] under [Install] and click [Next].
 ] under [Install] and click [Next].
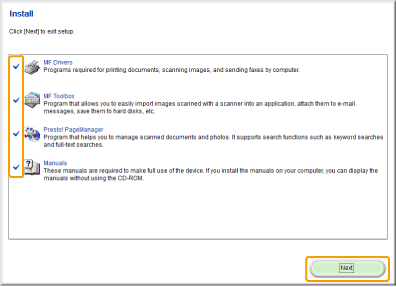
18
Restart your computer.
|
(1)
|
Select the [Restart Computer Now (Recommended)] check box.
|
|
(2)
|
Click [Restart].
|
 |
Remove the CD-ROM once this screen appears.
|

|
In the case of USB connection, wait until your computer is restarted.
In the case of network connection, check the installation results.
|
USB Cable Connection (Only when connecting with USB)
1
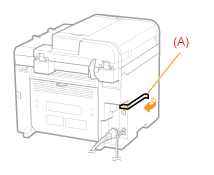
Remove the seal (A) on the USB port of the machine.
2
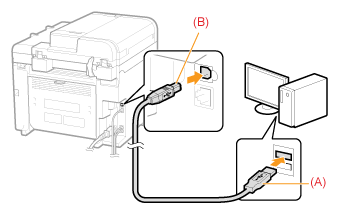
Connect the USB cable.
|
Flat end (A):
|
Connect (A) to the USB port on the computer.
|
|
Square end (B):
|
Connect (B) to the USB port on the machine.
|
 If a dialog box is displayed: If a dialog box is displayed:Follow the onscreen instructions and complete installation.
|
|
When installation is complete, check the installation results.
|
Checking the Installation Results
Check if the MF drivers, MF Toolbox, and e-Manual are installed correctly.
Check if the following icons are displayed for the installed applications.
Check if the following icons are displayed for the installed applications.
|
NOTE
|
About Icons That Are Displayed:Icons for each driver may be displayed separately or only representative icon may be displayed depending on the operating system.
|
|
Software
|
Location
|
Icon
|
|
Printer driver
|
[Devices and Printers] folder
|
 |
|
Fax driver
|
[Devices and Printers] folder
|
 |
|
Scanner driver
|
[Scanners and Cameras] or
[Scanners and Cameras Properties] folder |
For network connection |
For USB connection |
||
|
MF Toolbox
|
Desktop
|
 |
|
Network Scan Utility
|
Taskbar
|
 |
|
e-Manual
|
Desktop
|
 |


