 If a screen appears through the Plug and Play automatic setup (USB connection)
Easy Installation
1
Turn the computer on, and then log on to Windows as a user with administrative rights.
|
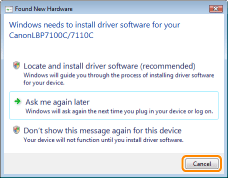
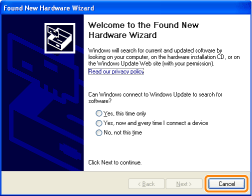
If a screen appears through the Plug and Play automatic setup (USB connection) Click [Cancel], turn OFF the printer, and then use this procedure to install the printer driver.
  |
2
Insert the supplied CD-ROM "User Software" into the CD-ROM drive of your computer.

3
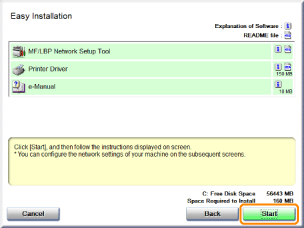
Click [Easy Installation].

|
If the above screen does not appear If the [AutoPlay] dialog box appears Click [Run AUTORUN.EXE].
If the [User Account Control] dialog box appearsClick [Yes] or [Continue].
|
4
Click [Start].
5
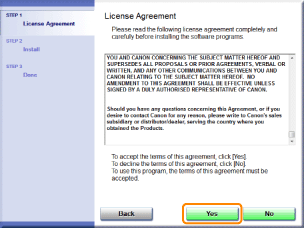
Read the contents of License Agreement, and then click [Yes].
6
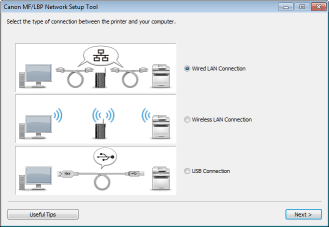
Specify the printer connection settings as needed.
|
Before specifying the settings, see "Connecting the Printer and Computer."
|
The setting procedure varies depending on your environment. Follow the instructions on the screen to specify the settings.
|
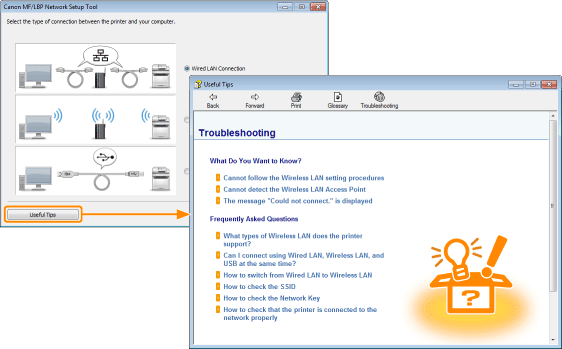
If you have a problem during the connection settings Click [Useful Tips] at the bottom left of the screen and see the help contents.
 |
7
Install the printer driver after specifying the printer connection settings.
|
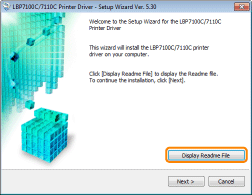
1.
|
Click [Display Readme File].
 |
|
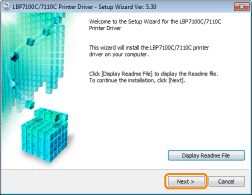
2.
|
Read the contents of the Readme file and then close the file.
It contains important information and special information not found in the e-Manual.
|
|
3.
|
Click [Next].
 |
|
4.
|
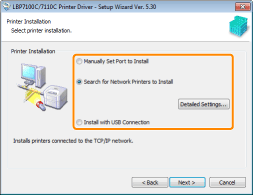
Select the method of installation.
|
||
|
|
 |
|
When connecting with USBSelect [Install with USB Connection].
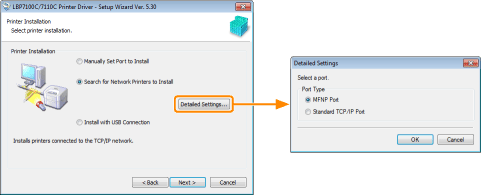
When connecting to a networkSelect [Search for Network Printers to Install].
When connecting via the print server (client)Select [Manually Set Port to Install].
|
|
|
|
|
5.
|
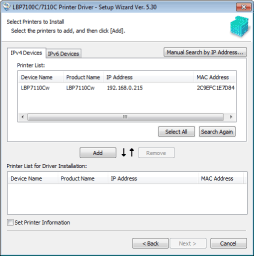
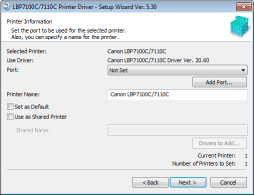
The installation procedure varies depending on the installation method. Follow the instructions on the screen to install the printer driver.
|
|
|
|
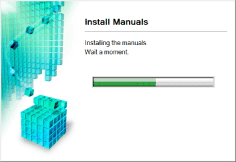
8
After the printer driver is installed, installation of the e-Manual starts.
Please wait a moment until the installation is complete. (It may take a long time to install the e-Manual.)
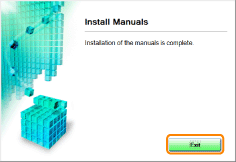
9
Click [Exit].
10
Confirm that [  ] appears in [Install], and then click [Next].
] appears in [Install], and then click [Next].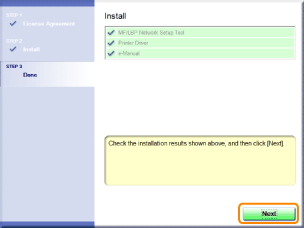
If [  ] appears ] appears |
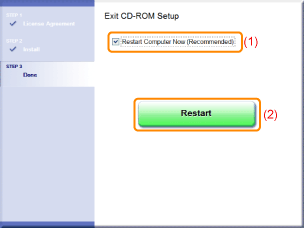
11
Restart your computer.
|
(1)
|
Select the [Restart Computer Now] check box.
|
|
(2)
|
Click [Restart].
|
 |
When the following screen appears, you can remove the CD-ROM.
|
|
When the installation is complete, an icon and folder for this printer will be created.
 "After Installation" "After Installation"
|