Specifying from Address Book
 |
|
The Address Book enables you to specify a destination by selecting from a list of registered destinations or by searching by name for destinations with recipient names.
|
 |
|
You need to register destinations in the Address Book before using this feature.
|
1
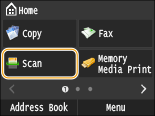
Press  and tap <Scan>.
 and tap <Scan>.
When the logon screen appears, use the numeric keys to enter the user name and password. Then select the authentication server and press  . Logging on to Authorized Send
 . Logging on to Authorized Send
2
Select <E-Mail>, <I-Fax>, or <File>.
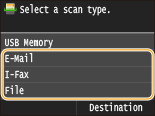
If you select <File>, proceed to step 4.
3
Tap <Destination>  <Specify from Address Book>.
 <Specify from Address Book>.
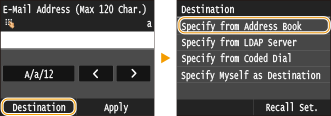
If the <Type> screen appears, select <To>, <Cc>, or <Bcc> as a destination type.
4
Select a tab using  /
/  .
.
 /
/  .
.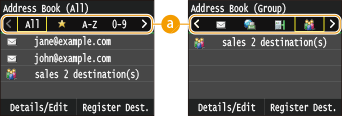
 <All>
<All>Displays all the destinations registered in the Address Book. For the marks beside the destinations, see the explanations below.
< >
>
 >
>Displays a list of destinations registered in Favorites.
<A-Z>/<0-9>/<ABC> to <YZ>
Displays destinations with recipient names whose first characters correspond to the characters of the selected tab.
< >
>
 >
>Displays destinations for faxes. To specify destinations using this tab, see Specifying from Address Book (Fax).
< >
>
 >
>Displays destinations for e-mails.
< >
>
 >
>Displays destinations for I-Faxes.
< >
>
 >
>Displays destinations for shared folders/FTP Server.
< >
>
 >
>Displays a list of destinations registered in Group Dial. This feature is not available when scanning documents to shared folders/FTP Server.
5
Select a destination.
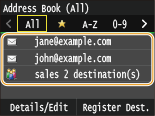

If you want to specify multiple destinations (e-mail/I-Fax)
Repeat steps 3 to 5. Up to 100 destinations can be specified.
 To delete destinations (e-mail/I-Fax)
If you specified multiple destinations, you can delete destinations as necessary.
|
1
|
Tap <Destination>
 <Confirm/Edit>. <Confirm/Edit>.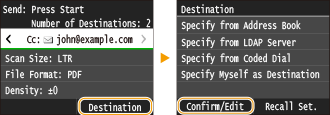 |
|
2
|
Select a destination you want to delete.
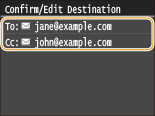 |
|
3
|
Tap <Remove>.
If you specified destinations in Group Dial in step 2, <Number of Destinations> is displayed on the screen. Selecting this item displays detailed destinations in Group Dial.
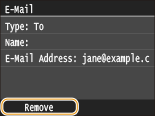 |
|
4
|
Tap <Yes>.
|
 |
If you want to easily and quickly delete destinations without displaying a list of destinationsBefore selecting <Confirm/Edit> in step 1, you can tap
 / / to toggle the destinations you specified. Display a destination you want to delete, and press to toggle the destinations you specified. Display a destination you want to delete, and press  . . |