Checking/Editing/Deleting the Information for a Destination
You can check, edit, or delete a specified destination before you scan your documents.
|
NOTE
|
|
You can only change destinations specified using the New Address and destinations obtained via an LDAP server.
|
Checking/Changing a Destination
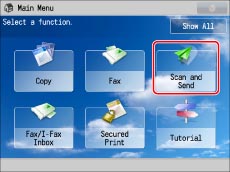
1.
Press [Scan and Send] → specify the destination.

2.
Select the destination → press [Details].
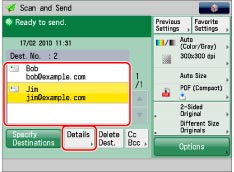
3.
Check or change the information for the destination as necessary.
If the destination has been specified from the Local Address Book or Remote Address Book:
Check the information for the destination → press [OK].
If the destination has been specified from the Address Book (LDAP Server):
Check or change the information for the destination as necessary → press [OK].
The procedure to change the information is the same as when specifying a new destination. (See "Specifying Destinations Using the Address Book (LDAP Server).")
If you entered a new destination:
Check or change the information for the destination as necessary → press [OK].
The procedure to change the information is the same as when creating a new destination. (See "Specifying a Destination by Entering an E-mail Address," "Specifying Destinations by Entering an I-Fax Address," and "Specifying a Destination by Entering a File Server.")
If the destination is a group address:
Select the destination → press [Details].
Check the information for the destination → press [OK] → [OK].
Deleting a Destination
1.
Press [Scan and Send] → specify the destination.
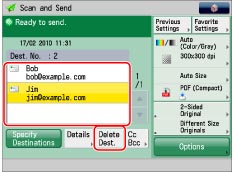
2.
Select the destination to be deleted → press [Delete Dest.].
|
NOTE
|
|
You can only change the destinations for jobs that have already finished scanning from the Status Monitor/Cancel screen. (See "Checking and Cancelling Send Jobs.")
|