Loading Paper in the Paper Drawer
NOTE |
When loading custom size paperThe procedure for loading custom size paper is different from that for loading standard size paper. See "Loading Custom Size Paper." |
Loading Standard Size Paper
 | For details on the paper that you can load in the paper drawer, see "Usable Paper." |
 | Load paper in Drawer 2, 3, 4 (optional) in the same manner as you load paper in Drawer 1. |
Before loading paper, see "Attention (Paper Drawer)." |
1
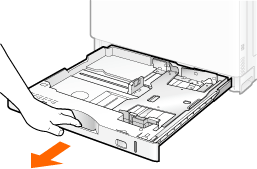
Pull out the paper drawer until it stops.
2
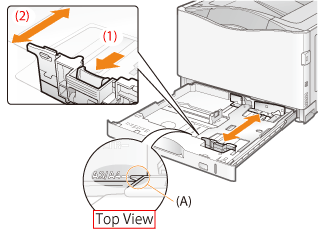
Slide the paper guides to the position of the size of the paper to be loaded.
Slide the side paper guides.
(1) | Hold the lock release lever. |
(2) | Slide the paper guides to the position of the size of the paper to be loaded. |
 | Align the position of (A) with the size mark of the paper to be loaded. |
 | The side paper guides move together. |
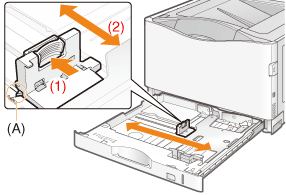
Slide the rear paper guide.
(1) | Hold the lock release lever. |
(2) | Slide the paper guide to the position of the size of the paper to be loaded. |
 | Align the position of (A) with the size mark of the paper to be loaded. |
3
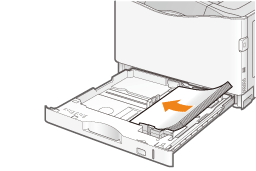
Load the paper with the printing side face-up, and the paper stack aligned with the rear paper guide.
NOTE |
When loading paper with a letterhead or logoSee "Paper Loading Orientation" and load the paper in the correct orientation. |
4
Hold down the paper, and then set it under the hooks (A) on the paper guides.
Make sure that the paper stack does not exceed the load limit mark lines (B).
 | Be sure that the paper stack does not exceed the load limit mark lines. If the paper stack exceeds the load limit mark lines, this may result in paper being misfed. |

IMPORTANT |
Be sure to align the paper guides to the paper.If the paper guides are too loose or too tight, this may result in paper being misfed or paper jams. 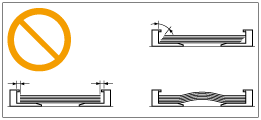 |
5
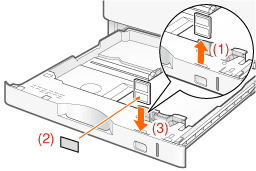
Insert the paper size indicator.
(1) | Take out the paper size indicator. |
(2) | Attach a paper size label. |
(3) | Insert the paper size indicator. |
6
Set the paper drawer in the printer.
For details on basic printing procedure, see "Configuring the Printer Driver and Printing".
|
