Saving PDF Documents with Desktop Editor
You can save a document edited with Desktop Editor as a PDF document (*.pdf).
|
NOTE
|
|
The PDF version of the saved document is 1.6.
|
Saving by Overwriting
This section describes how to overwrite a PDF document.
|
NOTE
|
|
For information on how to overwrite a PDF document in Therefore, see the following.
Saving Documents to Therefore from Desktop Editor (Administrator Guide)
|
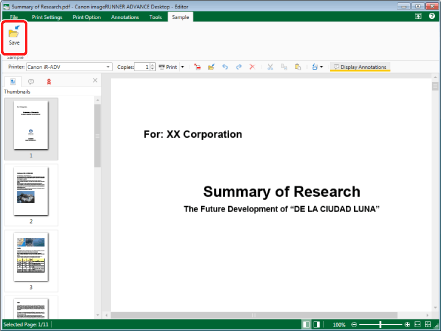
1.
Click [Save] on the ribbon.
Or, select [File] menu > [Save].
The PDF document is overwritten.
|
NOTE
|
|
If you switch to the [Print Settings] tab or [Print Option] tab on the ribbon, a confirmation message is displayed when overwriting. To overwrite the PDF document, click [Yes].
If commands are not displayed on the ribbon of Desktop Editor, see the following to display them.
The same operation can also be performed with the tool buttons. If tool buttons are not displayed on the toolbar of Desktop Editor, see the following to display them.
When saving an item in a library for which [Require Check Out] is enabled, perform check in as necessary.
If the following dialog box is displayed after saving, select the appropriate update process and then click [OK].
[Checked Out Document Confirmation]
[Modify Shared Document]
If you have not selected the [Check in automatically after exiting the application that is editing documents] check box, you need to manually check in and check out documents.
[File] menu > [Option] > [System Settings] > [Browser] > [Shared Document Management] > [Check in automatically after exiting the application that is editing documents]
|
Saving with a Name
This section describes how to save a document as a PDF document with a name.
|
NOTE
|
|
When saving in the PDF format, the following information set in Desktop Editor is not saved.
Print Settings
Header/footer settings
Watermark Settings
Original documents
Chapter names and structure
When saving in the PDF format, the following settings cannot be specified.
Making the document format conform to the PDF/A format
Enabling the OCR function
Export the document in the PDF format to specify the above settings. For more information, see the following.
|
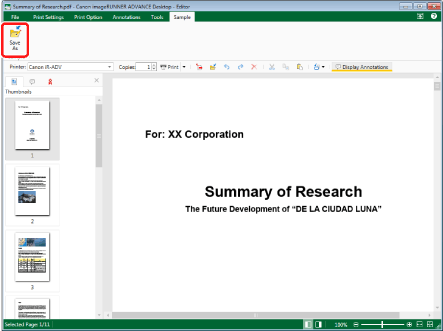
1.
Click [Save As] on the ribbon.
Or, select [File] menu > [Save As], and select one of the following.
[Save in Library]
[Save in Windows Folder]
[Save in Therefore]
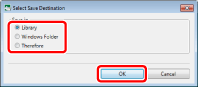
If [Select Save Destination] is displayed, proceed to step 2.
If [Save As] is displayed, proceed to step 3.
|
NOTE
|
|
If commands are not displayed on the ribbon of Desktop Editor, see the following to display them.
The same operation can also be performed with the tool buttons. If tool buttons are not displayed on the toolbar of Desktop Editor, see the following to display them.
[Select Save Destination] is displayed if two or more of the following check boxes are selected in [Destination Displayed in Save Destination Dialog when Saving/Exporting] in [System Settings].
[Library]
[Windows Folder]
[Therefore]
[Save As] is displayed if only one of the check box is selected.
[File] menu > [Option] > [System Settings] > [Editor] > [Options] > [Destination Displayed in Save Destination Dialog when Saving/Exporting]
For more information on the operations when you select the [File] menu > [Save As] > [Save in Therefore], see the following.
Saving Documents to Therefore from Desktop Editor (Administrator Guide)
|
2.
Select the save destination, and click [OK].
[Save As] is displayed.
|
NOTE
|
|
For more information on the operations when [Therefore] is selected, see the following.
Saving Documents to Therefore from Desktop Editor (Administrator Guide)
|
3.
Select a library or Windows Folder in which to save the document.
4.
Specify [Document Name] or [File name].
5.
Select [PDF File (*.pdf)] in [Document Type] or [Files of type].
6.
If you want to save in the PDF format with advanced settings specified, click [Detailed Settings].
[Detailed Settings for PDF Document] is displayed.
7.
Specify the detailed settings for the PDF document.
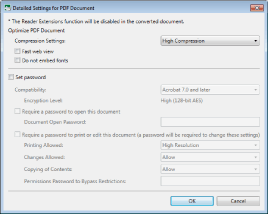
|
[Compression Settings]
|
Set the compression level of the PDF document.
|
|
[Fast web view]
|
Select this check box to optimize the PDF document for display on the Web.
Converting a PDF document with this check box selected enables the document to be downloaded page by page (with byte-serving) when the PDF has been uploaded to the Web.
|
|
[Do not embed fonts]
|
Select this check box to convert without using embedded fonts when creating the PDF document.
Converting to a PDF document without using embedded fonts enables the size of the PDF document to be reduced.
|
|
[Set password]
|
If you want to restrict PDF access, printing, and editing for security reasons, select this check box.
|
|
[Compatibility]
|
Select security compatibility settings for the PDF document.
|
|
[Require a password to open this document]
|
Select this check box to set a password for opening the document.
|
|
[Document Open Password]
|
Enter the password for the PDF document.
|
|
[Require a password to print or edit this document (a password will be required to change these settings)]
|
Select this check box to restrict printing, editing, and copying of the PDF document.
|
|
[Printing Allowed]
|
Set print permission for the PDF document.
|
|
[Changes Allowed]
|
Set edit permission of the PDF document.
|
|
[Copying of Contents]
|
Set copy permission for the contents of the PDF document.
|
|
[Permissions Password to Bypass Restrictions]
|
Enter the password to release print and editing restrictions in the document.
|
|
IMPORTANT
|
|
If you create a PDF document with the [Do not embed fonts] check box selected, the content displayed in the document may change. To prevent changes, install the fonts used in the PDF document to the computer that will display the document. If the content displayed in the PDF document still changes, save the document in the PDF format again with the [Do not embed fonts] check box deselected.
|
8.
Click [OK].
If you set a password for opening the document, [Confirm Document Open Password] is displayed. In this case, proceed to step 9.
If you set restrictions on printing and editing the document, [Confirm Permissions Password] is displayed. In this case, proceed to step 10.
If a password is not set, [Save As] is displayed again. In this case, proceed to step 11.
|
NOTE
|
|
[Confirm Document Open Password] is displayed when the [Require a password to open this document] check box is selected.
[Confirm Permissions Password] is displayed when the [Require a password to print or edit this document (a password will be required to change these settings)] check box is selected.
|
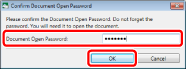
9.
Enter the password in [Document Open Password] and click [OK].
If you set restrictions on printing and editing the document, [Confirm Permissions Password] is displayed. In this case, proceed to step 10.
If restrictions on printing and editing the document are not set, [Save As] is displayed again. In this case, proceed to step 11.
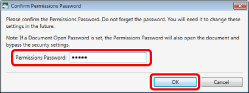
10.
Enter the password in [Permissions Password] and click [OK].
[Save As] is displayed again.
11.
Click [Save].
If a confirmation message is displayed, proceed to step 12.
[Specify Index Data] is displayed when a Therefore Library is specified as the save destination. Proceed to step 13.
12.
Click [Yes].
The document is saved as a PDF document with the specified document name.
|
NOTE
|
|
If the following dialog box is displayed after saving, select the appropriate update process and then click [OK].
[Checked Out Document Confirmation]
[Modify Shared Document]
If the [Check in automatically after exiting the application that is editing documents] check box in [System Settings] is deselected, you need to perform check in/check out manually.
[File] menu > [Option] > [System Settings] > [Browser] > [Shared Document Management] > [Check in automatically after exiting the application that is editing documents]
|
13.
Specify the value of the index data, and click [OK].
If a confirmation message is displayed, proceed to step 14.
14.
Click [Yes].
The document is saved as a PDF document with the specified document name.