Copying Part of the Original (Area Designation)

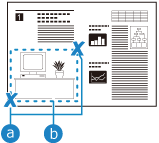
You can extract and copy part of an original, in a similar way to cropping a photo or cutting out a newspaper article. Since you specify the area to be copied while checking the preview screen, you do not need to crop the original.
You can also specify multiple areas and copy the part outside the specified areas.
You can also specify multiple areas and copy the part outside the specified areas.
* For the basic copy operations, see the following:
1
Place the original on the platen glass. Placing Originals
To specify an area, place the original on the platen glass. You cannot specify an area for an original placed in the feeder.
2
On the copy screen, press [Options]  [Area Designation]. Copy Screen
 [Area Designation]. Copy Screen
The [Area Designation] screen is displayed.
Press [Touch Entry].
The [Area Designation: Touch Entry] screen is displayed.
4
Press [Start Scanning].
The original is scanned, and a preview image is displayed.
Specify the area on the preview image.
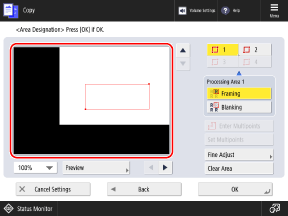
* The items that appear on the screen vary depending on the model and options.
Press two points ( ) to display a rectangle (
 ) with those points in diagonally opposite corners. Specify the area so that the part to be copied or the part to be excluded fits within the rectangle.
 ) to display a rectangle (
 ) with those points in diagonally opposite corners. Specify the area so that the part to be copied or the part to be excluded fits within the rectangle.
To cancel a specified point while specifying the area, press [Delete Point]. To cancel a specified area, press [Clear Area].
If the specified area to be copied is too small, the machine may not recognize the color information of the original correctly and may copy in black and white.
If the Area Is Difficult to Specify

Press [100%], and change the display magnification of the preview image to [200%] or [400%].
Press [ ], [
], [ ], [
], [ ], or [
 ] to move the display position of the preview image.
 ], [
], [ ], [
], [ ], or [
 ] to move the display position of the preview image.
You can press [Fine Adjust] to fine adjust the area. Use [Select Point] to select any of the four corner points, and then use [Move Point] to move the position of the point a little at a time.
When Specifying Multiple Areas

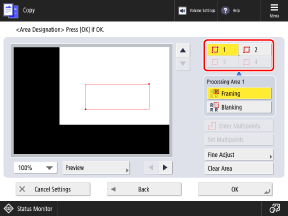
When the buttons for specifying multiple areas are displayed, you can specify up to four areas.
After you specify the first area, press [ ], [
], [ ], and [
 ] in that order to specify the remaining areas.
After you specify the first area, press [
 ], [
], [ ], and [
 ] in that order to specify the remaining areas.
Select the processing method for the specified area(s), and press [Preview].
A preview screen of the processed result is displayed.
[Framing]
The part inside the specified area is copied.
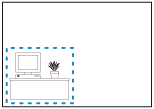
[Blanking]
The part outside the specified area is copied.
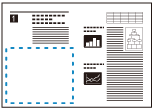
* When multiple areas are specified, you can select the processing method for each area. If there are overlapping areas and the processing methods for those areas are different, the processing method for the area specified later has priority.
7
Check that the area is specified correctly, and press [OK].
The [Area Designation: Touch Entry] screen is displayed again.
To respecify the area, press [Clear Area] on the [Area Designation: Touch Entry] screen, and repeat the operation from Step 5.
8
Press [Next], and select whether to center the specified area.
[Center Shift]
Moves the specified area to the center of the paper when copying.
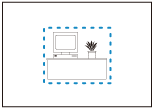
[Do Not Center Shift]
Keeps the same position as the original when copying.

Press [OK]  [Close].
 [Close].
The copy screen is displayed again.
10
Press [ Start].
 Start].
The part inside or outside the specified area is copied.
NOTE
Specifying an Area with a Complex Shape
You can also specify an area with a complex shape, as shown below. In Step 5, press [Enter Multipoints], and press 4 to 10 points on the preview image to specify the area. After you press the final point, press [Set Multipoints] to set the area.
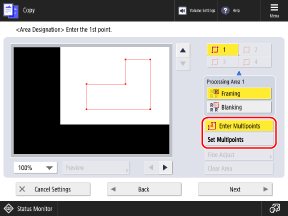
* You cannot specify multiple areas when using this method to specify an area.
* If [Enter Multipoints] is not displayed on the screen in Step 5, you cannot specify an area using this method.
Specifying an Area Using Numerical Values
You can also enter numerical values to specify an exact area. In Step 3, press [Numeric Key Entry], and specify the area by using the numeric keys to enter the values for [X1] to [Y2] with the top right of the original as the reference point.
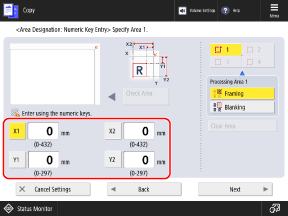
* The items that appear on the screen vary depending on the model and options.
Copying the Specified Area Repeatedly onto One Page
When you set [Repeat Images] to copy the same original repeatedly onto one page, and select [Framing] to extract part of the original, you can copy the specified area repeatedly onto the same page. Copying the Original Repeatedly onto One Page (Repeat Images)