Settings According to the Original

Configure the settings to efficiently scan according to the original.
You can also prevent scanning of blank pages.
You can also prevent scanning of blank pages.
Dividing an Original That Spreads Open into Two Pages
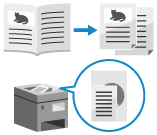
When scanning an original that spreads open, such as a book or magazine, you can configure the settings to scan the left and right pages as separate pages.
Placing an Original That Spreads Open

To scan an original that spreads open, place the original on the platen glass. Place the original on the platen glass while aligning the top of the original with the top left corner and top of the platen glass.

1
[W/Settings] is displayed at the bottom of the setting button.
2
Press [Close].
The scan screen is displayed again.
Scanning Originals of Different Sizes (Different Size Originals)
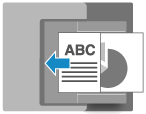
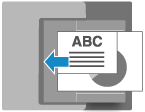
When scanning originals of different sizes, configure the settings to scan them after placing them together in the feeder.
This eliminates the need to place the originals for each size.
This eliminates the need to place the originals for each size.
Placing Originals of Different Sizes

When you place originals with the same vertical width, line up the sides that have the same vertical width. 


When you place originals with different vertical widths, line up the top left corners as seen from your viewpoint. 


Precautions when placing originals of different sizes
There are restrictions to the combinations of original sizes that can be placed together. 2-Sided Single Pass Feeder Specifications
Placing an inappropriate combination of original sizes can result in damage to the originals or a paper jam.
Placing an inappropriate combination of original sizes can result in damage to the originals or a paper jam.
Do not place originals of different paper thicknesses or paper quality together. This can result in a paper jam.
If you place originals of different vertical widths in the feeder, the originals with a smaller vertical width will not be secured by the slide guides and may be scanned at an angle. 


1
On the scan screen, press [Options]  [Different Size Originals]. Scan Screen
 [Different Size Originals]. Scan Screen
2
On the [Different Size Originals] screen, select whether the placed originals have the same vertical width.
If the [Different Size Originals] screen is not displayed, you can skip this step. Press [Close] to return to the fax screen. The steps thereafter are not required.
3
Press [OK]  [Close].
 [Close].
The scan screen is displayed again.
Scanning Large Numbers of Originals (Job Build)
When there are too many originals to place in the feeder at once, configure the settings so that the originals scanned in multiple batches can be sent or saved together.
You can send or save originals scanned using the feeder and originals scanned using the platen glass together.
You can send or save originals scanned using the feeder and originals scanned using the platen glass together.
1
On the scan screen, press [Options]  [Job Build]. Scan Screen
 [Job Build]. Scan Screen
[W/Settings] is displayed at the bottom of the setting button.
2
Press [Close].
The scan screen is displayed again.
NOTE
When placing multiple originals of various sizes in the feeder, you need to configure the settings for different size originals. Scanning Originals of Different Sizes (Different Size Originals)
Preventing Scanning of Blank Pages (Skip Blank Originals)
Automatically deletes (skips) pages that have been determined to be blank when scanning.
For example, when both 1-sided and 2-sided originals are placed in the feeder for 2-sided scanning, the back side (blank page) of a 1-sided original is also scanned. In this case, when the settings are configured to skip blank pages, pages determined to be blank while scanning are skipped automatically, eliminating the need to delete blank pages after scanning.
For example, when both 1-sided and 2-sided originals are placed in the feeder for 2-sided scanning, the back side (blank page) of a 1-sided original is also scanned. In this case, when the settings are configured to skip blank pages, pages determined to be blank while scanning are skipped automatically, eliminating the need to delete blank pages after scanning.
* Blank originals cannot be skipped when sending scanned data to the following destinations:
Fax
I-Fax
Mail Box
1
On the scan screen, press [Options]  [Skip Blank Originals]. Scan Screen
 [Skip Blank Originals]. Scan Screen
The [Skip Blank Originals] screen is displayed.
2
Select the color of paper to skip.
[All Colors]
You can skip all blank pages of an original regardless of the paper color.
[White Only]
Skips only blank pages on white paper.
* If you select a setting other than [Auto (Color/Gray)] or [Auto (Color/Black & White)] as the color when scanning, the machine operates according to the [All Colors] setting even when [White Only] is set. Selecting a Color
When Checking Scanned Data before Sending or Saving
Press [Preview] to select the checkbox.
You can display a preview screen to check the contents before sending or saving scanned data. Operating the Preview Screen
You can display a preview screen to check the contents before sending or saving scanned data. Operating the Preview Screen
* You cannot configure this setting when saving scanned data to Mail Box.
3
Adjust the accuracy for detecting blank pages, as needed.

1
Press [Adjust Recog. Level].
The [Adjust Recog. Level] screen is displayed.
2
Move the slider to the left or right to adjust the accuracy.
Selecting [+] increases the sensitivity level for detecting blank pages.
3
Press [OK].
The [Skip Blank Originals] screen is displayed again.
4
Press [OK]  [Close].
 [Close].
The scan screen is displayed again.
IMPORTANT
If the size of the original is set to a size larger than the actual original, blank pages may not be skipped correctly.
NOTE
If all pages of the scanned original are determined to be blank, scanning is canceled.
 2 Pages].