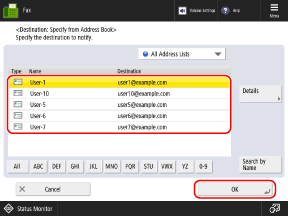
Press [Specify from Address Book] to display the Address Book screen.
On the Address Book screen, select the destination (e-mail address) to be set as the notice destination, and press [OK].
TX Result Notice Settings

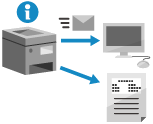
You can configure the settings to send the TX result by e-mail and print a TX report.
Sending the TX Result by E-mail
Configure the settings to send the TX result by e-mail when sending is complete.
Even if you are away from the machine when data is waiting to be sent, you can check the TX result from a computer or mobile device. You can also configure the settings to send the notice only when an error occurs.
You can set a destination registered in the Address Book (excluding destinations in a personal address list or user group address list) or an e-mail address of a login user as the notice destination.
Required Preparations
Register the e-mail address to be set as the notice destination in the Address Book of the machine or in the user information.
1
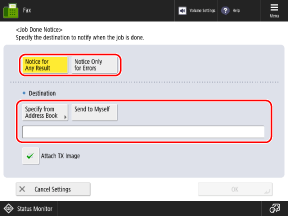
On the fax screen, press [Options]  [Job Done Notice]. Fax Screen
 [Job Done Notice]. Fax Screen
The [Job Done Notice] screen is displayed.
2
Set the notice condition and notice destination.

To attach the first page of the sent original as a PDF file to the e-mail notice, select the [Attach TX Image] checkbox.
When Selecting a Destination from the Address Book


You can filter the destinations displayed in the list by selecting the index at the bottom of the screen, [Search by Name], or an address list in the address list pulldown menu. Address Book Screen
To display destinations with a set access number, press [Access No.] and enter the access number.
3
Press [OK]  [Close].
 [Close].
The fax screen is displayed again.
Printing a TX Report
By default, a TX report is printed automatically when an error occurs.
You can configure the settings to print a TX report when sending is complete, regardless of the TX result.
You can configure the settings to print a TX report when sending is complete, regardless of the TX result.
* Depending on the machine settings, you may not be able to configure a TX report from the fax screen. [TX Report]
1
On the fax screen, press [Options]  [TX Report]. Fax Screen
 [TX Report]. Fax Screen
[W/Settings] is displayed at the bottom of the setting button.
2
Press [Close].
The fax screen is displayed again.