Printing Results Are Not Satisfactory
Dirt inside the machine may affect printing results. Perform care and cleaning to the machine first. Cleaning the Machine
Smudge Marks Appear on the Bottom Edge of Printouts

 Do you print data without margins?
This symptom occurs if a margin is set to none in the printer driver. A margin of 5 mm or less around the edge of paper or 10 mm or less around the edge of envelopes is not printable with the machine. Make sure to have margins around the document to print.
Setting in the Printer Driver
[Finishing] tab  [Advanced Settings]
  [Expand Print Region and Print]
  [Off]
[Off]
 [Advanced Settings]
  [Expand Print Region and Print]
  [Off]
[Off]
This procedure is common to the UFR II printer driver and the PCL printer driver. For the PS printer driver, see Help.
Streaks Appear on Printouts

 Are you using appropriate paper?
Check usable paper, and replace with appropriate paper.
Paper
Paper
Change the [Special Print Adjustment A] setting. The improvement effect becomes greater as the mode number becomes larger. Try in order from [Mode 1].
Setting in the Printer Driver
[Finishing] tab  [Advanced Settings]
  [Special Print Adjustment A]
  Select the mode
 [Advanced Settings]
  [Special Print Adjustment A]
  Select the mode
Specifying Settings in the Setting Menu of the Operation Panel

As the improvement effect is increased, the print density becomes lighter. In addition, the edges may be blurred or roughness may be slightly emphasized.
If you have changed the printer driver settings, the improvement effect will be achieved only when printing from the printer driver. To achieve the improvement effect in all print jobs, change the settings from the operation panel.
The problem may be solved if you change the paper type or environmental conditions.
 Are printouts smudged when you print soon after the toner cartridge is replaced or when you print for the first time in a long time?
Change the [Special Print Adjustment B] setting. The improvement effect becomes greater as the mode number becomes larger. Try in order from [Mode 1].
Setting in the Printer Driver
[Finishing] tab  [Advanced Settings]
  [Special Print Adjustment B]
  Select the mode
 [Advanced Settings]
  [Special Print Adjustment B]
  Select the mode
As the improvement effect is increased, the print speed will be slower.
Toner Smudges and Splatters Appear
Afterimages Appear on the Blank Area
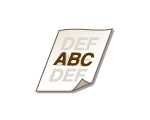
 Are you using appropriate paper?
Check usable paper, and replace with appropriate paper.
Paper
Paper
 Has the toner cartridge reached its life expectancy?
The inside of the toner cartridge may be degraded. Replace the toner cartridge.
Replacing the Toner Cartridge
Replacing the Toner Cartridge
Printouts Are Faded

 Is toner running low?
Check how much toner is left, and replace the toner cartridge as necessary.
Replacing the Toner Cartridge
Replacing the Toner Cartridge
 Are you using appropriate paper?
Check usable paper, and replace with appropriate paper.
Paper
Paper
 Is the correct paper type specified?
Specify the correct paper type for the paper to print on.
Printing a Document
Printing a Document
A Portion of the Page Is Not Printed/Print Position Is Incorrect
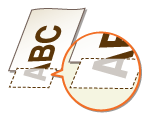
 Do you print data without margins?
This symptom can occur if a margin is set to none. A margin of 5 mm or less around the edge of paper or 10 mm or less around the edge of envelopes is not printable with the machine. Make sure to have margins around the document to print.
Setting in the Printer Driver
[Finishing] tab  [Advanced Settings]
  [Expand Print Region and Print]
  [Off]
[Off]
 [Advanced Settings]
  [Expand Print Region and Print]
  [Off]
[Off]
This procedure is common to the UFR II printer driver and the PCL printer driver. For the PS printer driver, see Help.
 Is the correct print position specified?
Adjust the print position settings to have appropriate values.
Offset Y/Offset X
Adjusting the Print Position
Offset Y/Offset X
Adjusting the Print Position
 Are you using custom size paper loaded in correct orientation?
Load the custom size paper in portrait orientation when you print without using the UFR II printer driver.
Load the custom size paper in landscape orientation if the following conditions are met when you are using the UFR II printer driver.
|
Paper Size in Select Feeder Menu
|
<Mixed Sizes>
|
|
Loaded Paper
|
Long edge length is 215.9 mm or less.
|
White Streaks Appear/Print Density Is Uneven

 Is toner running low?
Check how much toner is left, and replace the toner cartridge as necessary.
Replacing the Toner Cartridge
Replacing the Toner Cartridge
 Has the toner cartridge reached its life expectancy?
The inside of the toner cartridge may be degraded. Replace the toner cartridge.
Replacing the Toner Cartridge
Replacing the Toner Cartridge
Printouts Are Faded in Stripes

 Are you using paper that has absorbed moisture?
Set <Transfer Adj. Mode> to <On>.
Transfer Adj. Mode
Transfer Adj. Mode

Select <On> only for solving this problem. In general, if you select <On>, streaks may appear on printouts.
Replace with appropriate paper.
Paper
Paper
 Are you using appropriate paper?
Check usable paper, and replace with appropriate paper.
Paper
Paper
 Has the toner cartridge reached its life expectancy?
The inside of the toner cartridge may be degraded. Replace the toner cartridge.
Replacing the Toner Cartridge
Replacing the Toner Cartridge
Black Spots Appear on Printouts

 Is the fixing unit clean?
Set <Remove Dirt> to <On>.
Special Print Mode
Special Print Mode

If you select <On>, lines or edges may be smudged.
Clean the fixing unit.
Fixing Unit
Fixing Unit
Back of Paper Is Smudged

 Is the loaded paper smaller than the size specified in the print data?
Check whether the size specified in the print data matches that of the loaded paper.
Printouts Are Grayish
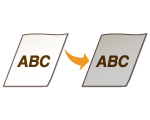
 Is the installation site of the machine exposed to direct sunlight?
Move the machine to a location sheltered from direct sunlight.
Relocating the Machine
Relocating the Machine
 Are you using heavy paper?
Set <Dark Prt Reduct Mode> to any of <Mode 1> to <Mode 4> according to the paper type.
Dark Prt Reduct Mode
Dark Prt Reduct Mode

If printouts of plain paper are grayish, set to <Mode 4>.
If this mode is selected, lines may be thinner.
Printouts Are Faded as a Whole
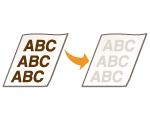
 Has the toner cartridge reached its life expectancy?
Set <High Density Mode> to <On>.
High Density Mode
High Density Mode

If you select <On>, blank areas may be grayish.
If the problem persists, the inside of the toner cartridge may be degraded. Replace the toner cartridge.
Replacing the Toner Cartridge
Replacing the Toner Cartridge

After setting a new toner cartridge, set <High Density Mode> back to <Off>. If <Off> remains selected, printouts may be grayish.
Horizontal Thin Lines Appear on Printouts

 Does this problem occur when, for example, you print immediately after turning ON the power in the case where the machine was not operated for long hours.
If horizontal thin lines appear in halftone areas or blank areas on printouts, set <Clean Drum> to <On>.
Clean Drum
Clean Drum
If the problem persists, replace the toner cartridge with a new one.
Replacing the Toner Cartridge
Replacing the Toner Cartridge

After replacing the toner cartridge, maintain <Clean Drum> in <On>.
Printed Barcode Cannot Be Read

 Are you using a small barcode or a barcode consisting of thick lines?
For paper sizes available in both portrait and landscape orientations, changing the orientation may solve the problem.
Loading Paper
Loading Paper
If the orientation cannot be changed, change the mode by using [Barcode Adjustment Mode].
Setting in the Printer Driver
[Finishing] tab  [Advanced Settings]
  [Barcode Adjustment Mode]
  Select the mode
 [Advanced Settings]
  [Barcode Adjustment Mode]
  Select the mode
Specifying Settings in the Setting Menu of the Operation Panel

Specifying the setting for [Barcode Adjustment Mode] may cause lines to be thinner.
If you select [Mode 3], the print speed will be slower.
If you have changed the printer driver settings, the improvement effect will be achieved only when printing from the printer driver. To achieve the improvement effect in all print jobs, change the settings from the operation panel.
