Registering Libraries
Folders and documents are saved in libraries.
The following types of libraries exist:
Personal Library
Document Server Library
SharePoint Server Library
Network Library
This section describes how to register a Personal Library and a Network Library.
For other ways to register libraries, see the following.
After registration, perform a connection test to the registered library.
|
Note
|
|
For information on how to register an Advanced Space of imageRUNNER ADVANCE as a personal library, see the following.
To edit a registered library's information, select the [Settings] menu > [Library Management], and open the [Library Management] dialog box. Select the library that you want to edit, and select [Change Regist. Info]. The following steps are the same as those to register a library.
|
In addition, refer to the following as necessary.
Registering Personal Libraries
A Personal Library is a library that you use to manage personal documents.
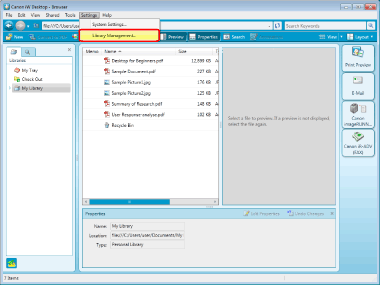
1.
Select the [Settings] menu > [Library Management].
Or, right-click on the Navigation Pane and select [Library Management].
2.
Click [Register Library].
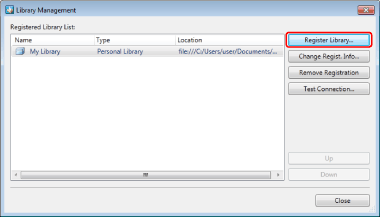
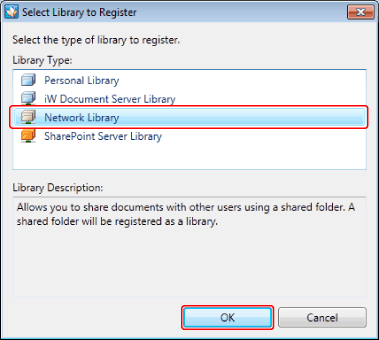
The [Select Library to Register] dialog box is displayed.
3.
Select [Personal Library] and then click [OK].
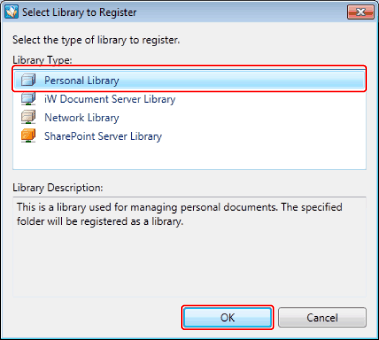
The [Register Library] dialog box is displayed.
4.
Click [Browse].
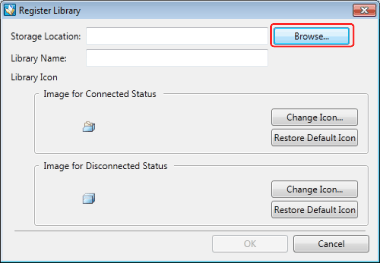
The [Browse For Folder] dialog box is displayed.
5.
Select a folder to use for a Personal Library and click [OK].

The selected folder is displayed in [Storage Location].
The name of the selected folder is displayed in [Library Name].
|
Note
|
|
You can also specify the folder that has been used as the Personal Library in a previous version of Desktop.
If you register a folder that is located in an upper or lower directory to the folder that has already been registered as a Network Library, the operations you perform to the registered Network Library will be treated as operations to a Personal Library.
A folder that is located in an upper or lower directory of a folder that has already been registered as a personal library cannot be registered as a Personal Library.
|
6.
If necessary, change the library settings and click [OK].
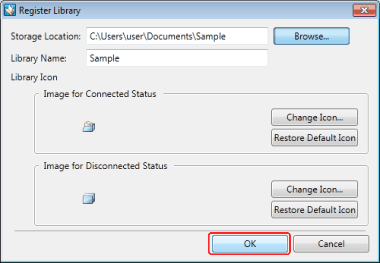
For information on how to change the name of the displayed library, see the following.
When setting the library icon, see the following.
7.
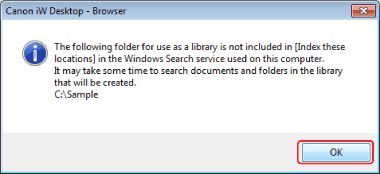
If a Windows Search confirmation message is displayed, click [OK].
The [Library Management] dialog box is displayed again.
|
Note
|
|
The confirmation screen is displayed when a folder in the local computer is registered without starting the Windows Search service.
|
8.
Test the connection to the registered library.
For more information on testing the connection to the library, see the following.
9.
Click [Close].
Registering a Network Library
A Network Library is a library that you register when you want to use a shared folder to share documents with other users.
1.
Select the [Settings] menu > [Library Management].
Or, right-click on the Navigation Pane and select [Library Management].
2.
Click [Register Library].
The [Select Library to Register] dialog box is displayed.
3.
Select [Network Library] and then click [OK].
The [Register Network Library] dialog box is displayed.
4.
Click [Browse].
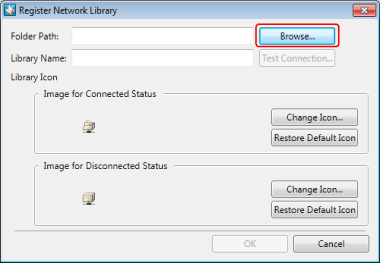
The [Browse For Folder] dialog box is displayed.
5.
Select a folder to use for a Network Library and click [OK].
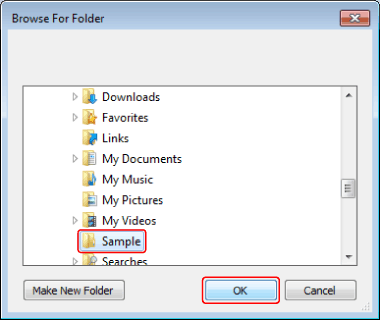
The selected folder is displayed in [Folder Path].
The name of the selected folder is displayed in [Library Name].
6.
If necessary, change the library settings and click [OK].
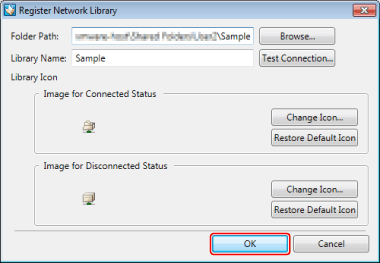
For information on how to change the name of the displayed library, see the following.
When setting the library icon, see the following.
The [Library Management] dialog box is displayed again.
7.
Test the connection to the registered library.
For more information on testing the connection to the library, see the following.
8.
Click [Close].