 on the operation panel. Use this screen to specify settings for and register functions.
Display
The <Home> Screen for initiating operations and screens for specifying settings appear in the display. You can also view job progress and messages here. Touch the display to operate it.
<Home> Screen
The <Home> Screen is displayed when the power is turned ON or by pressing  on the operation panel. Use this screen to specify settings for and register functions.
 on the operation panel. Use this screen to specify settings for and register functions.
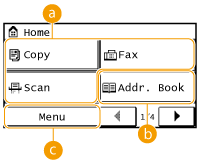
 Toggle functions
 <Addr. Book>
Use this to register or edit the destinations for e-mails and faxes. You can also display a registered destination when sending an e-mail or fax. Registering in the Address Book
 <Menu>
<Timer Settings>, <Preferences>, and many other machine settings start from this button. Setting Menu List
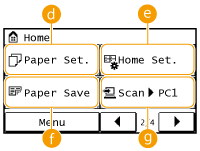
 <Paper Set.>
Select the paper for printing. This button is also used for specifying the size and type of paper loaded in the paper drawer and manual feed slot. Specifying Paper Size and Type
 <Home Set.>
Allows you to change the order that <Home> Screen buttons are displayed in. Customizing the <Home> Screen
 <Paper Save>
Settings are preregistered for economically copying 2 pages (or 4 pages) reduced on a single sheet. Using the <Paper Save> Button
 <Scan -> PC1> / <Scan -> PC2>
By registering scan settings beforehand, you can simply tap this button to start a scan. Scanning Using the <Scan -> PC> Button
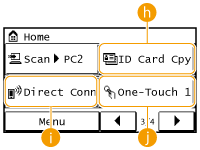
 <ID Card Cpy>
Settings are preregistered for copying the front and back sides of a driver's license or other ID card onto the same side of a page at actual size. Copying Both Sides of an ID Card onto One Page
 <Direct Conn> (MF249dw / MF247dw)
Use this to establish a direct wireless connection to a mobile device. Make Direct Connection (Access Point Mode) (MF249dw / MF247dw)
 <One-Touch 1> to <One-Touch 4>
If you register destinations beforehand as One-Touch Dial numbers, they can be quickly displayed. Specifying Destinations with the One-Touch Buttons
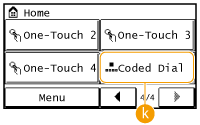
 <Coded Dial>
If you register destinations beforehand as coded dial numbers, they can be quickly displayed by simply entering a three-digit number. Registering in the Address Book
<Status Monitor> Screen
When you press  , a screen is displayed that enables you to check the status of documents that are being printed, sent, or received, as well as the status of the machine (amount remaining in the toner cartridge, etc.) and the network setting information such as the IP address of the machine.
 , a screen is displayed that enables you to check the status of documents that are being printed, sent, or received, as well as the status of the machine (amount remaining in the toner cartridge, etc.) and the network setting information such as the IP address of the machine.
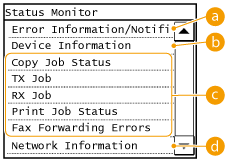
 <Error Information/Notification>
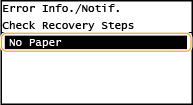
Displays the details of any errors that occurred. When an Error Message Appears
 <Device Information>
Displays the status of the machine, such as the paper size or the amount remaining in the toner cartridges.
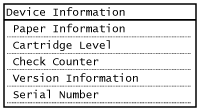
<Paper Information>
Displays the paper size specified in each paper source.
Displays the paper size specified in each paper source.
<Cartridge Level>
Displays the amount remaining in the toner cartridges. Other internal parts may reach the end of their lifetime before the toner runs out.
Displays the amount remaining in the toner cartridges. Other internal parts may reach the end of their lifetime before the toner runs out.
<Check Counter>
Displays the totals for printouts. Viewing the Counter Value
Displays the totals for printouts. Viewing the Counter Value
 Status of copy/print/send/receive jobs
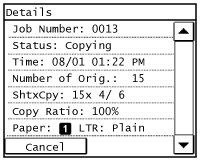
Displays the current status of the selected item. The <Copy Job Status> screen is shown below as an example.
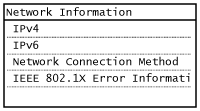
 <Network Information>
Displays the network settings such as the IP address of the machine and status such as the condition of wireless LAN communications.
When a Message Is Displayed
Messages are displayed at the top of the screen in situations such as when end of toner cartridge lifetime is reached or when a cover is left open. The display alternates between showing the normal screen and the message.

 |
When <You have notifications.> or <Tap Icon on Right ->> Is Displayed Tap  to view the notification. to view the notification. |
When an Error Occurs
In some cases when an error occurs, instructions on how to respond to the error are displayed. Follow the on-screen instructions to solve the problem. The screen displayed when a paper jam occurs is shown below as an example (When an Error Message Appears).
