
Installing the Printer
 | If you want to use the printer with optional accessories installed, install them before installing the printer. |
Carrying the Printer to the Installation Site
1
Carry the printer unit to the installation site.
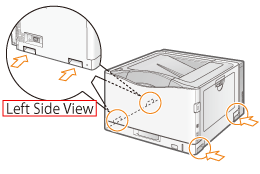
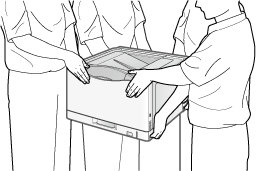
After confirming that the covers and trays are closed, carry the printer with three or more people by holding the lift handles on the lower portion of the printer and lifting it up at the same time.
Check the weight of the printer and then start to carry it, making sure that you can hold it safely.
 |  |  |
Connecting the Power Cord
1
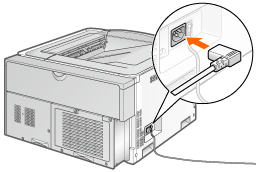
Insert the supplied power cord firmly in the power socket.
NOTE |
The form of the supplied power cordThe form of the supplied power cord may differ from the one in the above illustration. |
2
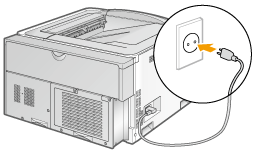
Connect the power cord.
3
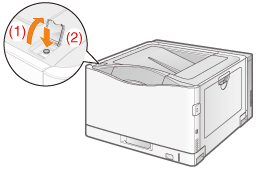
Press the power switch to turn the printer ON.
→ | The indicators and display on the control panel come on, and the printer initiates a self-diagnostic test on the printer unit and optional accessories. |
IMPORTANT |
Do not turn the printer ON immediately after turning it OFF.If you want to cycle the power of the printer, wait at least 10 seconds before turning it ON again. If the printer does not operate properlyIf an error message appears in the display on the control panelWhen turning ON the printer for the first time after installing the printer and paper feederDo not load paper in the paper drawer. Precautions when turning OFF the printerIf you turn the printer OFF, all print data remaining in the printer memory will be erased. Power consumption when the power is OFFEven if the printer is turned OFF, power is still consumed slightly while the power plug is inserted in the AC power outlet. To stop the power consumption completely, unplug the power plug from the AC power outlet. |
4
Select a display language using [  ] and [
  ], and then press [OK].
 ] and [
  ], and then press [OK].
5
Specify a date, and then press [OK].

6
Specify time, and then press [OK].

NOTE |
About the clock in this printerThe clock in the printer should be accurate within ± 60 seconds per month. Adjust the clock periodically. When setting time zones and daylight savings time |
7
Confirm the content of the displayed message, and then press [OK].

8
Press [  ] to select [Yes], and then press [OK].
 ] to select [Yes], and then press [OK].
If you selected [No], skip to step 10.
9
Enter the [Remote UI Access PIN], and then press [OK].
Press [  ] or [
  ] to increase or decrease the value, and [
  ] or [
  ] to move the cursor to enter.
 ] or [
  ] to increase or decrease the value, and [
  ] or [
  ] to move the cursor to enter.
 | Enter a number up to 7 digits in length for the PIN. |

Confirm the display.

If no abnormality is found during the self-diagnostic test, the Main Power indicator (green),  Ready indicator (green),
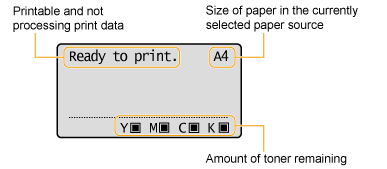
  Online indicator (green) and Paper Source indicator (green) come on, <Ready to print.> appears in the display, and the printer is ready to print.
 Ready indicator (green),
  Online indicator (green) and Paper Source indicator (green) come on, <Ready to print.> appears in the display, and the printer is ready to print.
The following information is displayed in the display.
Next, perform the following procedures.
|