Installing the Paper Feeder
By installing the optional paper feeder in addition to the supplied multi-purpose tray and paper drawer, the printer can feed up to 2,000 sheets of paper continuously and automatically.
 |
PAPER FEEDER PF-E1 |
<If the printer is already installed>When installing the paper feeder in the printer after installing the printer, move the printer to an appropriate location temporarily.  "Moving the Printer" "Moving the Printer"For details on the precautions for when installing the paper feeder, see "Attention (Printer Installation)." |
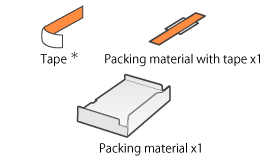
Remove all the orange tape if it is attached to the paper feeder when performing the following procedure.
1
Take the paper feeder out of the box.
2
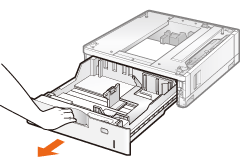
Pull out the paper drawer of the paper feeder until it stops.
3
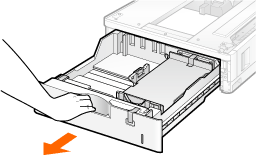
Remove the tape and taped material in the locations shown.
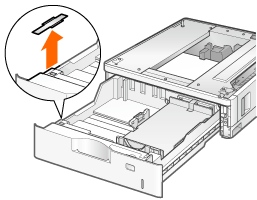
4
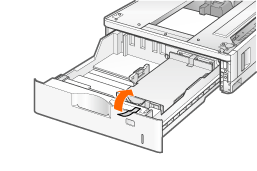
Remove the three pieces of tape that are securing the packing material.
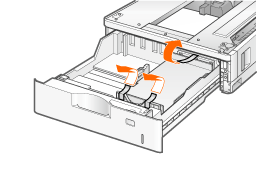
5
Remove the packing material.
Hold where marked (A) to remove.
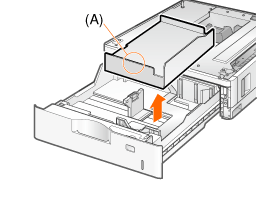
6
Set the paper drawer in the paper feeder.
Check ! | |||||||||
Remove the packing materials completely.Make sure that the following packing materials are completely removed.
| |||||||||
|
7
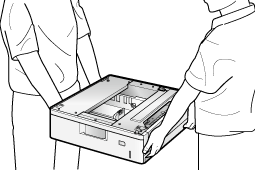
Place the paper feeder at the installation site.
Carry the paper feeder with two or more people by holding the lift handles on the lower portion of the paper feeder and lifting it up at the same time.
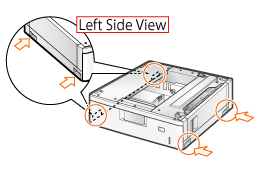
8
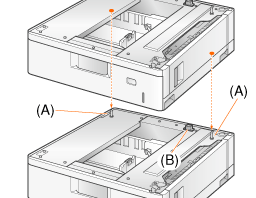
Stack paper feeders when using more than one.
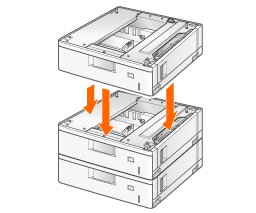
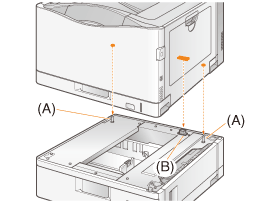
Also, match the positioning pins (A) and connector (B) when placing the paper feeder.
9
Place the printer on the paper feeder gently, with its sides and front even with those of the paper feeder.
For details on unpacking and moving the printer, see "Removing the Packing Materials" and "Installing the Printer."
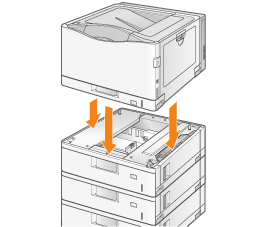
When lowering the printer, be sure to match the positioning pins (A) and connector (B).
10
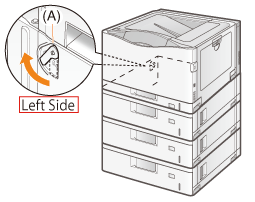
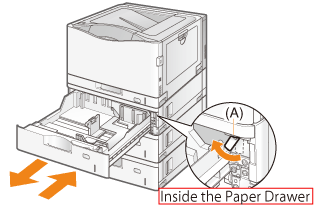
Match the lock lever (A) with the position shown.
Lock the front lock lever after pulling out the paper drawer.
Lock the paper feeders together in the same manner.
11
Insert the paper drawers in the printer and paper feeders.
Next, perform the following procedures. If you want to install the ROM modules, follow the procedure from Step 2 in "Installing ROM." If you want to install the SD card, follow the procedure from Step 2 in "Installing SD Card."
|
Setting the Paper Feeder Information
After installing the paper feeder, set the paper feeder information.
 | The operation method to use with Windows is explained here. If you are a Macintosh user, see the "Online Manual." |
1
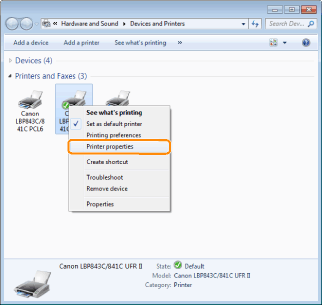
Open the printer folder.
2
Right-click the icon for the printer, and then select [Printer properties] or [Properties] from the pop-up menu.
3
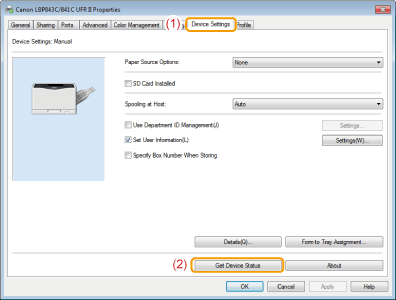
Obtain paper feeder information.
(1) | Display the [Device Settings] tab. |
(2) | Click [Get Device Status]. |
 → → | Paper feeder information is obtained automatically. |
NOTE |
When paper feeder information cannot be obtained automaticallySelect the paper source option installed on your printer in [Paper Source Options]. |
