Operating Files on a USB Memory Device
You can use the control panel of the machine to perform the following operations for files saved to a USB memory device inserted into the machine:
Change file names
Delete files
Add files (save documents scanned with the machine)
Required Preparations
Configure the settings to print data in a USB memory device. Preparations for Using a USB Memory Device
1
Insert a USB memory device into the USB port on the machine. Inserting and Removing a USB Memory Device
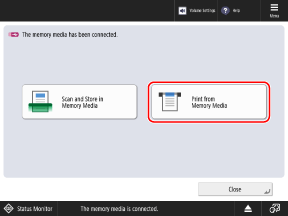
When the Shortcut Screen of Available Functions Is Displayed

Press [Print from Memory Media] and proceed to Step 4.

2
On the control panel, press [Access Stored Files] in the [Home] screen. [Home] Screen
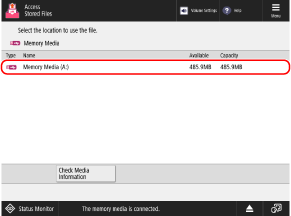
The screen for selecting the storage space is displayed.
3
Press [Memory Media].
Select the USB memory device with the file you want to operate.

Press [Check Media Information], select the USB memory device, and press [Details] to check the serial number and available capacity of the USB memory device.
5
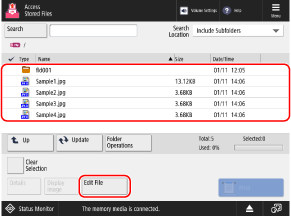
Display the folder with the file you want to operate.
6
Operate the file.

Press [Folder Operations] to create a folder or change its name.
When Changing the File Name
Select the file you want to rename, and press [Edit File]  [Change File Name].
Enter the file name, and press [OK] to change the file name.
 [Change File Name].
 Enter the file name, and press [OK] to change the file name.
When Deleting a File
Select the file you want to delete, and press [Edit File]  [Delete]
  [Yes].
 [Delete]
  [Yes].
* You can select and delete up to 32 files in the same folder at a time.
When Adding Files (When Saving Documents Scanned with the Machine)

The procedure is the same as the scan operation and settings in [Scan and Store] except that the steps to display the scan screen are different. Saving Scanned Data
1
Place the original. Placing Originals
If the screen for selecting the thickness of the original is displayed, select the thickness of the placed original.
2
Press [Edit File]  [Add Files (Scan and Store)].
 [Add Files (Scan and Store)].
The scan screen is displayed.
3
Configure the scan settings. Scan Settings
4
Press [ Start].
 Start].
Scanning of the original starts.
7
When the operation is completed, remove the USB memory device. Removing the USB Memory Device