Sending Faxes from the Document Binder Screen
You can fax a document using a fax driver specified in the Document Binder screen.
|
Note
|
|
For details on how to send faxes from the Desktop Browser screen, see the following.
For details on how to send faxes from the Annotation Editor screen, see the following.
If you are using a binder document, the print settings stored in the binder document are used when sending faxes. For details on the print settings, see the following.
|
In addition, refer to the following as necessary.
1.
In the Document Binder screen, edit the document to fax.
2.
In the Print Settings Pane, select the fax driver to use in [Printer Name].
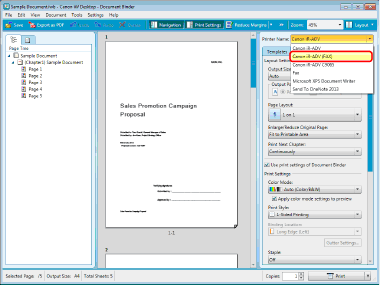
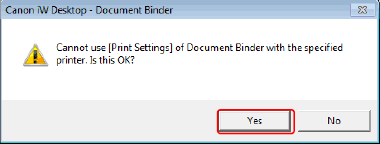
A confirmation message is displayed.
|
Note
|
|
For details on the confirmation message, see the following.
|
3.
Click [Yes] in the confirmation message dialog box.
4.
Select the [File] menu > [Print].
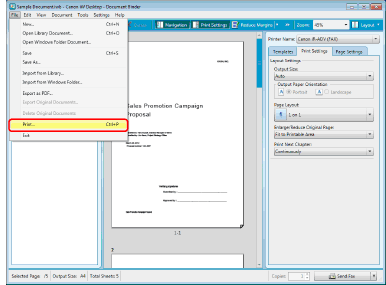
The [Send Fax] dialog box is displayed.
5.
To specify the pages to fax, select [Print Pages] in [Send Target] and specify the page number in the displayed [Range].
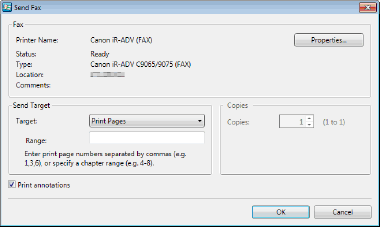
You can use the following formats to specify the page numbers using up to 255 characters.
When printing from page a to the last page: a-
("a" indicates the page number to start printing)
When printing from the first page to page n: -b
("b" indicates the page number to end printing)
When printing continuous pages: a-b
("a" and "b" indicate the page numbers to start and end printing respectively)
When printing discontinuous pages: c,d
("c" and "d" indicate the individual page numbers to print, separated by commas)
The entry order of page numbers is not the order of printing. Even when you enter "1,2" or "2,1", pages are printed in the order "1,2."
6.
Select [Print annotations] if you want to also send annotations via fax.
|
Note
|
|
However, annotations added with something other than Annotation Editor may be sent as a fax regardless of whether you select the [Print annotations] check box, depending on the type of annotation.
|
7.
Click [OK].
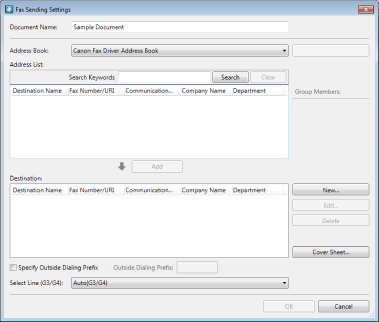
The [Fax Sending Settings] dialog box is displayed.
8.
Configure the fax destination.
|
Note
|
|
For details on how to set the destination address, see the following.
|
9.
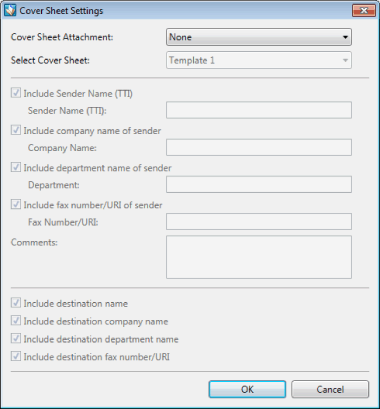
Configure the cover sheet settings if necessary.
|
Note
|
|
For more information on how to configure cover sheet settings, see the following.
|
10.
To specify a job name for the fax document to be sent, enter the name using up to 254 bytes in [Document Name].
11.
To fax a document using an external number, select the [Specify Outside Dialing Prefix] check box and enter the fax number in [Outside Dialing Prefix].
12.
When specifying the line to be used, select it from the [Select Line (G3/G4)] pull-down menu.
Select [Auto (G3/G4)] when specifying line is not required. Send faxes using the prior sending line specified by the device.
|
Note
|
|
If you send a fax with the IP fax function, this setting will be disabled.
|
13.
Click [OK].
The faxing starts.
|
Note
|
|
For more information on the status of fax jobs, see the following.
|
14.
When the fax transmission is completed, close the Document Binder screen.
Save the binder document shown in the screen if necessary.
|
Note
|
|
For more information on how to save the binder documents, see the following.
|