Printing Results Are Not Satisfactory
Dirt inside the machine may affect printing results. Perform care and cleaning to the machine first. Regular Cleaning
Smudge Marks Appear on the Edge of Printouts

 Are you using appropriate paper?
Check the supported paper types and replace with an appropriate type. Also, set the paper size and type correctly.
Available Paper
Loading Paper
Specifying Paper Size and Type
Available Paper
Loading Paper
Specifying Paper Size and Type
 Do you print data without margins?
This symptom occurs if a margin is set to none in the printer driver. A margin of 1/4" (5 mm) or less around the edge of paper or 3/8" (10 mm) or less around the edge of envelopes is not printable with the machine. Make sure to have margins around the document to print.
[Finishing] tab  [Advanced Settings]
  [Expand Print Region and Print]
  [Off]
[Off]
 [Advanced Settings]
  [Expand Print Region and Print]
  [Off]
[Off]Smudges Appear on Printouts

 Are you using appropriate paper?
If using the appropriate paper still does not solve the problem, changing the <Special Printing Mode A> or <Special Printing Mode Z> setting may solve the problem. <Mode 2> can improve the quality more significantly than <Mode 1>.
<Special Processing>
<Special Processing>
Afterimages Appear in Blank Areas

 Are you using appropriate paper?
 Is the amount remaining in the toner cartridge running low?
Check how much the amount remaining in the toner cartridge is left, and replace the toner cartridge as necessary.
Regardless of the amount remaining in the toner cartridge, the toner cartridge may reach the end of its lifetime depending on the use environment or the deterioration of materials inside the toner cartridge.
Replacing the Toner Cartridge
Replacing the Toner Cartridge
 Is the amount remaining in the drum cartridge running low?
Check how much the amount remaining in the drum cartridge is left, and replace the drum cartridge as necessary.
Regardless of the amount remaining in the drum cartridge, the drum cartridge may reach the end of its lifetime depending on the use environment or the deterioration of materials inside the drum cartridge.
Replacing the Drum Cartridge
Replacing the Drum Cartridge
Toner Smudges and Splatters Appear

 Are you using appropriate paper?
Setting <Special Printing Mode U> to <On> may solve the problem.
<Special Processing>
<Special Processing>
 Are you using paper containing much paper dust or other dust particles?
Smudges may appear in a printout when the paper has a lot of paper dust or other dust particles. Setting <Special Printing Mode L> to <On> may solve the problem.
<Special Processing>
<Special Processing>
 Is the amount remaining in the toner cartridge running low?
Check how much the amount remaining in the toner cartridge is left, and replace the toner cartridge as necessary.
Regardless of the amount remaining in the toner cartridge, the toner cartridge may reach the end of its lifetime depending on the use environment or the deterioration of materials inside the toner cartridge.
Replacing the Toner Cartridge
Replacing the Toner Cartridge
 Is the amount remaining in the drum cartridge running low?
Check how much the amount remaining in the drum cartridge is left, and replace the drum cartridge as necessary.
Regardless of the amount remaining in the drum cartridge, the drum cartridge may reach the end of its lifetime depending on the use environment or the deterioration of materials inside the drum cartridge.
Replacing the Drum Cartridge
Replacing the Drum Cartridge
Printouts Are Faded

 Are you using appropriate paper?
Check usable paper, and replace with appropriate paper. Also, specify the paper size and type settings properly.
Available Paper
Loading Paper
Specifying Paper Size and Type
Available Paper
Loading Paper
Specifying Paper Size and Type
 Are you using paper containing much paper dust?
Using paper containing much paper dust may result in a faded or streaky printout. Setting <Special Printing Mode G> to <On> may solve the problem.
<Special Processing>
<Special Processing>
 Are you using rough-surface paper?
Printed images may be faint when they are printed on rough-surface paper. Setting <Special Printing Mode Q> to <On> may solve the problem.
<Special Processing>
<Special Processing>

Setting this to <On> may affect the image quality.
 Are you using the machine in an environment with high humidity?
Setting <Special Printing Mode T> to <On> may solve the problem.
<Special Processing>
<Special Processing>

Printed images or text may be blurred when you set this to <On> and print in a low-humidity environment.
 Did you print on the back of a printed sheet?
Printing may be faint when you print on the back of a printed sheet. Setting <Special Printing Mode R> to <On> may solve the problem.
<Special Processing>
<Special Processing>

If you set to <On>, image quality may be affected or a paper jam may occur when a certain length of time elapses after printing on the front side or depending on the ambient humidity.
 Is the machine installed in the appropriate environment?
Install the printer in an appropriate location.
 Is the amount remaining in the toner cartridge running low?
Check how much the amount remaining in the toner cartridge is left, and replace the toner cartridge as necessary.
Regardless of the amount remaining in the toner cartridge, the toner cartridge may reach the end of its lifetime depending on the use environment or the deterioration of materials inside the toner cartridge.
Replacing the Toner Cartridge
Replacing the Toner Cartridge
 Is the amount remaining in the drum cartridge running low?
Check how much the amount remaining in the drum cartridge is left, and replace the drum cartridge as necessary.
Regardless of the amount remaining in the drum cartridge, the drum cartridge may reach the end of its lifetime depending on the use environment or the deterioration of materials inside the drum cartridge.
Replacing the Drum Cartridge
Replacing the Drum Cartridge
A Portion of the Page Is Not Printed

 Do you print data without margins?
This symptom occurs if a margin is set to none in the printer driver. A margin of 1/4" (5 mm) or less around the edge of paper or 3/8" (10 mm) or less around the edge of envelopes is not printable with the machine. Make sure to have margins around the document to print.
[Finishing] tab  [Advanced Settings]
  [Expand Print Region and Print]
  [Off]
[Off]
 [Advanced Settings]
  [Expand Print Region and Print]
  [Off]
[Off] Do the paper guides align with the edges of the paper?
If the paper guides are too loose or too tight, part of a document may not be printed.
Loading Paper
Loading Paper
Streaks Appear/Printing is Uneven

 Are you using appropriate paper?
 Is the platen glass dirty?
Clean the platen glass.
Cleaning the Platen Glass
Cleaning the Platen Glass
 Have you cleaned the fixing unit?
Clean the fixing unit.
Cleaning the Fixing Assembly
Cleaning the Fixing Assembly
 Are you using rough-surface paper?
Printed images may be faint when they are printed on rough-surface paper. Setting <Special Printing Mode Q> to <On> may solve the problem.
<Special Processing>
<Special Processing>

Setting this to <On> may affect the image quality.
 Are you using the machine in an environment with high humidity?
Change the setting for <Special Printing Mode T>. Setting this item to <On> may solve the problem.
<Special Processing>
<Special Processing>

Printed images or text may be blurred when you set this to <On> and print in a low-humidity environment.
 Are you using paper containing much paper dust?
Using paper containing much paper dust may result in a faded or streaky printout. Setting <Special Printing Mode G> to <On> may solve the problem.
<Special Processing>
<Special Processing>
 Is the amount remaining in the toner cartridge running low?
Check how much the amount remaining in the toner cartridge is left, and replace the toner cartridge as necessary.
Regardless of the amount remaining in the toner cartridge, the toner cartridge may reach the end of its lifetime depending on the use environment or the deterioration of materials inside the toner cartridge.
Replacing the Toner Cartridge
Replacing the Toner Cartridge
 Is the amount remaining in the drum cartridge running low?
Check how much the amount remaining in the drum cartridge is left, and replace the drum cartridge as necessary.
Regardless of the amount remaining in the drum cartridge, the drum cartridge may reach the end of its lifetime depending on the use environment or the deterioration of materials inside the drum cartridge.
Replacing the Drum Cartridge
Replacing the Drum Cartridge
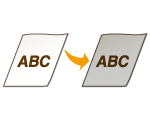
Printouts Are Entirely or Partially Grayish

 Is <Correct Density> in <Copy Settings> set too dark?
Adjust the setting so that density is lighter.
<Correct Density>
<Correct Density>
 Does the original have background color, is it stained, or are you copying an original such as a newspaper that is printed on thin paper so that text or images on the other side are visible through the paper?
Check the original and then adjust the density to the correct settings.
Basic Copy Operations
Basic Copy Operations
 Are you using a specific type of paper?
The printed side may come out in grayish color for certain type of paper. Check the type of paper you are using and try a different type.
Available Paper
Available Paper
Setting <Special Printing Mode U> or <Special Printing Mode G> to <On> may solve the problem.
<Special Processing>
<Special Processing>

A desirable effect may not be attained even with these settings applied.
 Is the machine installed in the appropriate environment?
Install the printer in an appropriate location.
Store the toner cartridge in an appropriate location for two to three hours, then try printing again. This may solve the problem. If the problem persists, replace the toner cartridge.
Replacing the Toner Cartridge
Replacing the Toner Cartridge
 Has the drum cartridge been left in direct sunlight for a long period of time?
Store the drum cartridge in an appropriate location for two to three hours, then try printing again. This may solve the problem. If the problem persists, replace the drum cartridge.
Replacing the Drum Cartridge
Replacing the Drum Cartridge
White Spots Appear

 Are you using paper that has absorbed moisture?
Replace with appropriate paper.
Loading Paper
Loading Paper
 Are you using appropriate paper?
 Is the amount remaining in the toner cartridge running low?
Check how much the amount remaining in the toner cartridge is left, and replace the toner cartridge as necessary.
Regardless of the amount remaining in the toner cartridge, the toner cartridge may reach the end of its lifetime depending on the use environment or the deterioration of materials inside the toner cartridge.
Replacing the Toner Cartridge
Replacing the Toner Cartridge
 Is the amount remaining in the drum cartridge running low?
Check how much the amount remaining in the drum cartridge is left, and replace the drum cartridge as necessary.
Regardless of the amount remaining in the drum cartridge, the drum cartridge may reach the end of its lifetime depending on the use environment or the deterioration of materials inside the drum cartridge.
Replacing the Drum Cartridge
Replacing the Drum Cartridge
Spots Appear
Reverse Side of Paper is Smudged

 Have you loaded paper that is smaller than the size of the print data?
Check to make sure that the paper size matches the size of the print data.
 Have you cleaned the fixing unit?
Clean the fixing unit.
Cleaning the Fixing Assembly
Cleaning the Fixing Assembly
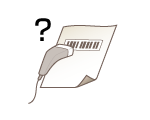
Printed Barcode Cannot Be Read

 Are you trying to read a small barcode or one with thick lines?
Enlarge the barcode.
Changing the <Select Line Width> setting may solve the problem.
<Special Processing>
<Special Processing>
