Saving/Loading Settings
You can save the setting data of the menu options in your computer, or register the saved data in the machine. The exported data can be imported. If using same model, other machines can import the data exported from this machine and vice versa. These operations can be performed only when you have logged on in System Manager Mode.
 | ||||||||||||||||||||||||||||
Settings that cannot be imported/exported
|
Saving Settings
1
Start the Remote UI and log on in System Manager Mode. Starting Remote UI
2
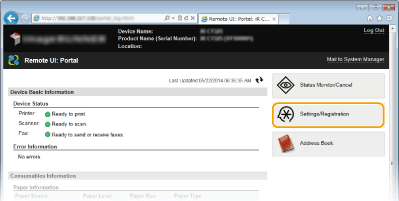
Click [Settings/Registration].

3
Click [Import/Export]  [Export].
 [Export].
4
Specify export settings.

 [Settings/Registration]
Select the check box.
 [Encryption Password]
Enter the password.
 [Confirm]
Enter the same password.
5
Click [Start Exporting].
6
Follow the on-screen instructions to specify the location where the exported setting data is saved.
The setting data will be saved.
 |
Do not operate until the process is complete.The screen remains the same during the export process. Do not operate the Remote UI until the message [The (file name) download has completed.] is displayed at the bottom of the screen. |
Loading Settings
1
Start the Remote UI and log on in System Manager Mode. Starting Remote UI
2
Click [Settings/Registration].

3
Click [Import/Export]  [Import].
 [Import].
4
Specify import settings.

 [File Path]
Specify the Address Book file to be imported.
To specify the file to be imported, click [Browse] and select the file, or enter the path to the file in [File Path] (the file name with the location where the file is saved).
 [Decryption Password]
Enter the password for importing the encrypted file.
 [Address Book]
Select the check box, if you want to import Address book data. Saving/Loading Address Book
 [Settings/Registration]
Select the check box.
5
Click [Start Importing].
6
Click [OK].
The specified setting data will be imported into the machine.
7
Restart the Machine.
Turn OFF the machine, wait for at least 10 seconds, and turn it back on.