Specifying Paper Size and Type in the Paper Deck
1
Load the paper in the paper deck. Basic Paper Loading Method
2
Press  (Settings/Registration).
 (Settings/Registration).
3
Press <Preferences>  <Paper Settings>
  <Paper Settings>.
 <Paper Settings>
  <Paper Settings>.
4
Select the button for the paper deck in which paper is loaded and press <Set>.
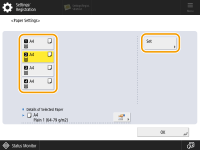
The paper sources are represented by the following icons, respectively. Note that the paper source indications differ depending on the options installed.
 : Paper deck
 : POD Deck-E (upper deck)
 : POD Deck-E (middle deck)
 : POD Deck-E (lower deck)
5
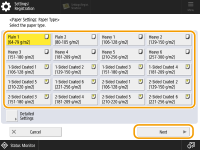
Select the same paper type as the one you loaded  press <Next>.
 press <Next>.
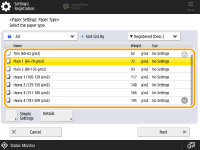

If the paper type of the paper that you have loaded is not listed on the detailed setting screen, you can register it in the paper type list. Paper Type Management Settings
While you are registering the custom paper type for a paper source, the paper type settings are protected and you cannot change the detailed information for custom paper type or delete the custom paper type in <Paper Type Management Settings> in <Preferences> (Settings/Registration).
You can also select the paper type from the simple setting screen by pressing <Simple Settings>.
6
Select the paper size and press <OK>.
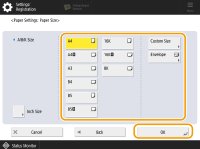
 When loading custom size paper
Specify the size of paper loaded in the paper deck.
1 | Select the paper deck in which paper is loaded and press <Custom Size>. |
2 | Specify the length of the <X> side and <Y> side. |
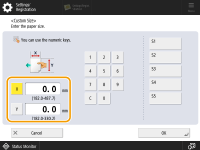
Press <X> or <Y> to enter the length of each side using the numeric keys.  If you register the paper size you use frequently on buttons <S1> to <S5>, you can call them up with one touch. Registering Free Size Paper (Custom Size Paper) | |
3 | Press <OK>. |
 When loading envelopes
Specify the type of envelopes loaded in the paper deck.
1 | Select the paper deck in which envelopes are loaded and press <Envelope>. |
2 | Select the type of envelopes loaded in the paper deck. 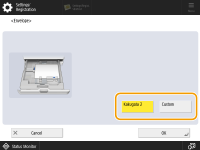  If the envelope type is not set correctly, a paper jam will occur.  When using custom size envelopes, press <Custom>  <Next> <Next>  enter the envelope dimensions. Press <X> or <Y> enter the envelope dimensions. Press <X> or <Y>  use the numeric keys to enter the length of the respective dimension. use the numeric keys to enter the length of the respective dimension. |
3 | Press <OK>. |
7
Press <OK>.
8
Change the paper size label of the paper deck as necessary.