Superimposing Images
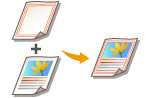 | You can register images such as logos and decorated frames as image forms, and superimpose them on the output. This function enables you to print company logos on handouts for meetings or unify the design of business proposals by adding frames. |
Superimposing the Form Image
Superimpose the form image onto the document to output.
1
Press <Access Stored Files>. <Home> Screen
2
Select a mail box, select a file you want to print and press <Print>.
3
Press <Change Print Settings>, <Options> and <Superimpose Image>.
4
Press <Set> in <Front Side>.

If you want to superimpose the form image on the back side when making a 2-sided print, configure <Back Side>. To superimpose the same form image as the front side, press <Same as Front Side>. To super impose a form image different from the front side, press <Set> and proceed to step 5.
5
Select the form image to superimpose and press <Next>.
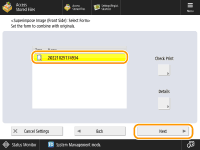
If you want to print a form image by itself to check the output, select the form image from the list and press <Check Print>. If you want to confirm the size of the form image and the overlap setting, press <Details>.
6
Select how the image overlaps and press <OK>.
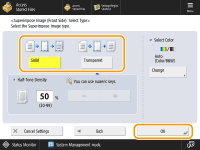
To superimpose the form image without adjusting the density, press <Solid>. To superimpose the form image with the density decreased, press <Transparent> and adjust the density.
7
Press <OK>  <Close>.
8
Press <Start Printing>.
Printing starts.
 |
If you changed the image position (Shifting the Image), the settings are applied to both the form image and document. |