Restricting the Users Who Can Print or Perform the Printer Settings
You can restrict the users who can print or perform the printer settings with IP addresses by using a Web browser (Remote UI).
Always use the Remote UI to specify the IP address. The control panel allows you only to switch the address filter setting between On and Off.
Restriction Using the IP v. 4 Address
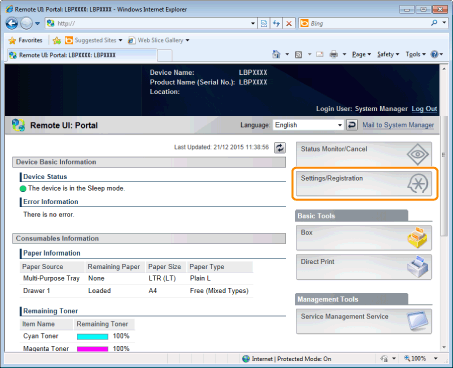
1
Start the Remote UI, and then log in as Administrator.
2
Click [Settings/Registration].
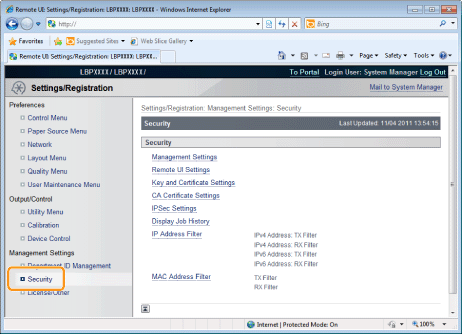
3
Select [Security] from the [Management Settings] menu.
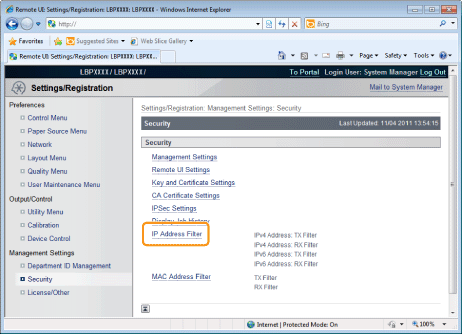
4
Click [IP Address Filter].
5
Click [Edit] under [IPv4 Address: TX Filter] or [IPv4 Address: RX Filter].
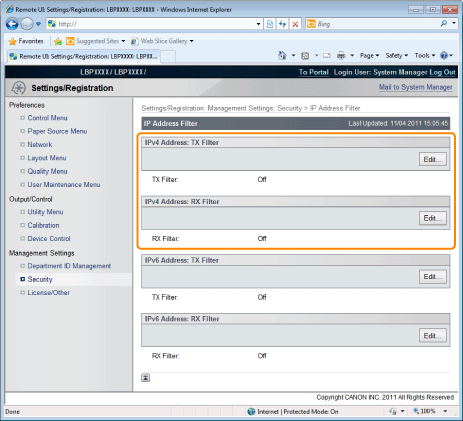
[IPv4 Address: TX Filter] | It limits the sending of data from the printer. |
[IPv4 Address: RX Filter] | It limits the sending of data to the printer. |
6
Select the [Use Filter] check box, and then [Default Policy].
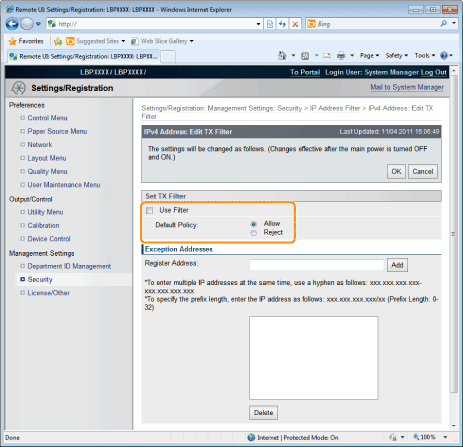
If you select [Reject], you will only be able to transmit or print from users (clients) entered in the [Exception Addresses] field.
If you select [Allow], you will not be able to transmit or print from users (clients) entered in the [Exception Addresses] field.
If you clear the [Use Filter] check box, you will be able to transmit and print from all users (clients).
7
Set the IP address.
(1) | Enter the IP address for which you want to reject or permit to print.
| ||
(2) | Click [Add].
|

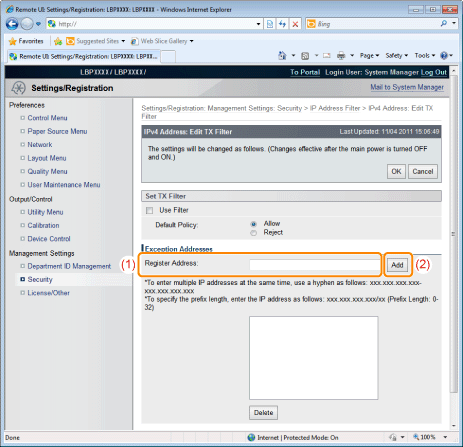
You can also enter IP addresses as follows.
Input example of the IP addresses | Method for entering IP addresses |
192.168.0.1-192.168.0.10 | If you want to enter the IP addresses of consecutive numbers, place "-" (hyphen) between the address of the smallest number and that of the largest number. |
192.168.0.0/16 | In order to specify the subnet range (prefix length), enter a "/" (slash) after the normal IP address symbol, and then enter another prefix length (maximum 32). |
NOTE | ||||
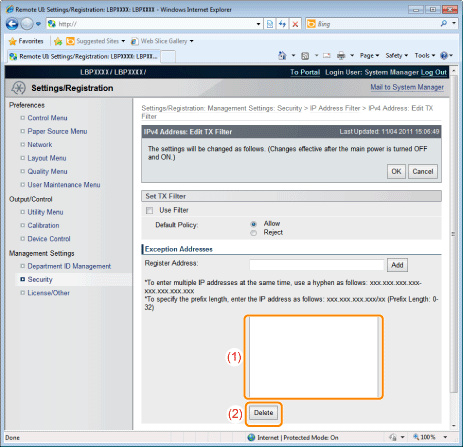
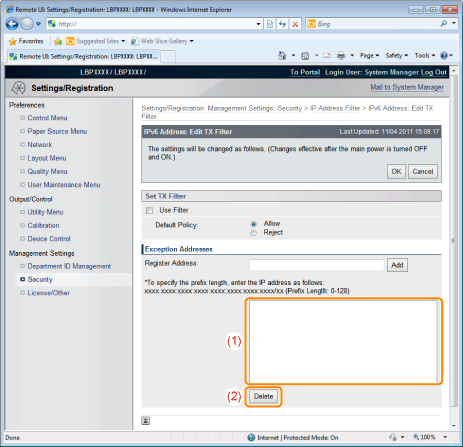
When "0" is entered in [Prefix Length]All the IP addresses become the target for rejection or permission. When "32" is entered in [Prefix Length]The IP address of the printer becomes the target for rejection or permission. When deleting a set IP address
 |
8
Click [OK].
9
Perform a hard reset or restart the printer.
→ | After performing a hard reset or restarting the printer, the settings are effective. |
NOTE | ||||||
To perform a hard resetYou can perform a hard reset using the following procedure.
|
Restriction Using the IP v. 6 Address
1
Start the Remote UI, and then log in as Administrator.
2
Click [Settings/Registration].
3
Select [Security] from the [Management Settings] menu.
4
Click [IP Address Filter].
5
Click [Edit] under [IPv6 Address: TX Filter] or [IPv6 Address: RX Filter].
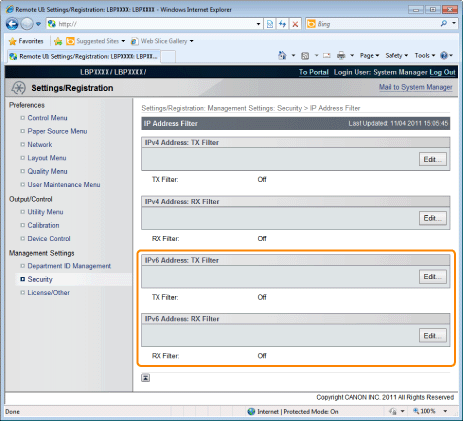
[IPv6 Address: TX Filter] | It limits the sending of data from the printer. |
[IPv6 Address: RX Filter] | It limits the sending of data to the printer. |
6
Select the [Use Filter] check box, and then select [Default Policy].
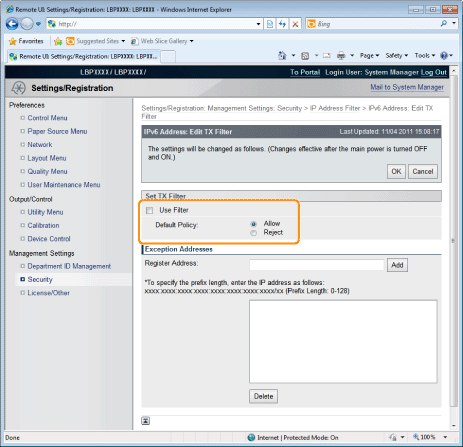
If you select [Reject], you will only be able to transmit or print from users (clients) entered in the [Exception Addresses] field.
If you select [Allow], you will not be able to transmit or print from users (clients) entered in the [Exception Addresses] field.
If you clear the [Use Filter] check box, you will be able to transmit and print from all users (clients).
7
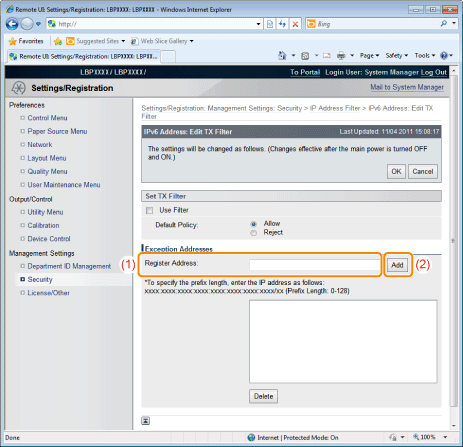
Set the IP address.
(1) | Enter the IP address for which you want to reject or permit to print.
| ||
(2) | Click [Add].
|
You can also enter IP addresses as follows.
Input example of the IP addresses | Method for entering IP addresses |
fe80::0000/64 | In order to specify the subnet range (prefix length), enter a "/" (slash) after the normal IP address symbol, and then enter another prefix length (maximum 128). |
NOTE | ||||
When "0" is entered in [Prefix Length]All the IP addresses become the target for rejection or permission. When "128" is entered in [Prefix Length]The IP address of the printer becomes the target for rejection or permission. When deleting a set IP address
 |
8
Click [OK].
9
Perform a hard reset or restart the printer.
→ | After performing a hard reset or restarting the printer, the settings are effective. |
NOTE | ||||||
To perform a hard resetYou can perform a hard reset using the following procedure.
|