Clearing Paper Jams (Output Area, Right Cover Area, Duplex Unit Area, or Drawer 1/2/3/4)
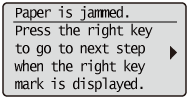
Referring to the procedure on the display, follow the steps below to remove jammed paper.
1
Press [  ].
].
].
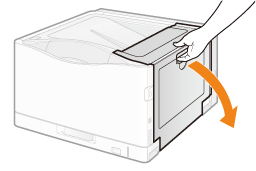
2
Open the right cover.
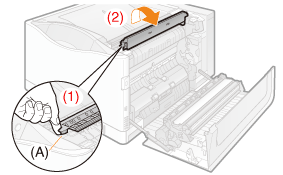
3
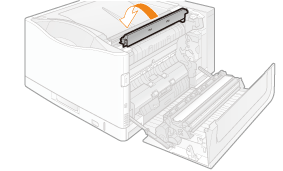
Open the paper output guide.
(1) Hold the tab (A).
(2) Open it.
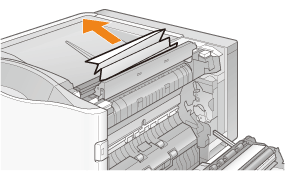
4
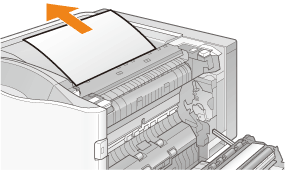
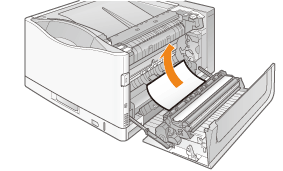
Remove the jammed paper by pulling it gently in the direction of the arrow.
5
Make sure that no paper is jammed inside the paper output guide, and then close it.
6
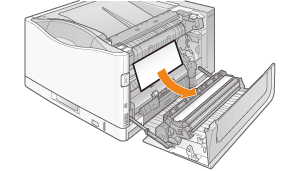
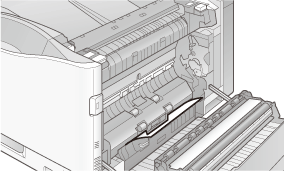
If the paper is jammed in the area shown in the figure, remove the paper by pulling it gently in the direction of the arrow.
7
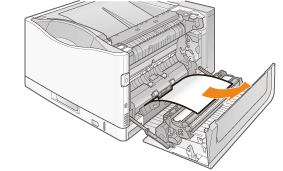
Remove the jammed paper by pulling it gently in the direction of the arrow.
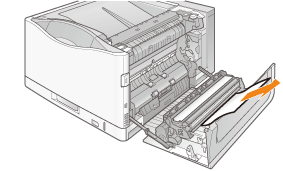
8
Remove the jammed paper by pulling it gently
If paper is jammed in locations shown in the figure and cannot be removed easily, do not pull forcefully, and instead follow the steps shown in the message for another location.
9
Close the right cover.
→ | When paper is jammed in the paper drawer, the jammed paper is output automatically. |
The message disappears, and the printer is ready to print. | |
If a message does not disappearPaper or pieces of paper may remain in the area surrounding the paper drawer. See the following, pull out the paper drawer, and then remove the paper or pieces of paper. | |
Paper may be jammed in a different location. Check other locations and remove any jammed paper. | |
 | If the message is still displayed after removing paper, check that the right cover is firmly closed. |