1-sided and 2-sided Printing
You can select whether to print on one side or both sides of each sheet of paper.
Paper Type | Paper Size |
Plain paper (60 to 105 g/m²) | Standard size paper A3, B4, A4, B5, A5, Ledger (11 x 17), Legal, Letter, Executive, Foolscap, 8K and 16K Custom size paper: Short edges 148.0 to 297.0 mm, long edges 182.0 to 450.0 mm |
Heavy paper (106 to 163 g/m²) | |
Coated paper (100 to 160 g/m²) |
Before performing 2-sided printing, see "Attention (1-sided Printing and 2-sided Printing)." |
1.
Select [Print] from the [File] menu of the application.
2.
Select your printer from [Printer] → [Finishing] → Select [1-sided Printing] or [2-sided Printing] from [Print Style].
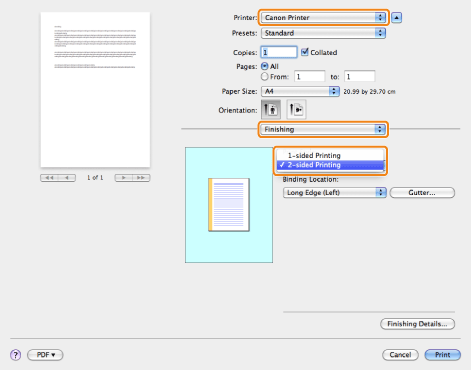
NOTE |
The default setting for [Print Style] is [2-sided Printing]. You can save the 1-sided printing setting as a preset. For details, see "Using [Presets] for Printing." |
3.
Select the binding edge from [Binding Location].
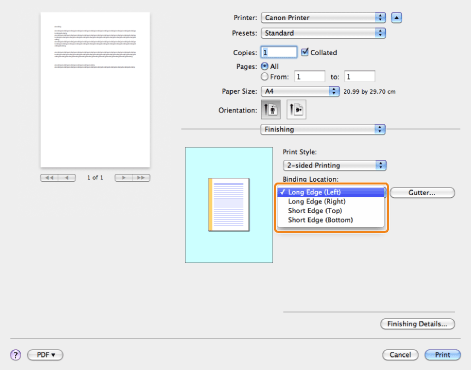
The output image is displayed in the preview area.
4.
If you want to set the gutter width, click [Gutter].
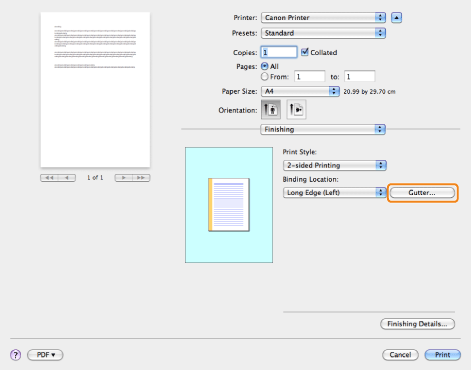
If you do not set the gutter width, skip to step 6.
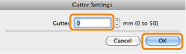
5.
Specify the gutter width → click [OK].
6.
Click [Print].
NOTE |
The screen may vary according to the operating system, as well as the type and version of the printer driver. |