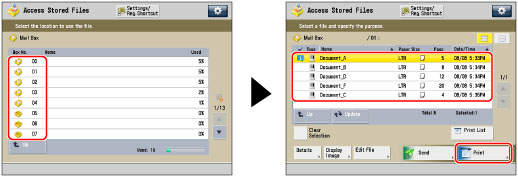
Select the desired Mail Box → select the desired file → press [Print].
3
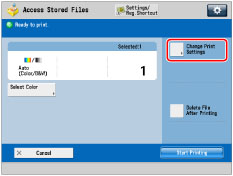
Press [Change Print Settings].
4
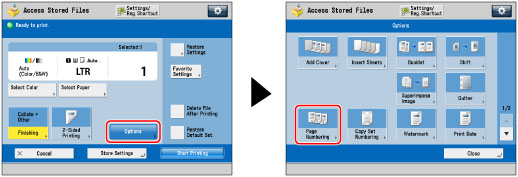
Press [Options] → [Page Numbering].
5
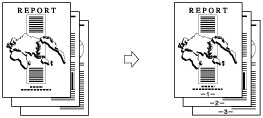
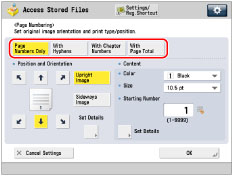
Select the type of page number.
6
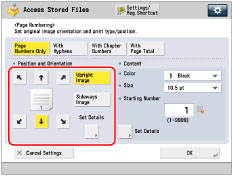
Set the image orientation and print position.
Orientation:
[Upright Image]:
Prints the image upright on the paper.
[Sideways Image]:
Prints the image sideways on the paper.
Upright Image
Sideways Image
NOTE
If you set any two of [Copy Set Numbering], [Watermark], or [Print Date] to print in the same position, a confirmation message appears when you press (Start).
You can press [Set Details] to adjust the printing position and set the printing position for the back side when performing two-sided printing.
To adjust the printing position, press [X] or [Y] → adjust the printing position with [-] or [+] → press [OK].
To set the printing position for the back side when performing two-sided printing, select [Opposite to Front Side] or [Same as Front Side] → press [OK].
7
Specify the print settings for the page numbers.
Press the <Color> drop-down list → select the color of the page numbers.
Press the <Size> drop-down list → select the size of the page numbers.
Enter the starting number using - (numeric keys).
8
To specify detailed printing settings, press [Set Details].
If you do not want to specify other settings, proceed to step 9.
Select the printing position for the text to add → press [OK] → [OK].
Counting inserted sheets:
Press [Inserted Sheets].
Press [Count] → [OK] → [OK].
Counts all sheet insertions, chapter pages, and back covers inserted after the first page. However, chapter numbers and page numbers are only printed onto the main document pages.
If you press [Do Not Count], the machine does not count any sheets, chapter pages, or back covers inserted after the first page. Chapter numbers and page numbers are only printed onto the main document pages.
9
Press [OK] → [Close].
IMPORTANT
Printing performance may not be optimal, depending on the file content and combination of settings.
If you use [Page Numbering] with [Add Cover], [Insert Sheets], or [Job Separator], numbers will not be printed on the inserted pages.
NOTE
The Superimpose Image mode cannot be used with files including images with resolutions of less than 600 x 600 dpi.
If you select [With Chapter Numbers] in combination with the Sheet Insertion or Job Separator mode, the chapter numbers are counted at the following times:
This site uses cookies to provide its contents and functions and improve their qualities etc. You can find out more about our use of the cookies here. If you select "Reject", only cookies necessary to provide the contents and functions of the site are recorded and stored.
 (Main Menu) → [Access Stored Files] → [Mail Box].
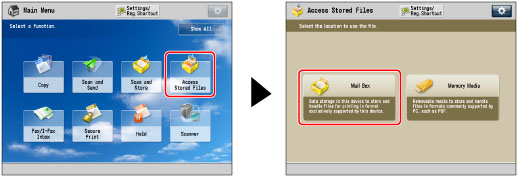


 (Start).
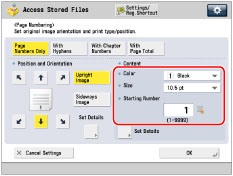
 -
-  (numeric keys).