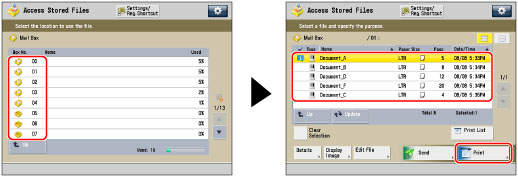
Select the desired Mail Box → select the desired file → press [Print].
3
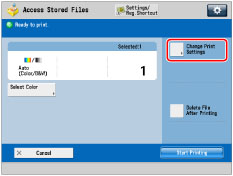
Press [Change Print Settings].
4
Press [Options] → [Watermark].
5
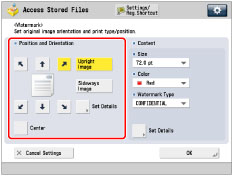
Set the image orientation and print position.
Orientation:
[Upright Image]:
Prints the image upright on the paper.
[Sideways Image]:
Prints the image sideways on the paper.
Upright Image
Sideways Image
If you select [Center] for the print position, the watermark is printed on the center of the paper.
NOTE
If you set any two of [Page Numbering], [Copy Set Numbering], or [Print Date] to print in the same position, a confirmation message appears when you press (Start).
You can press [Set Details] to adjust the printing position.
To adjust the printing position, press [X] or [Y] → adjust the printing position with [-] or [+] → press [OK].
To set the printing position for the back side when performing two-sided printing, select [Opposite to Front Side] or [Same as Front Side] → press [OK].
6
Specify the print settings for the watermark.
Press the <Size> drop-down list → select the size of the watermark.
Select the size of the watermark from [10.5 pt], [12.0 pt], [14.0 pt], [24.0 pt], [36.0 pt], [54.0 pt], and [72.0 pt].
Press the <Color> drop-down list → select the color of the watermark.
Press the <Watermark Type> drop-down list → select the type of watermark.
If you select [Custom], press [Enter] and enter the custom text → press [OK] → [OK].
IMPORTANT
Text that you enter in [Custom] is not automatically saved. If you want to register text to be selected with watermarks whenever necessary, press [Register] → enter the text to be registered.
This site uses cookies to provide its contents and functions and improve their qualities etc. You can find out more about our use of the cookies here. If you select "Reject", only cookies necessary to provide the contents and functions of the site are recorded and stored.
 (Main Menu) → [Access Stored Files] → [Mail Box].
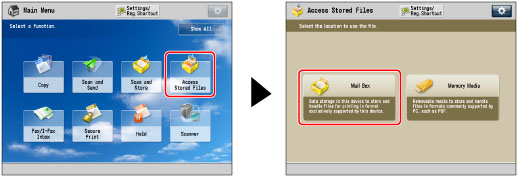


 (Start).
