Adding a Gutter

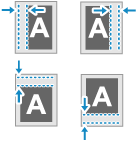
You can add a margin (gutter) for stapling or hole punching when copying. You can configure the gutter separately for the front and back sides of the paper.
1
On the copy screen, press [Options]  [Gutter]. Copy Screen
 [Gutter]. Copy Screen
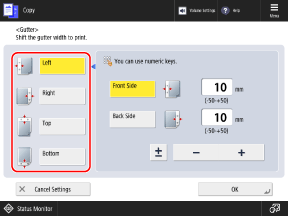
The [Gutter] screen is displayed.
Select the gutter position.

3
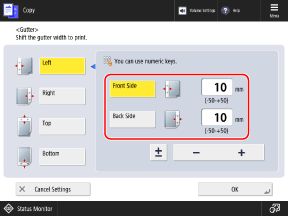
Enter the margin width for the front side and back side.

Press [Front Side] or [Back Side] to select it, and enter the value.
You can press [±] to switch the entered value between positive and negative.
If you specify a negative value, the margin is created on the side opposite from the position selected in Step 2. Use this setting if you want to narrow the margin width when copying an original that already has a gutter.
Setting the Gutter with 2-Sided Copying

If the original does not have a gutter
Set the margin widths for the front side and back side.
Set the margin widths for the front side and back side.
If the original has a gutter
Set the margin widths according to the type of 2-sided copying, as described below. 2-Sided Copy Settings
Set the margin widths according to the type of 2-sided copying, as described below. 2-Sided Copy Settings
[1-Sided  2-Sided]: Set the margin width for the back side only.
 2-Sided]: Set the margin width for the back side only.
[2-Sided  2-Sided]: You do not need to set the margin widths (gutter).
 2-Sided]: You do not need to set the margin widths (gutter).
[2-Sided  1-Sided]: Set the margin width for the back side only.
 1-Sided]: Set the margin width for the back side only.
Setting the Gutter with N on 1
The margin width set for the front side is applied to both sides. The margin width set for the back side is not applied. Combining Multiple Originals onto One Page (N on 1)
4
Press [OK]  [Close].
 [Close].
The copy screen is displayed again.
IMPORTANT
When Part of the Image on the Edge of the Original Is Missing After Being Copied
When you set the gutter, the position of the original is shifted according to the margin width. Therefore, when you copy an original with an image extending to the edges without margins, part of the image at the edge of the original may be missing in the copy.
To fit the image on the page, you can set [Copy Ratio] to reduce the size according to the margin width when copying. Enlarge and Reduce Settings