Scanning to Create a Booklet (Booklet Scan)

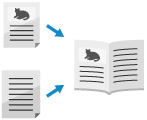
You can scan an original as a booklet when printing scanned data.
* You can use booklet scan only when saving scanned data to Mail Box.
* For the basic scanning operations, see the following:
1
Place the original. Placing Originals
Place an original of the same size. You cannot use booklet scan when scanning originals of different sizes.
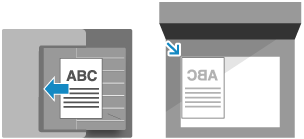
Place a vertical original in portrait orientation.

* Using booklet scan while placing a vertical original in landscape orientation will make even pages upside down.
2
On the scan screen, press [Options]  [Booklet Scan]. Scan Screen
 [Booklet Scan]. Scan Screen
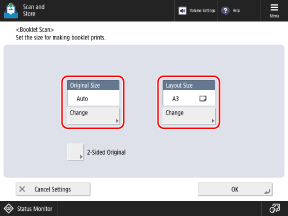
The [Booklet Scan] screen is displayed.
3
Set the original size and paper size, as needed.

When Changing the Original Size
Press [Change] under [Original Size], select the original size, and then press [OK].
When Changing the Paper Size for Booklet Printing

Press [Change] under [Layout Size], select the paper size, and then press [OK].
The data output size (paper size of scanned data) is set automatically according to the [Layout Size] setting.
To perform booklet printing for an original at 100% magnification, use the paper size when the original is spread open.
Example: When the size of the original is A4
The data output size is automatically set to A5 size when [Layout Size] is set to [A4R]. (The original is reduced automatically.)
The data output size is automatically set to A4 size when [Layout Size] is set to [A3].
When Scanning a 2-sided Original

Press [2-Sided Original], select how the original opens, and press [OK].
[Book Type]
Select this if the top and bottom orientation of the front and back sides of the original are the same.

[Calendar Type]
Select this if the top and bottom orientation of the front and back sides of the original are opposite.

4
Press [OK]  [Close].
 [Close].
The scan screen is displayed again.