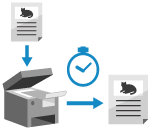
Delayed Send Settings

Configure the settings to send scanned data automatically at a specified time instead of sending it immediately.
* You cannot use this setting when scanning from [Scan and Store].
1
On the scan screen, press [Options]  [Delayed Send]. Scan Screen
 [Delayed Send]. Scan Screen
The [Delayed Send] screen is displayed.
2
Enter the time for Delayed Send.
Enter the time using 24-hour format regardless of the time display format setting.
3
Press [OK]  [Close].
 [Close].
The scan screen is displayed again.
NOTE
You can check whether the scanned data was sent on the [Status Monitor] screen. Checking the Send or Save Status and Log of Scanned Data
You can specify up to 64 jobs for Delayed Send.
However, the actual number of jobs that can be set may be less in the following cases:
However, the actual number of jobs that can be set may be less in the following cases:
When sending multiple scanned data jobs at the same time
When sending large volumes of scanned data
When using a large amount of memory in a Mail Box or Fax/I-Fax Inbox